Enable Imagemagick in PHP8 on Ubuntu 20.04 For WordPress. ImageMagick is a powerful open-source software suite that is used for creating, editing, and converting images. It is commonly used by WordPress developers and designers to enhance the visuals of their websites. If you’re running Ubuntu 20.04 and PHP8, and you want to enable ImageMagick in your WordPress installation, then this blog post is for you.
Make Sure ImageMagick Is Installed
Before we begin, let’s make sure that you have ImageMagick installed on your Ubuntu 20.04 server. You can check this by running the following command:
$ convert --version
If ImageMagick is installed, you should see a message with the version number. If it’s not installed, you can install it by running the following command:
$ sudo apt-get install imagemagick
Now that you have ImageMagick installed, you can proceed to enable it in PHP8. Here are the steps to follow:
Step 1: Install the PHP extension for ImageMagick
You’ll need to install the PHP extension for ImageMagick to enable it in PHP8. You can do this by running the following command:
$ sudo apt-get install php8.0-imagick
Step 2: Restart Apache
After installing the PHP extension for ImageMagick, you’ll need to restart Apache to apply the changes. You can do this by running the following command:
$ sudo systemctl restart apache2
Step 3: Test ImageMagick
To test whether ImageMagick is now enabled in PHP8, you can create a test file in your WordPress installation directory. Here’s an example:
<?php
header('Content-Type: image/png');

$im = new Imagick();
$im->newImage(100, 100, 'red');
$im->setImageFormat('png');

echo $im;
?>
Save this file as test.php in the root directory of your WordPress installation. Then, open it in your web browser by visiting the URL: http://your-domain.com/test.php
If everything is working correctly, you should see a red square image displayed in your browser.
Congratulations! You’ve now enabled ImageMagick in PHP8 on your Ubuntu 20.04 server for use in WordPress.
In Conclusion
In conclusion, ImageMagick is a powerful tool for working with images on your WordPress website. By following the steps outlined in this blog post, you can enable ImageMagick in PHP8 on your Ubuntu 20.04 server and start taking advantage of its capabilities today.
Still Having Trouble? Look Over These Steps
If you are still having trouble, take a look at these steps. To Enable Imagemagick in PHP8 on Ubuntu 20.04 For WordPress, you can follow these steps:
Enable Imagemagick in PHP8 on Ubuntu 20.04 For WordPress
Update your package index:
sudo apt update
Install Imagemagick:
sudo apt install imagemagick
Verify that Imagemagick has been installed successfully:
convert --version
This command should output the version information of Imagemagick.
If you plan on using Imagemagick with PHP, you may also need to install the PHP Imagick extension:
sudo apt install php-imagick
Restart the Apache web server (if you are using it):
sudo systemctl restart apache2
After completing these steps, Imagemagick should be enabled on your Ubuntu server. However now you need to make sure it works with PHP8. So use these commands.
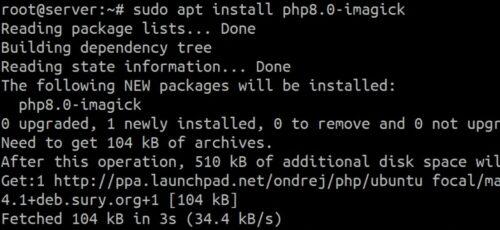
sudo apt install php8.0-imagick
You will see the following.
Now you need to put in the following.
sudo a2enmod proxy_fcgi setenvif
Next, enter this to enable it.
sudo a2enconf php8.0-fpm
Reload Apache.
sudo systemctl reload apache2


A1WEBSITEPRO Social Media Pages
Here are my social media pages, lets hook up!