Learn how to use the Chroma Green Screen feature in Olive Video Editing Studio! This is Lesson 7 in our series covering Olive 0.2.
Using a green screen can elevate your video projects by allowing you to replace the background with any image or video you choose. Whether you're working on a creative project or want to add some flair to your videos, mastering this feature is essential.
In this tutorial, I'll walk you through:
- Setting up your green screen footage in Olive 0.2: Importing and preparing your video assets.
- Applying the chroma key effect: Isolating the green screen to create transparency.
- Adjusting the effect for a clean cutout: Fine-tuning edge tolerance, smoothing, and spill suppression.
- Adding a new background: Integrating your custom image or video seamlessly.
Setting up your green screen footage in Olive 0.2
Here are some suggestions on setting up your green screen footage.
Grab some Green Screen Footage
There are several different places to grab green screen footage. Here are some direct links to pexels and pixabay where you can check out their subscribe green screen footage.
Lighting is Very Important
You can also make green screen footage yourself. You will need to get some lights and green screen background. Do not skimp on the lights, they make all the difference in the world when it comes to creating green screen content. Here is a direct link to an awesome green screen kit. Here is a post I did on lighting and how important it is when filming. Make sure you check that post out because you will get very frustrated in post production if your lighting is all wrong!
Applying the chroma key effect
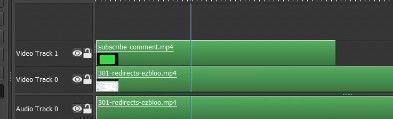
To apply the chroma key effect make sure the green screen track is on top of the video track that you want to enhance.
Click on the green screen video track. Go up to the Node editor then hit the plus sign then Keying then Chroma Key.
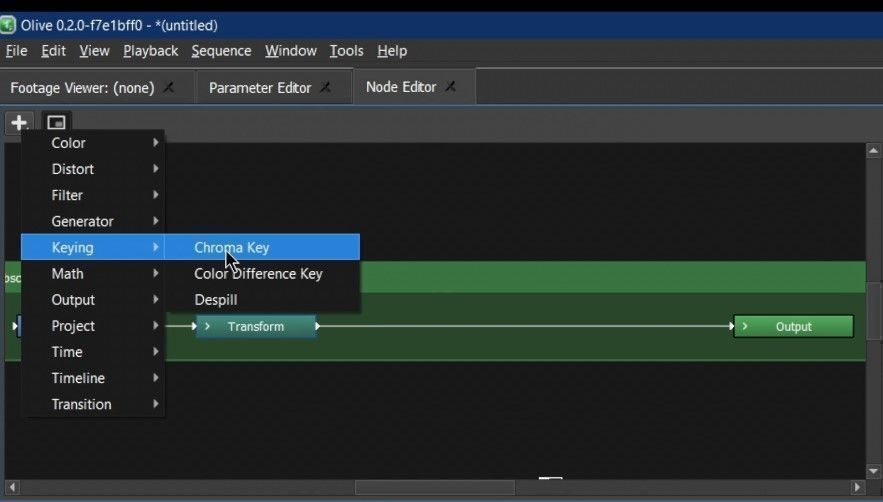
Now insert the Chroma Key button before the Output box.
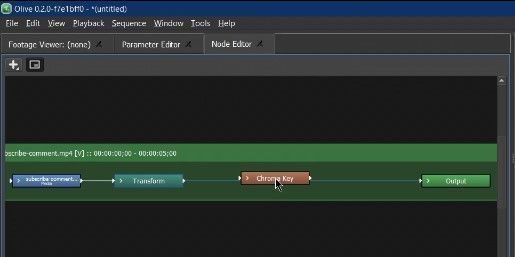
Now you should see the green background disappear and only the relevant footage visible.
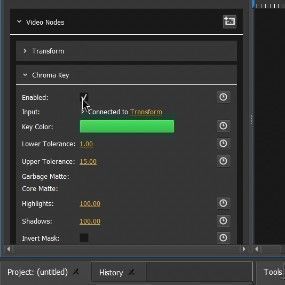
Adjusting the effect for a clean cutout
If you find the key tool taking out some of the footage that is suppose to be visible adjust the tolerance in the Chroma Key editor under the Parameters tab.
Adding a new background
You can always add backgrounds like I did in the video of a desk. Just make sure that your green screen footage is on top of the background track.
Video
Follow along, and by the end of this lesson, you'll be ready to create stunning green screen effects for your own projects.