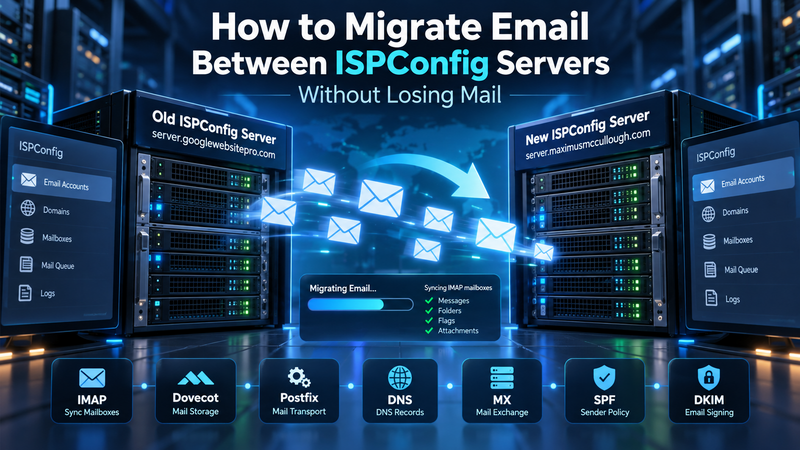
Moving websites from one #ISPConfig server to another is fairly straightforward, but email deserves a little more care. You do not want to switch servers only to discover that years of old messages, sent mail, folders, or attachments were left behind.
I recently had to retire an older ISPConfig server running #Ubuntu 22.04 and Apache and move the important email accounts to a newer ISPConfig server running Ubuntu 26.04 and Nginx.
The important thing to understand is that Apache versus Nginx has very little to do with the email migration itself. ISPConfig commonly handles email through #postfix and #Dovecot. What we really need to migrate is the contents of the #IMAP mailboxes.
For this job I used imapsync. It allowed me to copy the mail directly from one Dovecot server to another while leaving the original mailbox completely intact.
Why I Chose imapsync
There are several ways to migrate mail between servers. You could copy the contents of /var/vmail directly, migrate ISPConfig databases, or attempt to move the entire server configuration.
That was unnecessary in my case because I only had a handful of email accounts that actually needed their old mail preserved. The rest could simply start with empty mailboxes on the new server.
Using IMAP had several advantages:
- The old server remains untouched.
- The destination server can already be in production.
- Mailbox folders are copied automatically.
- Read and unread status can be retained.
- Sent, Trash, Junk, Drafts, and custom folders can be transferred.
- The process can be safely run multiple times.
- Only new or changed messages need to be synchronized during later runs.
The Server Configuration
My old ISPConfig mail server was:
server.oldexample.com
Ubuntu 22.04
Apache
Postfix
Dovecot
The new server was:
server.newexample.com
Ubuntu 26.04
Nginx
Postfix
Dovecot
The important part is that both servers provide IMAP access.
You Only Need imapsync on One Machine
One useful thing about imapsync is that it does not need to be installed on both mail servers.
I installed it only on the new server.
OLD SERVER
Dovecot / IMAP
      |
      |
      v
   imapsync
running on the
 NEW SERVER
      |
      v
NEW Dovecot / IMAP
The old server simply behaves like any other remote IMAP server.
First Check Dovecot on the New Server
Before attempting any migration, make sure Dovecot is actually listening.
ss -ltnp | grep -E ':993|:143'Normally you should see listeners for ports 993 and 143.
In my case, nothing appeared.
Checking Dovecot revealed the problem:
systemctl status dovecot --no-pager -lDovecot was installed but had failed to start.
The error was:
Fatal: Error in configuration file /etc/dovecot/dovecot.conf:
The first setting must be dovecot_config_version
The server had Dovecot 2.4 installed, while ISPConfig had previously generated configuration intended for an older Dovecot version.
Do Not Manually Hack the Dovecot Configuration
Instead of manually modifying individual Dovecot configuration directives, I updated ISPConfig and allowed ISPConfig to regenerate the service configuration correctly.
I ran:
ispconfig_update.shDuring the ISPConfig update I chose:
Reconfigure Permissions in master database? yes

Reconfigure Services? yes

ISPConfig Port [8080]:
Press ENTER

Create new ISPConfig SSL certificate? no

Reconfigure Crontab? yes
The important option for the Dovecot repair was:
Reconfigure Services? yesISPConfig then regenerated the configuration for:
- Postfix
- Dovecot
- SpamAssassin
- Rspamd
- BIND
- Pure-FTPd
- Nginx
- Database services
- Other ISPConfig-managed services
Verify Dovecot After the ISPConfig Update
First validate the configuration:
doveconf -n >/dev/null
echo $?
A result of:
0means Dovecot considers the configuration valid.
Then:
systemctl status dovecot --no-pager -lI now had:
Active: active (running)Finally:
ss -ltnp | grep -E ':993|:143'Dovecot was now listening on:
0.0.0.0:993
0.0.0.0:143

[::]:993
[::]:143
At that point the new mail server was ready.
Installing imapsync on Ubuntu
I installed imapsync on the new Ubuntu server rather than modifying the old server.
First install the required Perl modules and utilities:
apt update

apt-get install -y \
libauthen-ntlm-perl \
libclass-load-perl \
libcrypt-openssl-rsa-perl \
libcrypt-ssleay-perl \
libdata-uniqid-perl \
libdigest-hmac-perl \
libdist-checkconflicts-perl \
libencode-imaputf7-perl \
libfile-copy-recursive-perl \
libfile-tail-perl \
libio-compress-perl \
libio-socket-inet6-perl \
libio-socket-ssl-perl \
libio-tee-perl \
libjson-webtoken-perl \
libmail-imapclient-perl \
libmodule-scandeps-perl \
libnet-dbus-perl \
libnet-dns-perl \
libnet-ssleay-perl \
libpar-packer-perl \
libproc-processtable-perl \
libreadonly-perl \
libregexp-common-perl \
libsys-meminfo-perl \
libterm-readkey-perl \
libtest-fatal-perl \
libtest-mock-guard-perl \
libtest-mockobject-perl \
libtest-pod-perl \
libtest-requires-perl \
libtest-simple-perl \
libunicode-string-perl \
liburi-perl \
libtest-nowarnings-perl \
libtest-deep-perl \
libtest-warn-perl \
make time cpanminus
Before installing a large group of packages on a production server, it is a good idea to simulate the installation first:
apt-get --simulate install PACKAGE_NAMES_HEREI specifically checked that the proposed installation showed:
0 upgraded
0 to remove
That meant the installation was adding dependencies rather than replacing important ISPConfig components.
Download imapsync
cd /root

wget -N https://imapsync.lamiral.info/imapsync

chmod 755 imapsync
Test it:
/root/imapsync --versionMy installed version reported:
2.324I then installed it into the local system path:
cp /root/imapsync /usr/local/bin/imapsync

chmod 755 /usr/local/bin/imapsync
Verify:
imapsync --versionCreate the Mailbox on the New ISPConfig Server First
Before copying any mail, create the destination mailbox through ISPConfig.
For example:
max@example.comThe account must exist on both servers before imapsync can log into them.
The passwords do not have to be identical.
Keep Passwords Out of Shell History
Instead of putting passwords directly into the imapsync command, I loaded them into environment variables.
For the old mailbox:
read -rsp "OLD mailbox password: " IMAPSYNC_PASSWORD1
echo
export IMAPSYNC_PASSWORD1
For the new mailbox:
read -rsp "NEW mailbox password: " IMAPSYNC_PASSWORD2
echo
export IMAPSYNC_PASSWORD2
The password does not appear while typing and does not become part of the command stored in shell history.
Perform a Dry Run First
Before copying actual mail, I tested one mailbox:
imapsync \
  --host1 server.oldexample.com \
  --user1 'max@example.com' \
  --ssl1 \
  --host2 server.newexample.com \
  --user2 'max@example.com' \
  --ssl2 \
  --sslargs2 SSL_verify_mode=0 \
  --automap \
  --justfolders \
  --dry
The options:
--justfolders
--dry
allow us to verify authentication and folder mapping without transferring the messages.
The test successfully detected folders such as:
Drafts
INBOX
Junk
Sent
Trash
It also correctly mapped:
Trash  -> Trash
Junk   -> Junk
Sent   -> Sent
Drafts -> Drafts
Perform the Real Migration
Once the dry run succeeded, I removed:
--justfolders
--dry
The actual command became:
imapsync \
  --host1 server.oldexample.com \
  --user1 'max@example.com' \
  --ssl1 \
  --host2 server.newexample.com \
  --user2 'max@example.com' \
  --ssl2 \
  --sslargs2 SSL_verify_mode=0 \
  --automap
My first test mailbox contained 1,081 messages.
The final imapsync report stated:
Final difference host2 - host1 : 0 messages, 0 bytes

The sync looks good,
all 1081 identified messages in host1 are on host2.

Detected 0 errors

Exiting with return value 0
That is exactly what we want to see.
The Old Mailbox Is Not Deleted
Nothing in the command above removes messages from the old server.
After the migration:
OLD SERVER
1,081 messages

NEW SERVER
1,081 messages
This makes the process considerably safer because the original server remains a backup until the migration is completely finished.
It Is Okay if the New Server Has Extra Messages
Another mailbox produced:
Final difference host2 - host1 : 1 messages, 906 bytes

The sync looks good,
all 38 identified messages in host1 are on host2.

The sync is not strict,
there are 1 among 39 identified messages in host2
that are not on host1.

Detected 0 errors
This is not a migration failure.
It simply means the destination mailbox already contained one message that did not exist on the old server.
imapsync may suggest using:
--delete2to make the destination an exact mirror of the source.
I deliberately did not do that.
For a migration, preserving mail is usually more important than forcing both servers to be identical. Using --delete2 could delete legitimate destination-only messages.
Clear the Passwords When Finished
unset IMAPSYNC_PASSWORD1
unset IMAPSYNC_PASSWORD2
Migrating Multiple Mailboxes
Once the first mailbox proved that the process worked, I created a script for the remaining accounts.
nano /root/migrate-remaining-mail.shHere is the script:
#!/usr/bin/env bash

OLD_HOST="server.oldexample.com"
NEW_HOST="server.newexample.com"

MAILBOXES=(
    "user1@example.com"
    "user2@example.com"
    "user3@example.com"
)

LOGDIR="/root/mail-migration-logs"

mkdir -p "$LOGDIR"
chmod 700 "$LOGDIR"

SUCCESS=0
FAILED=0

for EMAIL in "${MAILBOXES[@]}"; do

    echo
    echo "============================================================"
    echo "Migrating: $EMAIL"
    echo "============================================================"
    echo

    read -rsp "OLD password for $EMAIL: " OLD_PASSWORD
    echo

    read -rsp "NEW password [press ENTER if same]: " NEW_PASSWORD
    echo

    if [[ -z "$NEW_PASSWORD" ]]; then
        NEW_PASSWORD="$OLD_PASSWORD"
    fi

    export IMAPSYNC_PASSWORD1="$OLD_PASSWORD"
    export IMAPSYNC_PASSWORD2="$NEW_PASSWORD"

    SAFE_NAME="${EMAIL//@/_}"
    SAFE_NAME="${SAFE_NAME//./_}"

    LOGFILE="$LOGDIR/${SAFE_NAME}.log"

    imapsync \
        --host1 "$OLD_HOST" \
        --user1 "$EMAIL" \
        --ssl1 \
        --host2 "$NEW_HOST" \
        --user2 "$EMAIL" \
        --ssl2 \
        --sslargs2 SSL_verify_mode=0 \
        --automap \
        --logfile "$LOGFILE"

    RESULT=$?

    unset IMAPSYNC_PASSWORD1
    unset IMAPSYNC_PASSWORD2
    unset OLD_PASSWORD
    unset NEW_PASSWORD

    if [[ $RESULT -eq 0 ]]; then
        echo "SUCCESS: $EMAIL"
        ((SUCCESS++))
    else
        echo "FAILED: $EMAIL"
        echo "Check:"
        echo "$LOGFILE"
        ((FAILED++))
    fi

    read -rp "Press ENTER to continue to the next mailbox..."

done

echo
echo "============================================================"
echo " MIGRATION FINISHED"
echo "============================================================"

echo "Successful: $SUCCESS"
echo "Failed:     $FAILED"
echo
echo "Logs:"
echo "$LOGDIR"
Make it executable:
chmod 700 /root/migrate-remaining-mail.shThen run:
/root/migrate-remaining-mail.shWhy Running imapsync Again Is Important
One of the best features of this method is that the migration can be run repeatedly.
Suppose the first migration copies:
10,000 messagesThe old server continues operating for another two days and receives:
25 new messagesRunning imapsync again does not blindly create another 10,025 copies.
It compares the mailboxes and synchronizes what is missing.
A later run might therefore transfer only those 25 new messages.
This allows a very safe migration strategy:
Initial bulk migration
        |
        v
Verify mailboxes
        |
        v
Change DNS
        |
        v
Allow DNS propagation
        |
        v
Run imapsync again
        |
        v
Catch remaining messages
        |
        v
Retire old server
Testing the New Mailbox With Thunderbird
Before changing public DNS, I tested the migrated mailbox using Thunderbird.
The incoming server was temporarily changed from:
server.oldexample.comto:
server.newexample.comThe IMAP settings were:
Protocol: IMAP
Port: 993
Connection Security: SSL/TLS
Authentication: Normal password
Username: full@email-address.com
This makes it easy to visually inspect:
- Inbox messages
- Sent mail
- Trash
- Junk
- Drafts
- Attachments
- Read and unread messages
DNS Settings for the New Mail Server
Moving the messages is only part of the migration. DNS must eventually direct new mail to the new server.
For example, my new mail server IP was:
75.41.70.194Typical DNS records include:
server.example.com   A   75.41.70.194

mail.example.com     A   75.41.70.194

smtp.example.com     A   75.41.70.194

imap.example.com     A   75.41.70.194
When using Cloudflare, mail-related hostnames should normally remain:
DNS onlyrather than being placed behind the standard Cloudflare proxy.
MX Record
The domain also needs an MX record directing incoming email to the new server.
For example:
Type: MX
Name: @
Server: server.example.com
Priority: 10
The MX target should be a hostname, not an IP address.
SPF
A basic SPF record might look like:
v=spf1 a mx ip4:75.41.70.194 ~allDuring the migration, if both servers may still legitimately send mail, both IP addresses can temporarily be authorized:
v=spf1 a mx ip4:NEW_SERVER_IP ip4:OLD_SERVER_IP ~allOnce the old server is retired, remove the old IP.
DKIM
DKIM requires special attention during a server migration.
The public DKIM key published in DNS must correspond to the private DKIM key being used by the new mail server.
For example:
key1._domainkey.example.comIf the DNS record contains the old server's public key while the new server signs messages using a different private key, DKIM authentication will fail.
I therefore compared the DKIM record in DNS with the key configured by ISPConfig on the new server.
DMARC
During migration I prefer a monitoring policy:
v=DMARC1; p=none;This allows authentication problems to be identified without immediately asking receiving mail systems to reject messages.
Once SPF and DKIM have been thoroughly verified, a stricter policy can be considered.
Reverse DNS / PTR
Do not forget reverse DNS.
If the mail server is:
server.example.com
75.41.70.194
you ideally want:
server.example.com
        |
        v
75.41.70.194

75.41.70.194
        |
        v
server.example.com
The first is the normal A record.
The second is the PTR or reverse-DNS record.
PTR records are normally configured through the hosting provider that owns the IP address rather than through Cloudflare.
My Final Migration Procedure
- Create the destination mail domains in ISPConfig.
- Create the destination mailboxes.
- Verify Dovecot is running on the new server.
- Install imapsync on the new server.
- Perform a dry run on one mailbox.
- Perform the real mailbox synchronization.
- Verify the mailbox in Thunderbird or another IMAP client.
- Synchronize the remaining important mailboxes.
- Configure MX, SPF, DKIM, DMARC, A records, and PTR.
- Change DNS to direct mail to the new server.
- Leave the old server running temporarily.
- Run imapsync again to catch messages received during DNS propagation.
- Verify incoming and outgoing mail.
- Only then retire the old mail server.
Do Not Shut Down the Old Mail Server Immediately
Even after changing DNS, some remote mail systems may temporarily continue using cached DNS information.
That means email can still arrive on the old server for a period of time.
Keeping the old server online and performing another imapsync pass gives you a simple way to recover those messages.
Final Thoughts
Migrating email does not have to mean copying raw mail directories, manipulating ISPConfig database tables, or taking the mail system offline.
For a small or medium number of important mailboxes, using IMAP synchronization is a very controlled approach.
The original mailbox remains intact, the destination can be tested before DNS is changed, and the process can be repeated as many times as necessary until the final cutover is complete.
The most important lesson is to treat the migration as a synchronization rather than a one-time copy:
Copy
Verify
Switch DNS
Synchronize again
Verify again
Retire the old server
That small amount of overlap can be the difference between a clean migration and discovering later that important email disappeared during the transition.
Join the Discussion
Create an account or sign in to leave a comment.