
When you are deep into an investigation—whether you are a forensic analyst, an investigative journalist, or an educator presenting a case study—data chaos is your worst enemy.
Between scattered timestamps, nested email threads, ring camera footage, and endless PDF reports, piecing together a chronological narrative is a nightmare. Traditional software is often bloated, slow, and overly complicated. We knew there had to be a better way to manage investigations that matched the speed and efficiency of custom web solutions.
Today, we are thrilled to introduce our Custom Case Timeline Manager—a secure, blazing-fast, and collaborative web application built specifically to help investigators organize, analyze, and present digital evidence.
Mobile Optimized!
This application is also mobile optimized so you can add evidence on the run!
Transforming How You Handle Case Files
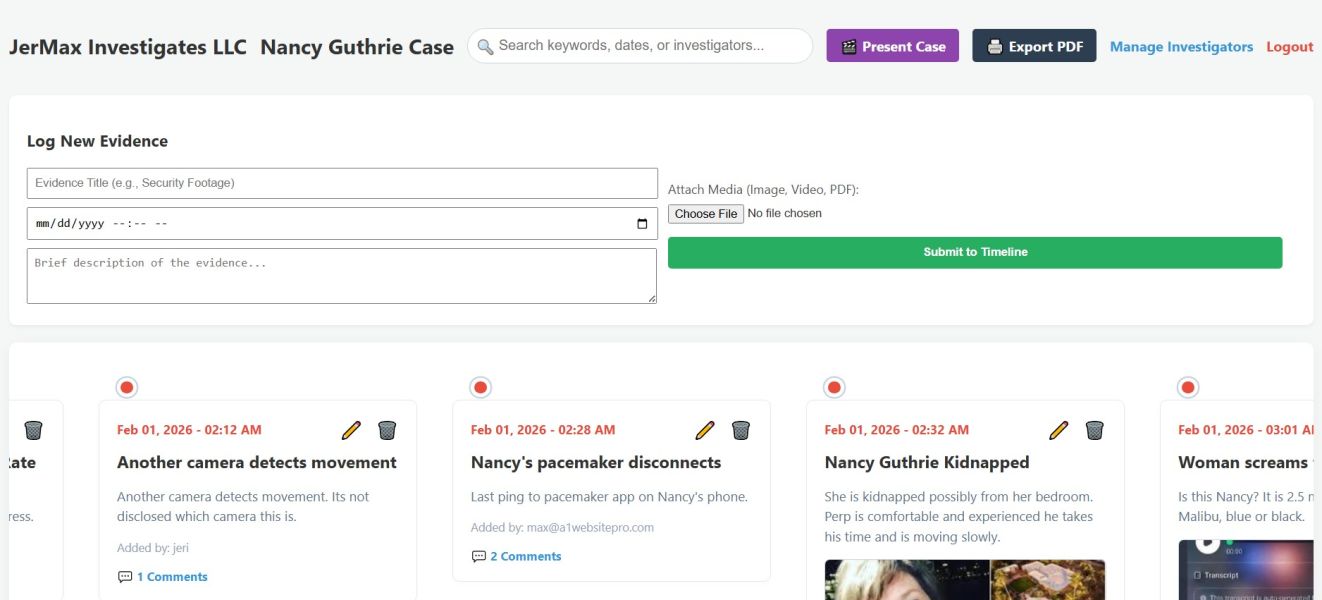
1. The Interactive, Real-Time Timeline
At the heart of the software is the chronological evidence track. Instead of digging through folders, every piece of evidence—be it a suspect's text message, a security camera video, or a forensic PDF—is plotted exactly where it belongs on a visual timeline.
Because investigations are team efforts, we engineered the timeline for real-time collaboration. If a detective across the country logs a new piece of evidence, it instantly and silently slides onto your screen without you ever having to hit refresh. No screen flickering, no lost reading positions—just seamless teamwork.
2. Instant "god-mode" Search and Filter
When you are dealing with hundreds of data points, finding that one specific event from "February 1st" is critical. We built an instant, client-side search engine right into the dashboard.
Start typing a keyword, a date, or an investigator's name, and the timeline instantly filters down to the exact cards you need in milliseconds. It is incredibly lightweight and ensures you never lose your train of thought while hunting for a clue.
3. Deep-Dive Investigator Notes
Evidence rarely speaks entirely for itself; it requires context and debate. Every single piece of evidence on the timeline features a dedicated, expandable comment section. Investigators can leave timestamped notes, debate theories, and update their findings. If new information comes to light, comments can be edited inline instantly, keeping the case file perfectly accurate.
4. Cinematic Presentation Mode
One of the biggest hurdles for educators and trial presenters is getting evidence out of the database and onto a projector screen. Exporting everything to PowerPoint often breaks video links and ruins image formatting.
We solved this by building a Native Presentation Mode. With one click, your browser transforms the timeline into a distraction-free, 16:9 widescreen slideshow. High-resolution photos scale perfectly, videos play natively right on the slide, and investigator notes are tucked away in a sleek accordion. All you need is a standard presentation clicker or your keyboard arrows to walk your audience through the case, step-by-step.
5. One-Click Official PDF Reporting
Need a hard copy for a physical file or to hand to a client? Click "Export PDF." The software instantly compiles every title, description, timestamp, investigator note, and media thumbnail into a beautifully formatted, paginated, and date-stamped official report. It strips away the web interface and triggers your browser's native print dialog, giving you a perfect document in seconds.
6. Ironclad Security and Access Control
Because case data is highly sensitive, we built the architecture with strict security protocols. The software features an encrypted login system and a dedicated Investigator Management dashboard. Case administrators can instantly add new team members, reset passwords, or revoke access with a single click. Furthermore, strict database rules ensure that if an investigator leaves the team, their uploaded evidence and notes are safely preserved to maintain the chain of custody.
Built for Speed. Built for Truth.
We don't believe in clunky, bloated software. This Case Timeline Manager is designed to get out of your way so you can focus on what actually matters: solving the case.
Ready to upgrade your investigative tools?
Contact us today to request a demo or set up a secure instance for your team.
Investigator User Guide: Case Timeline Manager
Welcome to the Case Timeline Manager. This tool is designed to help you log, organize, and analyze case evidence in real-time. Follow the steps below to manage your case files effectively.
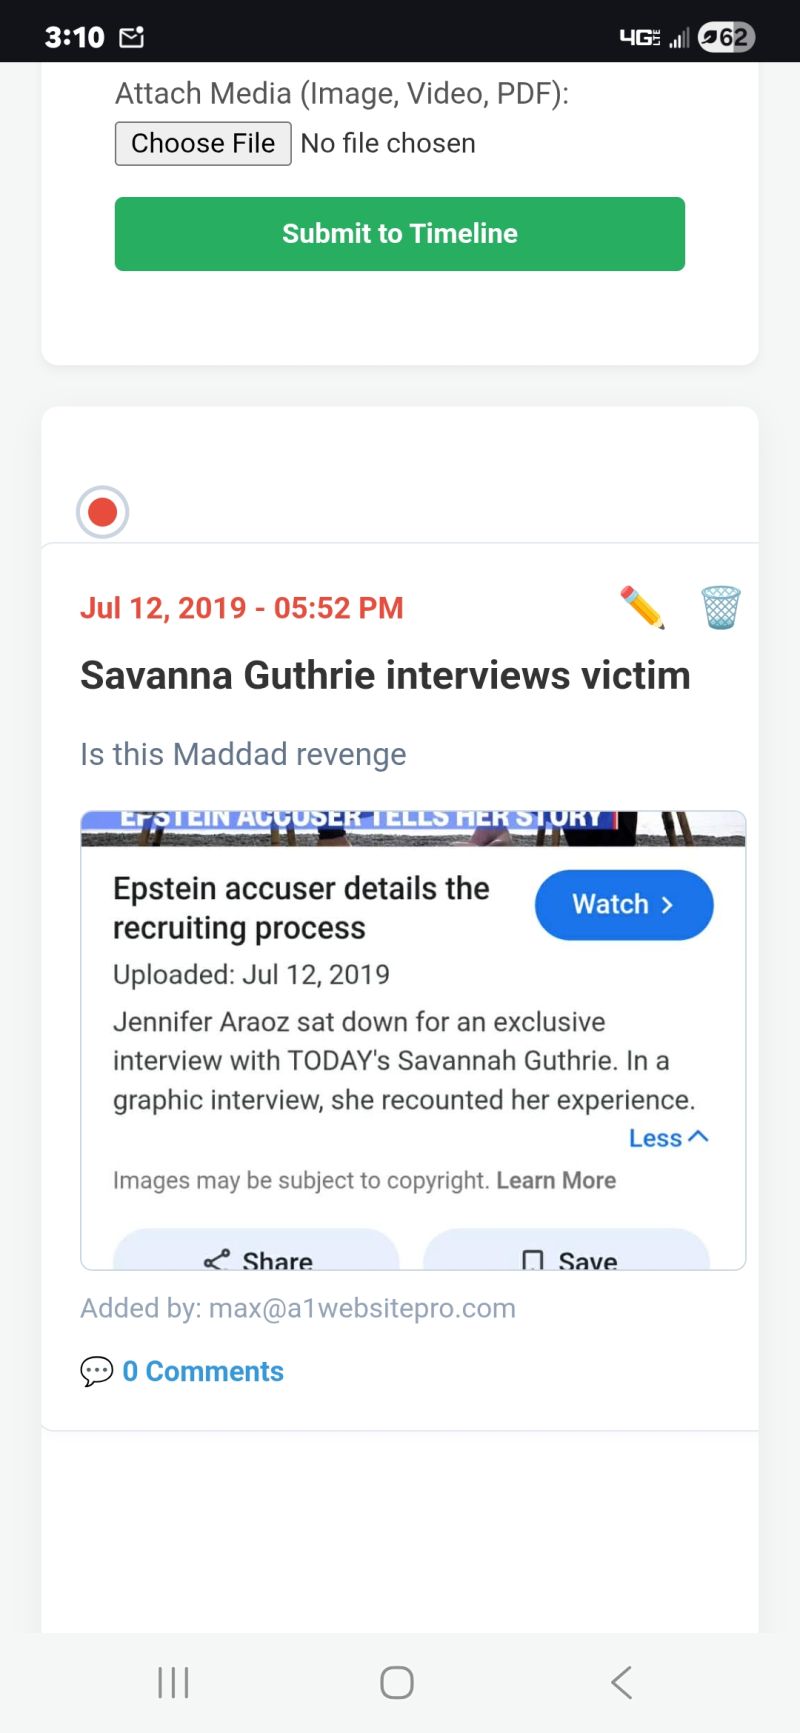
1. Adding New Evidence to the Timeline
- Locate the Add Evidence form on the left side of your dashboard.
- Enter a brief but descriptive Title for the event or artifact.
- Select the exact Date & Time the event occurred using the calendar picker.
- Provide a detailed Description of the evidence and its relevance to the case.
- (Optional) Click Choose File to attach supporting media. You can upload images (.jpg, .png), videos (.mp4), or documents (.pdf, .doc).
- Click the Submit to Timeline button. Your entry will securely upload and instantly appear in chronological order on the timeline.
2. Editing Existing Evidence
If you need to correct a typo, adjust a timestamp, or replace a file after it has been submitted:
- Locate the specific evidence card on the timeline.
- Click the ✏️ (Edit) icon in the top-right corner of the card.
- An edit window will appear. Update the text fields or the date as needed.
- (Optional) To replace the attached media, select a new file from your computer. If you want to keep the existing media, simply leave the file input blank.
- Click Save Changes. The timeline will automatically update.
3. Deleting Evidence
Note: Deleting evidence is permanent and will also remove all associated investigator comments and media files.
- Locate the evidence card you wish to remove.
- Click the red 🗑️ (Trash) icon in the top-right corner of the card.
- A prompt will ask you to confirm your action. Click OK to permanently delete the record.
4. Adding and Managing Investigator Notes (Comments)
You can collaborate with other investigators by leaving notes on specific pieces of evidence.
- To add a note: Click the 💬 [X] Comments button at the bottom of an evidence card to expand the notes section. Type your observation into the input box and click Post.
- To edit your note: Expand the comments section, locate your note, and click the ✏️ (Edit) icon next to your name. Update your text and click Save.
- To delete your note: Expand the comments section, locate your note, and click the red 🗑️ (Trash) icon.
5. Searching and Filtering the Timeline
- Locate the Search Bar (🔍) at the top of the dashboard.
- Start typing any keyword, date, or investigator's name.
- The timeline will instantly filter out unrelated cards, displaying only the evidence that matches your search in real-time. Clear the search box to view the full timeline again.
6. Exporting and Presenting the Case
You can seamlessly export the timeline for court presentations or physical case files using the buttons at the top right of the dashboard.
- 🎬 Present Case: Click this to enter a distraction-free, full-screen slideshow mode. Use your keyboard's left and right arrow keys (or a presentation clicker) to navigate through the evidence chronologically. Press Esc to exit.
- 🖨️ Export PDF: Click this to generate an official, date-stamped document containing all evidence, media thumbnails, and investigator notes. Your browser's print dialog will automatically open, allowing you to print or "Save as PDF".