In this tutorial, I will show you how to install #Linux Mint and create a bootable flash drive. You can do this install a couple different ways, but I recommend backing up your current computer either way. Recently I created a tutorial on how to back up your Windows 10 computer. Windows 10 Backup Computer Files and Folders | Easy Instructions For Beginners (a1websitepro.com) Another thing that you want to note is if your computer is a 32 or a 64 bit operating system. This will let you know what version of Linux Mint that you can download. Video can be found on the last page.
Buy Latest Version of Linux Mint
The first part of this tutorial shows you how to create a bootable flash drive for your computer. If you would rather buy an already made bootable flash drive with Linux Mint on it, click here. The price range is anywhere from $10 to $40. If you want to create one yourself, then read on. If you already have a bootable flash drive with the latest Linux Mint on it then skip to the page that starts with, "Installing Linux Mint on a Computer".Linux Mint on Macintosh
If you are on a Macintosh computer, you do not need to worry about the bits. You need to click on the Apple icon, then click "About This Mac" then look for the processor heading. If you do not see Intel somewhere in the processor information, then you cannot install Linux Mint. For Mac users, I like this tutorial for installing Linux Mint on a Mac How to Install Linux on a Mac : HelloTech How. I do cover the Mac installation in this tutorial though. The process is very similar for any OS. For those of you using Windows or another version of Linux for your OS, read on.Download Linux Mint
They call the current version Linux Mint 20.02 Uma and you can download it here. They have 3 different editions, but I recommend the "Cinnamon Edition" because it has the most features.Download Etcher
If you are running Windows, Mac or another version of Linux, download Etcher and install it. You will need Etcher to make a bootable disk to install Linux Mint. We will use this later in the tutorial.Verifying Your ISO Image Download
Anyone can create an ISO Image, so it is important to verify your Linux Mint download. You should see 2 files where you downloaded your Linux Mint 20.02 above. They are sha256sum.txt and sha256sum.txt.gpg when you are on that page right click and select "Save Link As" then save it to your computer. We will do 2 tests, the Integrity Check and Authenticity Check, keep following along. Note that if you are on a Windows Operating system, go to page #2.Integrity Check
To do an "Integrity Check" generate your ISO a SHA256 and compare it with the sum in sha256.txt sum that you downloaded. Enter the following Code into your terminal. Make sure that you are in the same directory as your ISO file.sha256sum -b yourfile.iso
Authenticity Check
Import Linux Mint Signing Key first by entering this code into the terminal.gpg --keyserver hkp://keyserver.ubuntu.com:80 --recv-key "27DE B156 44C6 B3CF 3BD7 D291 300F 846B A25B AE09"If it complains about the key ID, enter the following commands.
gpg --keyserver hkp://keyserver.ubuntu.com:80 --recv-key A25BAE09
gpg --list-key --with-fingerprint A25BAE09
Check the fingerprint to make sure it reads#ff0000;"> 27DE B156 44C6 B3CF 3BD7 D291 300F 846B A25B AE09 To verify it, enter the following into the terminal. Again make sure that you are in the same directory as your ISO file.
gpg --verify sha256sum.txt.gpg sha256sum.txtIf you are on Windows, we will do this a different way. Please follow along on the next page.
Windows Integrity Check
To verify on Windows, you need to download and install GnuPG. Make sure that you scroll down on the page and when you come to download.sig Simple installer for the current GnuPG this is the one you want. Here is a direct link to download it from the site. If they changed it, you may have to go to the site to get the correct one pictured below. After you have downloaded it you need to install it on your windows operating system. It does not matter if you give it administrative privileges or not.
Performing The Integrity Check In Windows
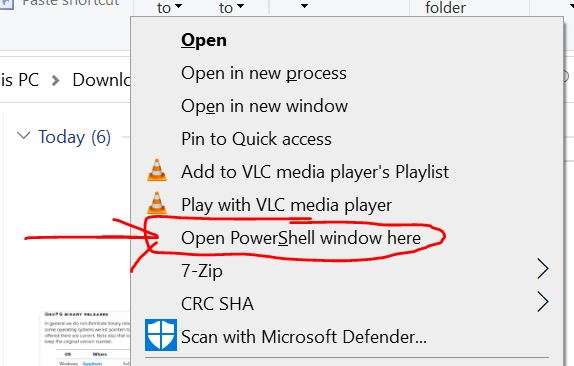
Now navigate to your downloads folder or the folder where you downloaded your Linux Mint. DO NOT go inside the folder. We just want to see the folder that contains the Linux Mint download, sha256sum & sha256sum.txt.gpg files. Hold the "SHIFT" key down on your keyboard and right click the folder. You will see a menu pop up. Yours will either say, "Open with PowerShell" or "Open command window here". I included a picture of both menues below.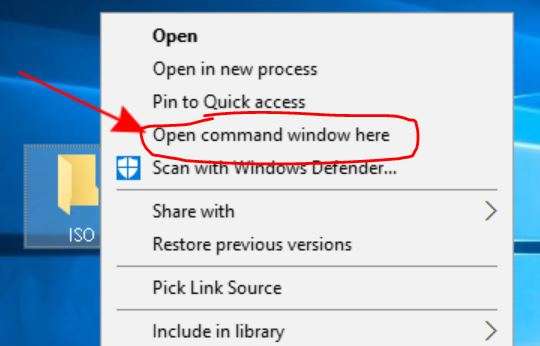 If PowerShell it will look like this.
 You will now see a command line. I am using PowerShell so it looks blue on my computer. Here is the command that you want to enter. NOTE: that if you copy this code and then you go to your terminal and right click it will automatically enter the text. You may have to change the filename of your ISO file.
CertUtil -hashfile filename.iso SHA256Here is what I had to change it to so that it matches my ISO file. Also note that if you start to type a filename the program may try to auto complete it for you.
CertUtil -hashfile linuxmint-20.2-cinnamon-64bit.iso SHA256My results were successful. You can see them below. If you did not receive a successful message, then you need to go back and re-download Linux Mint again.

Authenticity Check in Windows
Now let's perform the Authenticity Check in Windows. In the same PowerShell Window, enter the following commands. We are going to get a key, then verify its authenticity. This may be tricky or may fail, but I included 3 different codes to help you below.gpg --keyserver hkps://keyserver.ubuntu.com:443 --recv-key 27DEB15644C6B3CF3BD7D291300F846BA25BAE09The above code may fail for some users, if so, enter the following into your terminal.
gpg --keyserver keyserver.ubuntu.com --recv-key 27DEB15644C6B3CF3BD7D291300F846BA25BAE09If that one fails, then try this one.
gpg --keyserver hkp://keyserver.ubuntu.com:80 --recv-key 27DEB15644C6B3CF3BD7D291300F846BA25BAE09If it continues to fail, please see more detailed instructions here.
When Successful Look Here
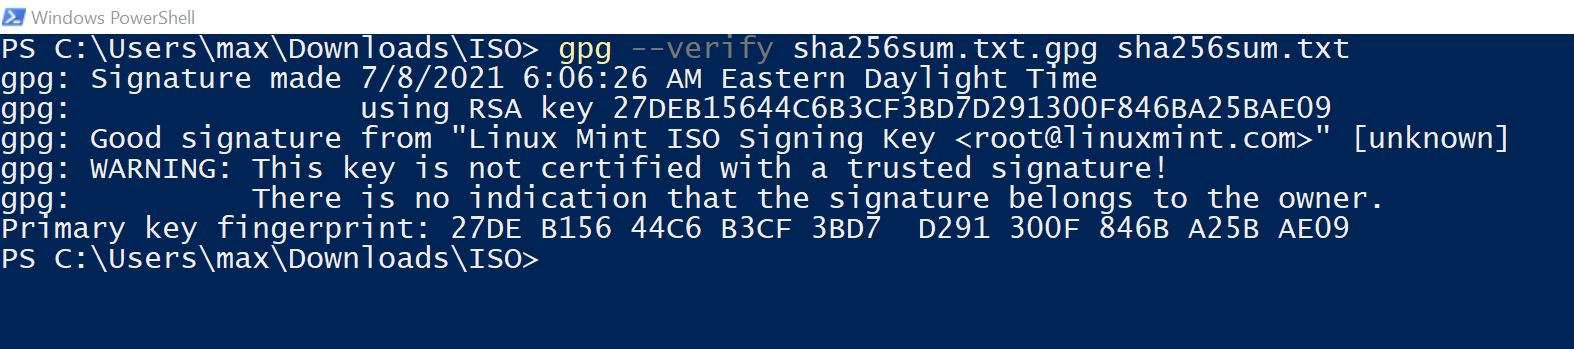
Now, once the above is successful, copy and paste this code into your terminal. Be in the same directory as your ISO and other downloaded files.gpg --verify sha256sum.txt.gpg sha256sum.txtYou should get a message that looks like this. Don't worry about what it all says, the only thing we are interested in are the important parts. It is a good signature!
 Now that you could authenticate and verify your download, it's time to burn it to a flash drive and make it bootable with Etcher.
The Flash Drive
The next thing that you will need during this process is a USB flash drive or SD card. Yes, you can burn to a CD, it will be up to you what you want to put it on. The steps to follow are the same. However, there are many times when someone has a 2 gig flash drive but then only a 100MB is available. If you find yourself in this situation, then I recommend the following video to clean your flash drive. If not, skip over it to the next section.Formatting Your USB Flash Drive In Windows
If you skipped over the above video, you will still need to format your flash drive. Note that this is unnecessary if you are burning it onto a CD. Here are the steps to format your flash drive.- Insert the flash drive into your computer.
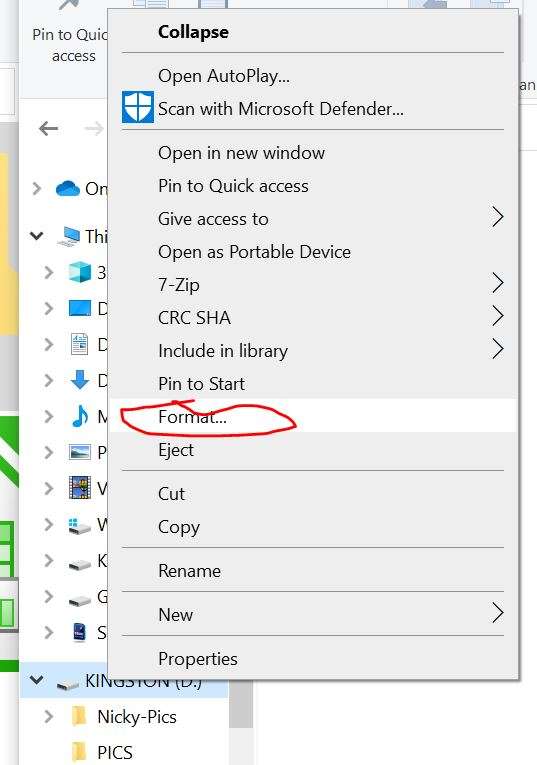
- Right click on the flash drive in your folder explorer view, then click format.
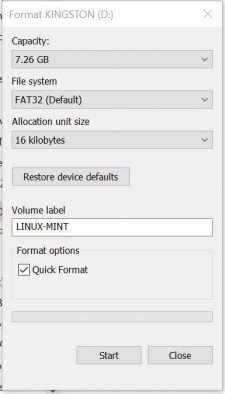
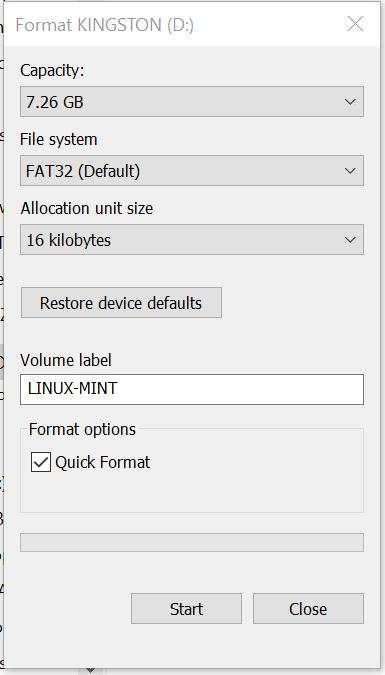
- For the format settings, copy what I did below in this graphic.
- This is actually an 8 GB flash drive, but notice it's only giving me 7.26 in my capacity. This is why I included the video above.
- Set the File system to FAT32 because it is usable over all types of operating systems. Mac, Windows and Linux.
- They set allocation unit size to 16 kilobytes.
- I named my Volume Label LINUX-MINT
- I ticked "Quick Format"
- Then click start
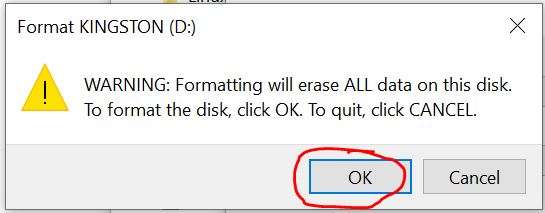
 The next thing that will happen is that they warn you that your entire USB Flashdive will be erased, click OK.
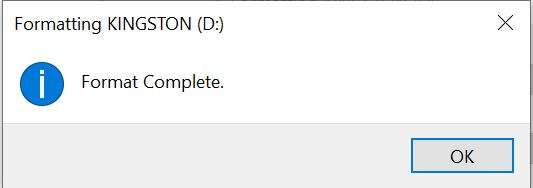
- Next windows will show you a notification that the format has been complete.
Formatting your USB Flash Drive in Mac
- Insert USB Flash drive into a port.
- Mac will recognize that you inserted the USB drive by displaying it on the Desktop.
- Launch the Disk Utility
- Click "Search" in top right corner of the screen.
- Type "Disk Utility" and select it to launch it
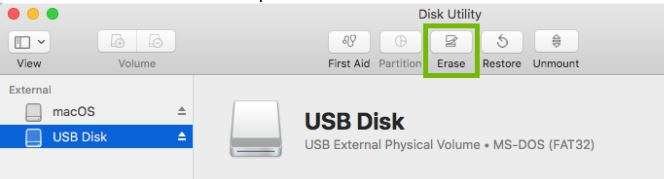
- Select your USB flash drive on the left.
- Select Erase at the top middle of the screen
- Next you will be prompted to type a name in for the dirve. You can name it Linux Mint or whatever you want.
- Choose MS_DOS (FAT) Format option.
- Next select "Erase" the a progress bar will appear.
- Select "Done" once completed.
- Quit the Disk Utility
Formatting your USB Flash Drive in Linux
We want to use FAT32 for formatting because that covers all different operating systems. Therefore, this is the procedure to format a USB flash drive in Linux.- Bring up your Terminal {Control T}.
- Run the following command
df
- The terminal will print out a list of mounted partitions as well as other useful information.
- Locate your USB Flash drive on the list. Note: if you are unsure which one it is then simply unplug the USB flash drive then plug it back in.
- Unmount your USB Flash drive by typing in the following. Your USB may not be the same as mine /dev/sdb1 so make sure you type in the path to your USB Flash Drive.
-
sudo umount /dev/sdb1
-
- Now let's format that drive by typing in the following. Remember that yours will probably be different.
-
sudo mkfs.vfat /dev/sdb1
-
- Now verify the USB drive by typing in the following.
-
sudo fsck /dev/sdb1
-
Creating A Bootable Flash Drive
To create a Bootable Flash Drive, insert your formatted USB Flash drive into your computer. Then bring up the Etcher program that we downloaded earlier. The official name of it on your computer is balenaEtcher. It will look like this when you bring it up.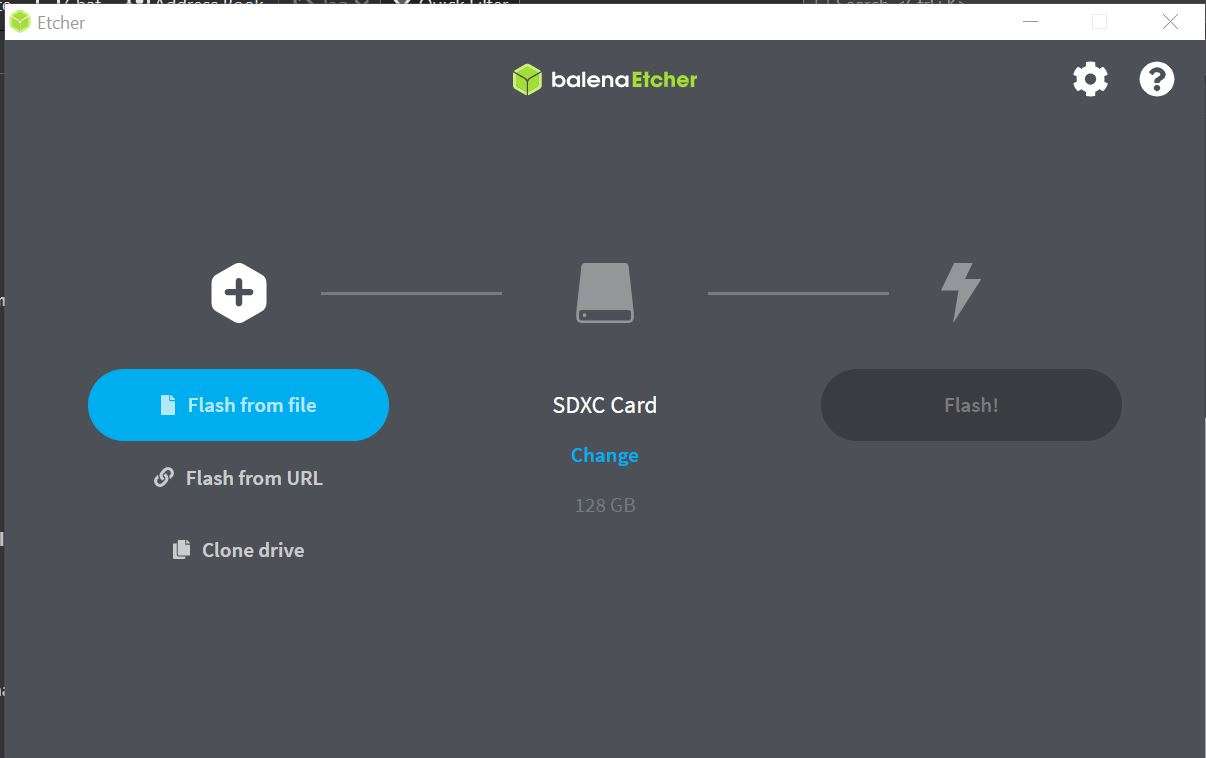 On the left, click on "Flash from file" and locate your ISO file, then select it. Next, select your formatted USB flash drive. This could also be a SD card or CD-ROM. Once you have everything selected, then you should see the "Flash!" button light up. Click it.
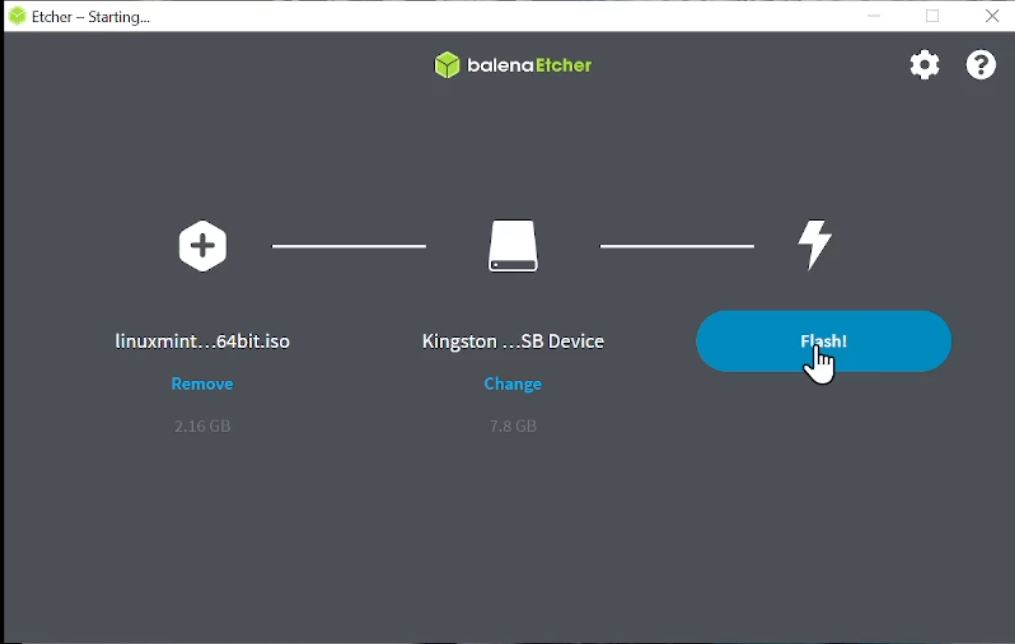 It may take a few minutes, then you will receive a complete notification when done. After that you may remove the flash drive and install the latest version of Linux Mint on just about any desktop computer or laptop. Let's go over the process of install Linux Mint on another computer.
Installing Linux Mint on a Computer
Now that you have a bootable flash drive, you want to install your Linux Mint onto a computer. There are a few things that you must know. To get to the computer "Boot Menu" you will need to know what buttons to push to get it to come up. This can be tricky. Basically, while the computer is starting up, you need to keep hitting a key like F9 repeatedly to bring up the boot menu. However, the key to bring up the boot menu changes on different computers, therefore it's tricky. I have a list below of the major brands of computers that may help you bring up the boot menu on your computer. You may have to experiment with these keys for the different models. If you want to get to the Boot Menu through Windows 10 instead of the BIOS scroll pass this next section.Chart For Different Computer Models
Chart created by tchofide.com| Computer Manufacturer | Type | Model | Boot Menu Key | BIOS Key |
| ACER SERIES | ||||
| ACER | Esc, F12, F9 | Del, F2 | ||
| ACER | netbook | AspireOne, Aspire Timeline | F12 | F2 |
| ACER | netbook | Aspire v3, v5, v7 | F12 | F2 |
| ASUS SERIES | ||||
| ASUS | desktop | F8 | F9 | |
| ASUS | laptop | Esc | F2, F9 | |
| ASUS | laptop | R503C | F8 | F2, DEL |
| ASUS | netbook | Eee PC 1025c | Esc | F2 |
| COMPAQ | ||||
| COMPAQ | Presario | Esc, F9 | F10 | |
| DELL SERIES | ||||
| DELL | desktop | Dimension, Inspiron, Latitude | F12 | F2 |
| DELL | desktop | Inspiron One 2020, 2305, 2320, 2330 All-In-One | F12 | F2 |
| DELL | laptop | Inspiron | F12 | F2 |
| DELL | laptop | Precision | F12 | F12 |
| HP SERIES | ||||
| HP | generic | Esc, F9 | Esc, F10, F1 | |
| HP | desktop | Media Center | Esc | F10 |
| HP | desktop | Pavilion 23 All In One | Esc | F10 |
| HP | desktop | Pavilion g6 and g7 | Esc | F10 |
| HP | desktop | Pavilion HPE PC, h8-1287c | Esc | Esc F10 |
| HP | desktop | Pavilion PC, p6 2317c | Esc | Esc F10 |
| HP | desktop | Pavilion PC, p7 1297cb | Esc | Esc F10 |
| HP | desktop | TouchSmart 520 PC | Esc | Esc F10 |
| HP | laptop | 2000 | Esc | Esc |
| HP | notebook | Pavilion | Esc | F10 |
| HP | notebook | ENVY dv6 and dv7 PC | Esc | Esc |
| LENOVO SERIES | ||||
| LENOVO | desktop | F12, F8, F10 | F1, F2 | |
| LENOVO | laptop | F12 | F1, F2 | |
| LENOVO | laptop | IdeaPad P500 | F12 or Fn + F11 | F2 |
| SAMSUNG SERIES | ||||
| SAMSUNG | F12, Esc | |||
| SAMSUNG | netbook | NC10 | Esc | F2 |
| SAMSUNG | ultrabook | Series 5 Ultra and Series 7 Chronos | Esc | F2 |
| SONY SERIES | ||||
| SONY | VAIO, PCG, VGN | F11, ASSIST | F1, F2, F3 | |
| SONY | VGN Esc | F10, ASSIST | F2 | |
| TOSHIBA SERIES | ||||
| TOSHIBA | Protege, Satellite, Tecra | F12 | F1, Esc | |
| TOSHIBA | Equium F12 | F12 | F12 | |
| MOTHERBOARDS | ||||
| ASUS | F8 | Del | ||
| GIGABYTE | F12 | Del | ||
| MSI | F11 | Del | ||
| INTEL | F10 | F2 | ||
| ASROCK | F11 | F2, Del | ||
| EVGA | F7 | Del | ||
| OTHER MANUFACTURERS | ||||
| XIAOMI | Notebook | MI Notebook Air | Fn +F2 (Choose Boot Menu) | Fn +F2 (Choose BIOS Setup) |
| PANASONIC | Toughbook | F2 (go to the exit and then choose boot order) | F2, Del | |
| NEC | F5 | F2 | ||
| PACKARD BELL | F8 | F1, Del | ||
| eMCHINES | F12 | Tab, Del | ||
| FUJITSU | F12 | F2 | ||
| GATEWAY | F11, Esc, F10 | F2, Del | ||
| iBALL | i360 | CompBook | F9 (Choose your media under boot option) | Del |
| HUAWEI | Matebook | F2 | F12 | |
| SHARP | F9 | F2 |
Alternate Way To Get To Boot Menu in Windows 10
Alternatively, there are a few ways to get to the boot menu from Windows 10 if you can start the computers in Windows. Here are 3 different methods to get your boot menu to come up on Windows 10.- Hold Shift Key down and click Restart at the same time.
- Open the "run" app and type in the following into the box and hit OK. shutdown /r /o
- Click Close when you are about to be signed out.
- Wait a few seconds, then you would access "Boot Menu Options".
- Use Windows Settings
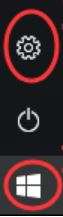
- Go to "Start" then click on Settings, which is the little Cog Wheel.
- Scroll down to Update & security.
- Click "Recovery" on the left.
- Under Advanced Start Up, click the Restart Now button.
- Now you can boot from your USB Flash Drive.
- Go to "Start" then click on Settings, which is the little Cog Wheel.
Installing Linux Mint Alongside Windows Part 1
When installing Linux Mint, you may want to install it along with another operating system. You would need to partition the drive and allocate space for Linux Mint and your other operating system like Windows. Do this before you install Linux Mint with your bootable flash drive if you desire to run both operating systems. However, if you totally want to replace your current operating system with Linux Mint, this step is unnecessary.Minimum Requirements for Linux Mint
Keep in mind while performing this action the minimum requirements for Linux Mint.- 1GB RAM (2GB recommended for a comfortable usage).
- 15GB of disk space (20GB recommended).
- 1024×768 resolution (on lower resolutions, press ALT to drag windows with the mouse if they don’t fit in the screen).
Steps To Allocate Space in Windows 10
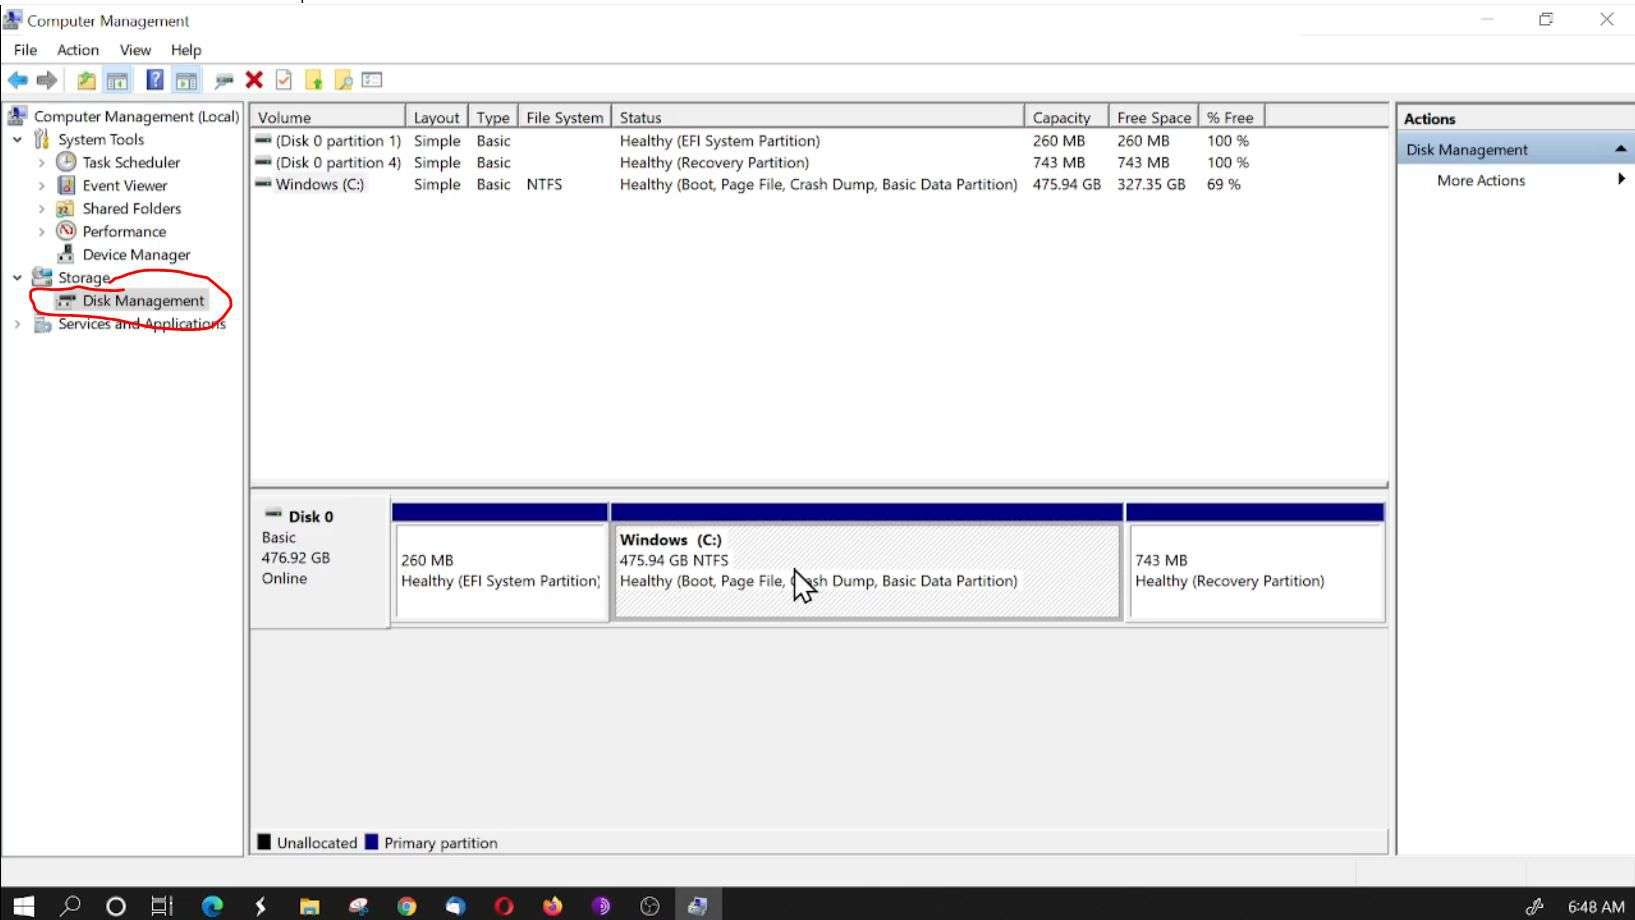
- Go to start on your computer and type in "Computer Management".
- Click on "Disk Management" on the left, then you will see a list of your drives. This may take a minute or 2 to populate.
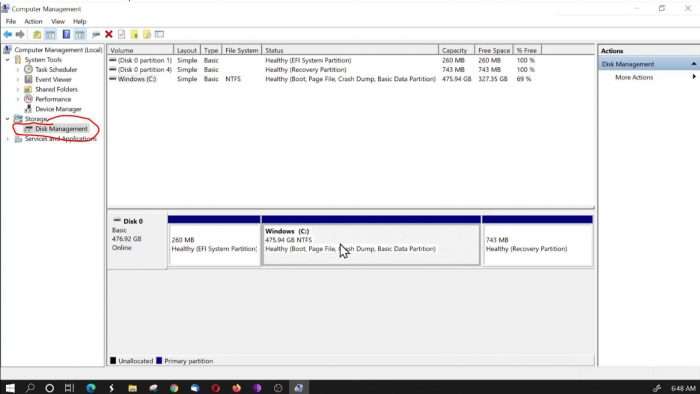 Notice that there is no "Unallocated Space" on the c: drive. This means that we will have to shrink the drive before we can install Linux Mint from our Flash drive. Right-click over the Windows (C:) drive and left click "Shrink Volume".

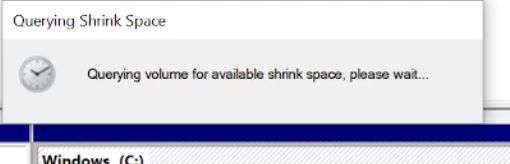
- The system will query the space that is available and let you know how far you can shrink it.
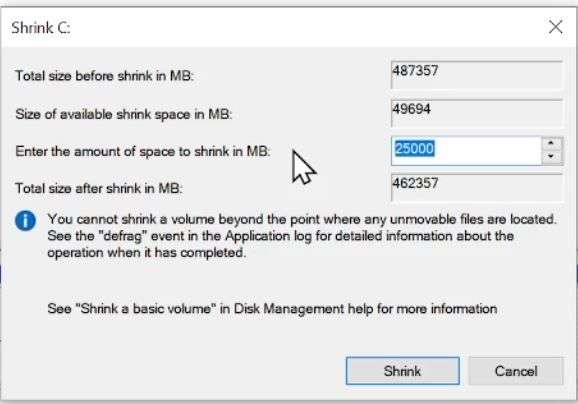
- Next, you will have a box pop up to enter a number in MB. I put mine at 25000, you can see here. Then click the "shrink" button.
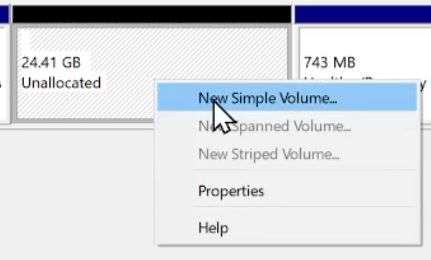
- Notice now you have Unallocated space on your C: Drive.
- We need to format that so that we can install Linux Mint on that part of your drive. Right click on the Unallocated part and left click "New Simple Volume".
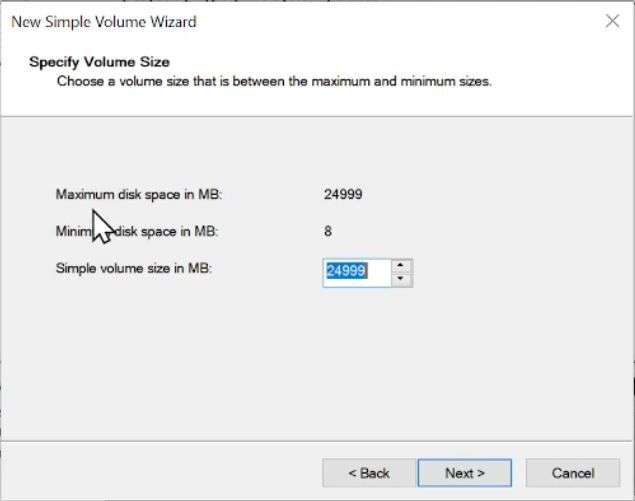
- You will have a Wizard Box appear that will walk you through the process.
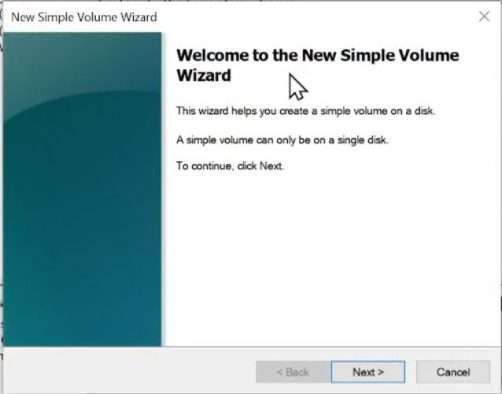
- Click Next again on the next box. Do not make any changes here.

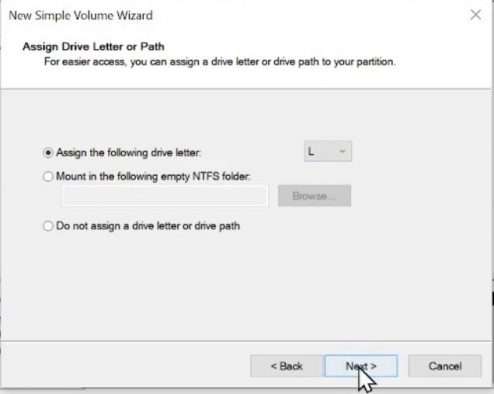
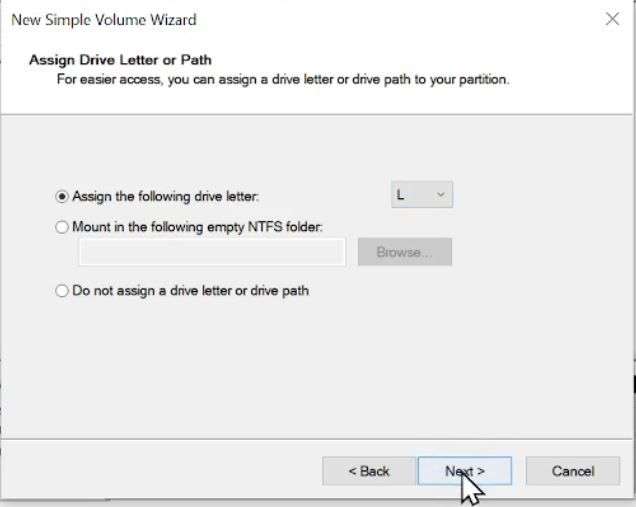
- Now assign a drive letter to your new drive volume. I chose the letter L for Linux Mint, but you can choose whatever you want.Click next.
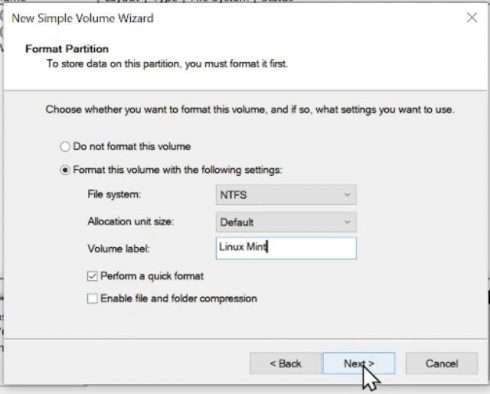
- In the next box, change the volume label to Linux Mint if you want, then click next. Leave everything as is.
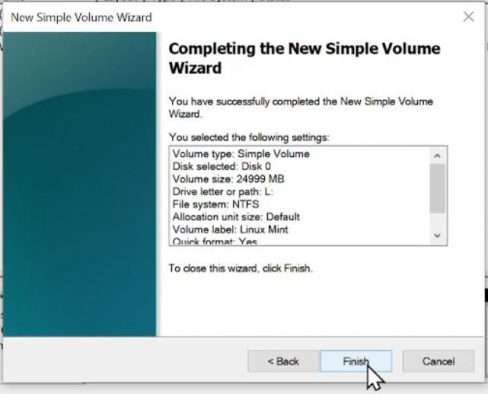
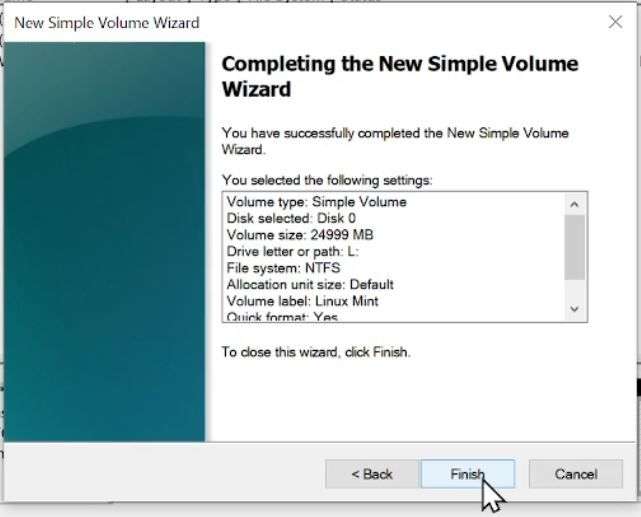
- Next you will see a confirmation box, click Finish.


 You will also be able to see the drive space in the computer management box.
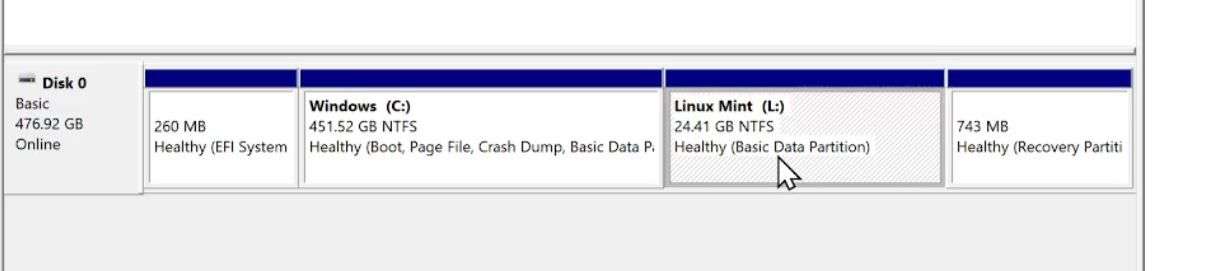 Now you are ready to install Linux Mint alongside Windows! Click to the next page.
Installing Linux Mint Alongside Windows Part 2
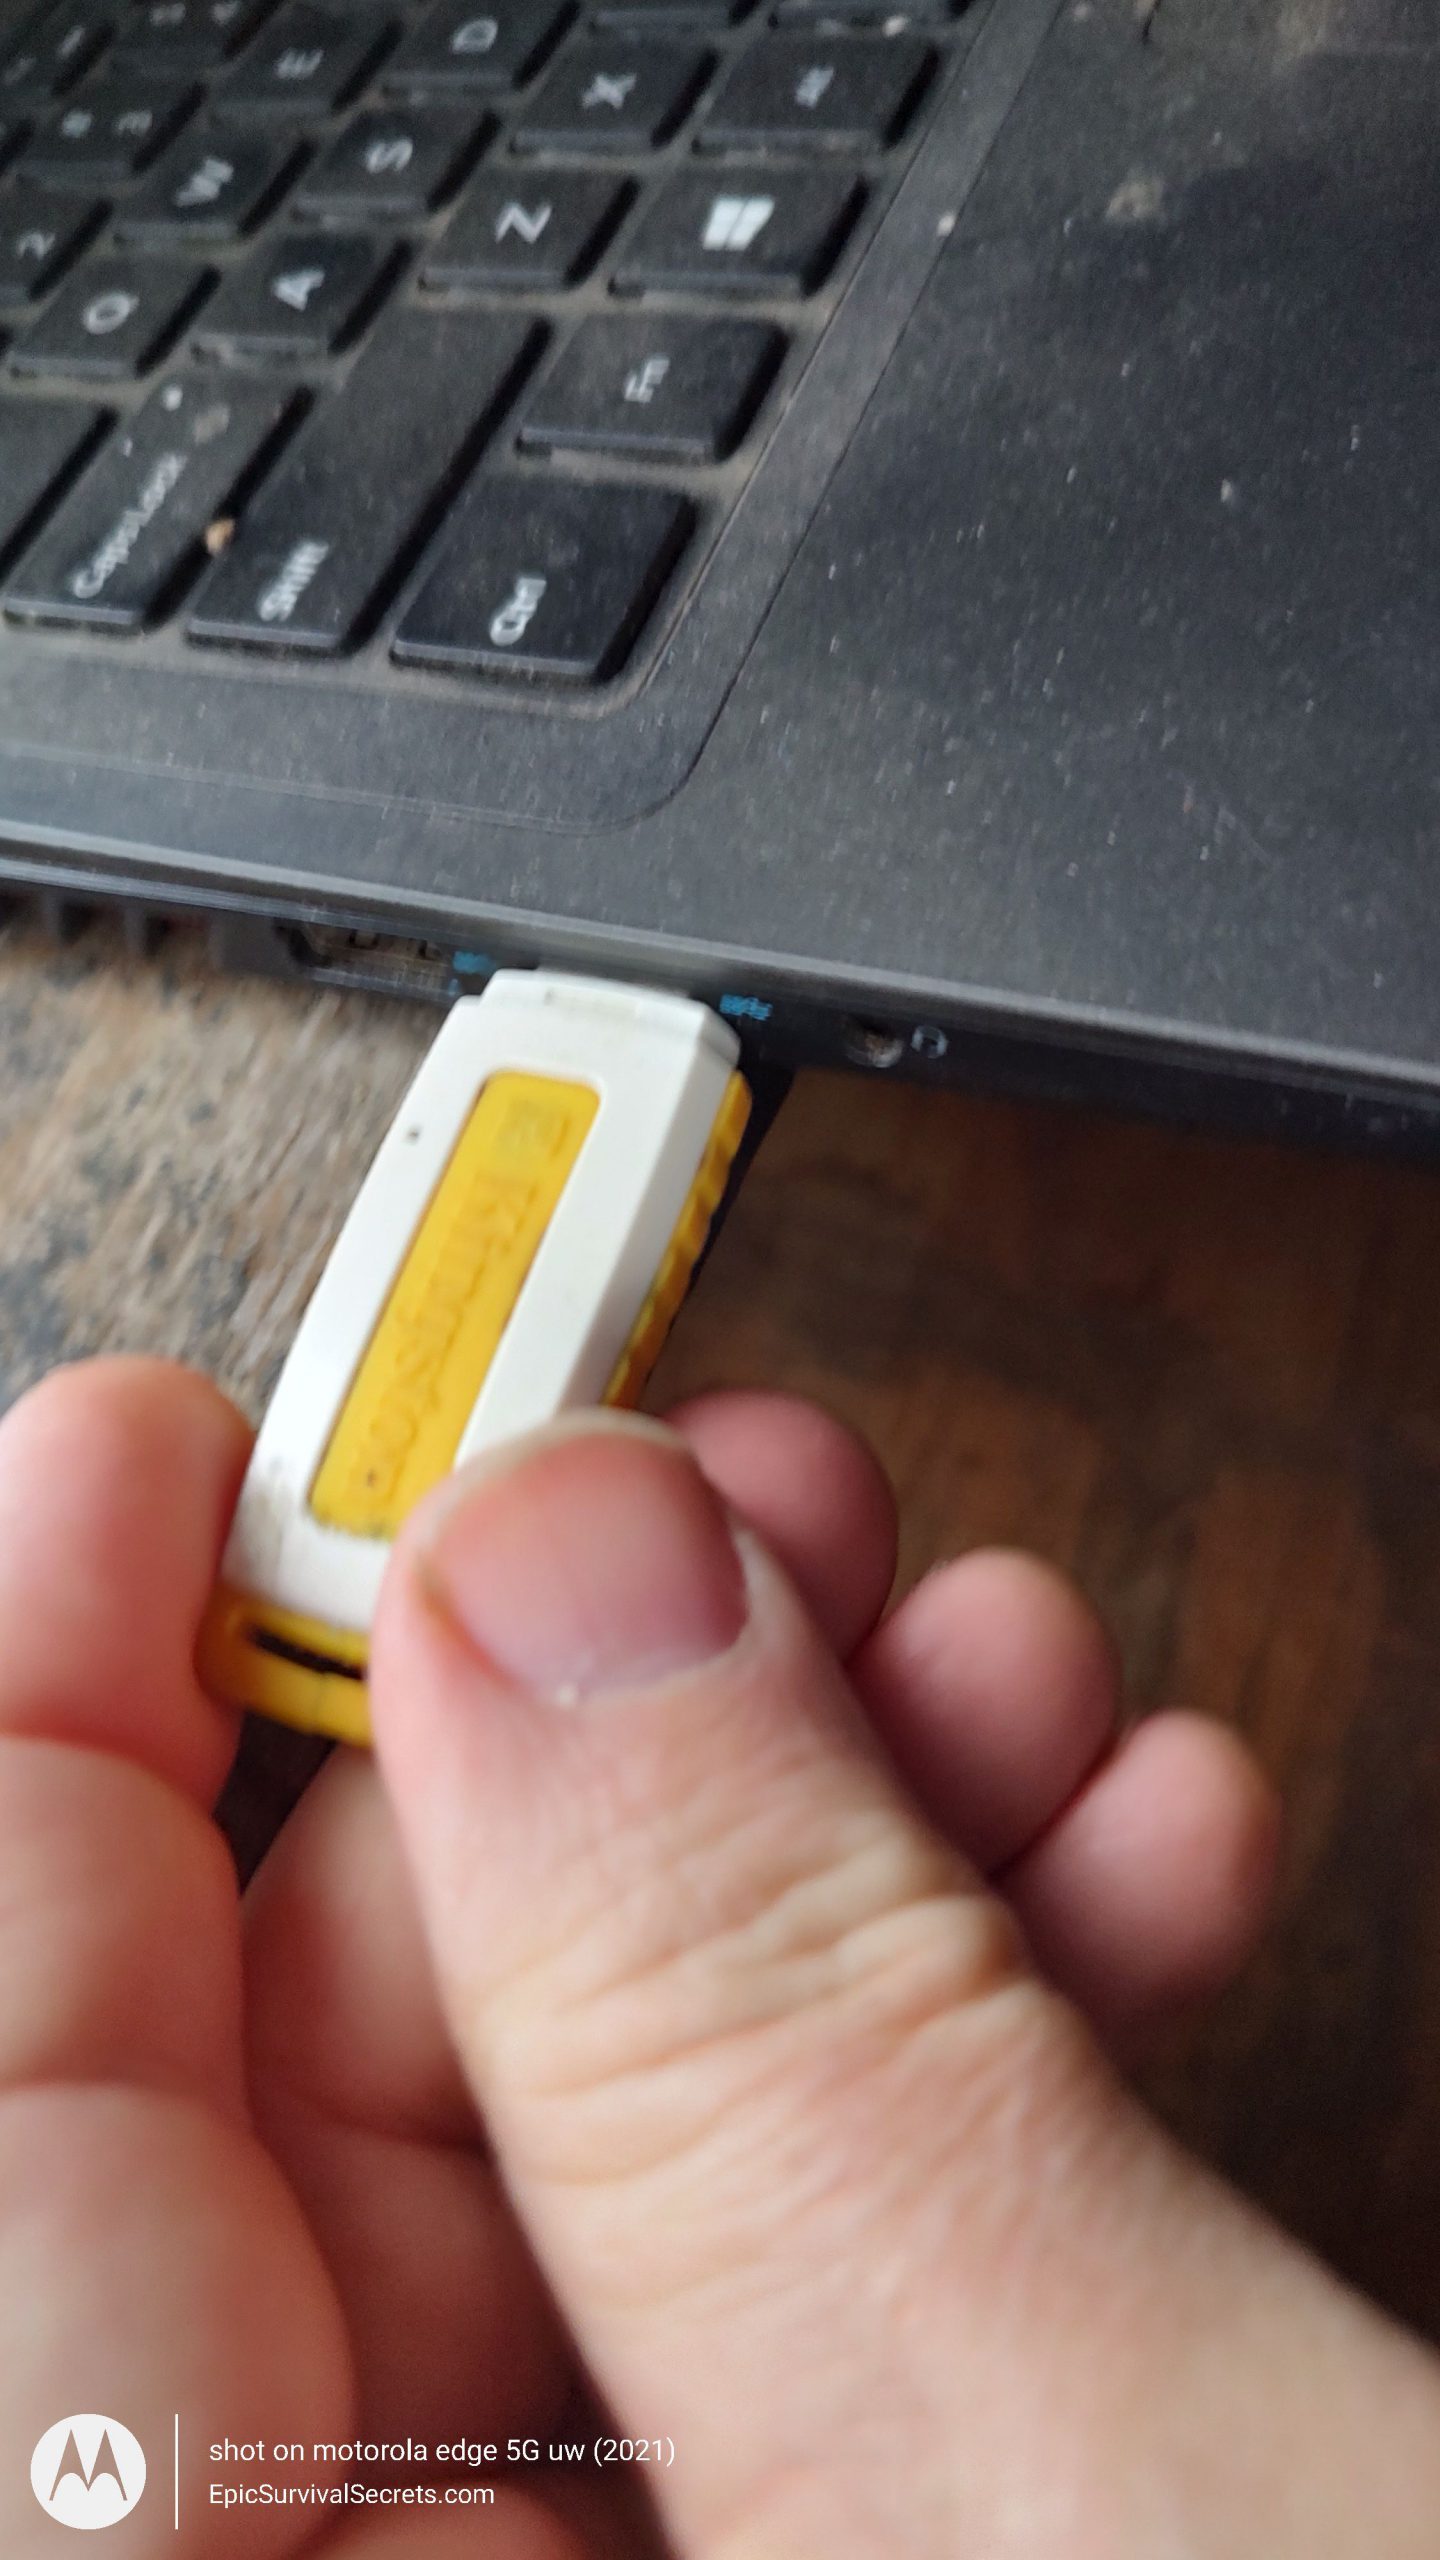
Now we are ready to install Linux Mint alongside our Windows operating system. Turn your computer off. Take your bootable flash drive with Linux Mint on it and insert it into your computer.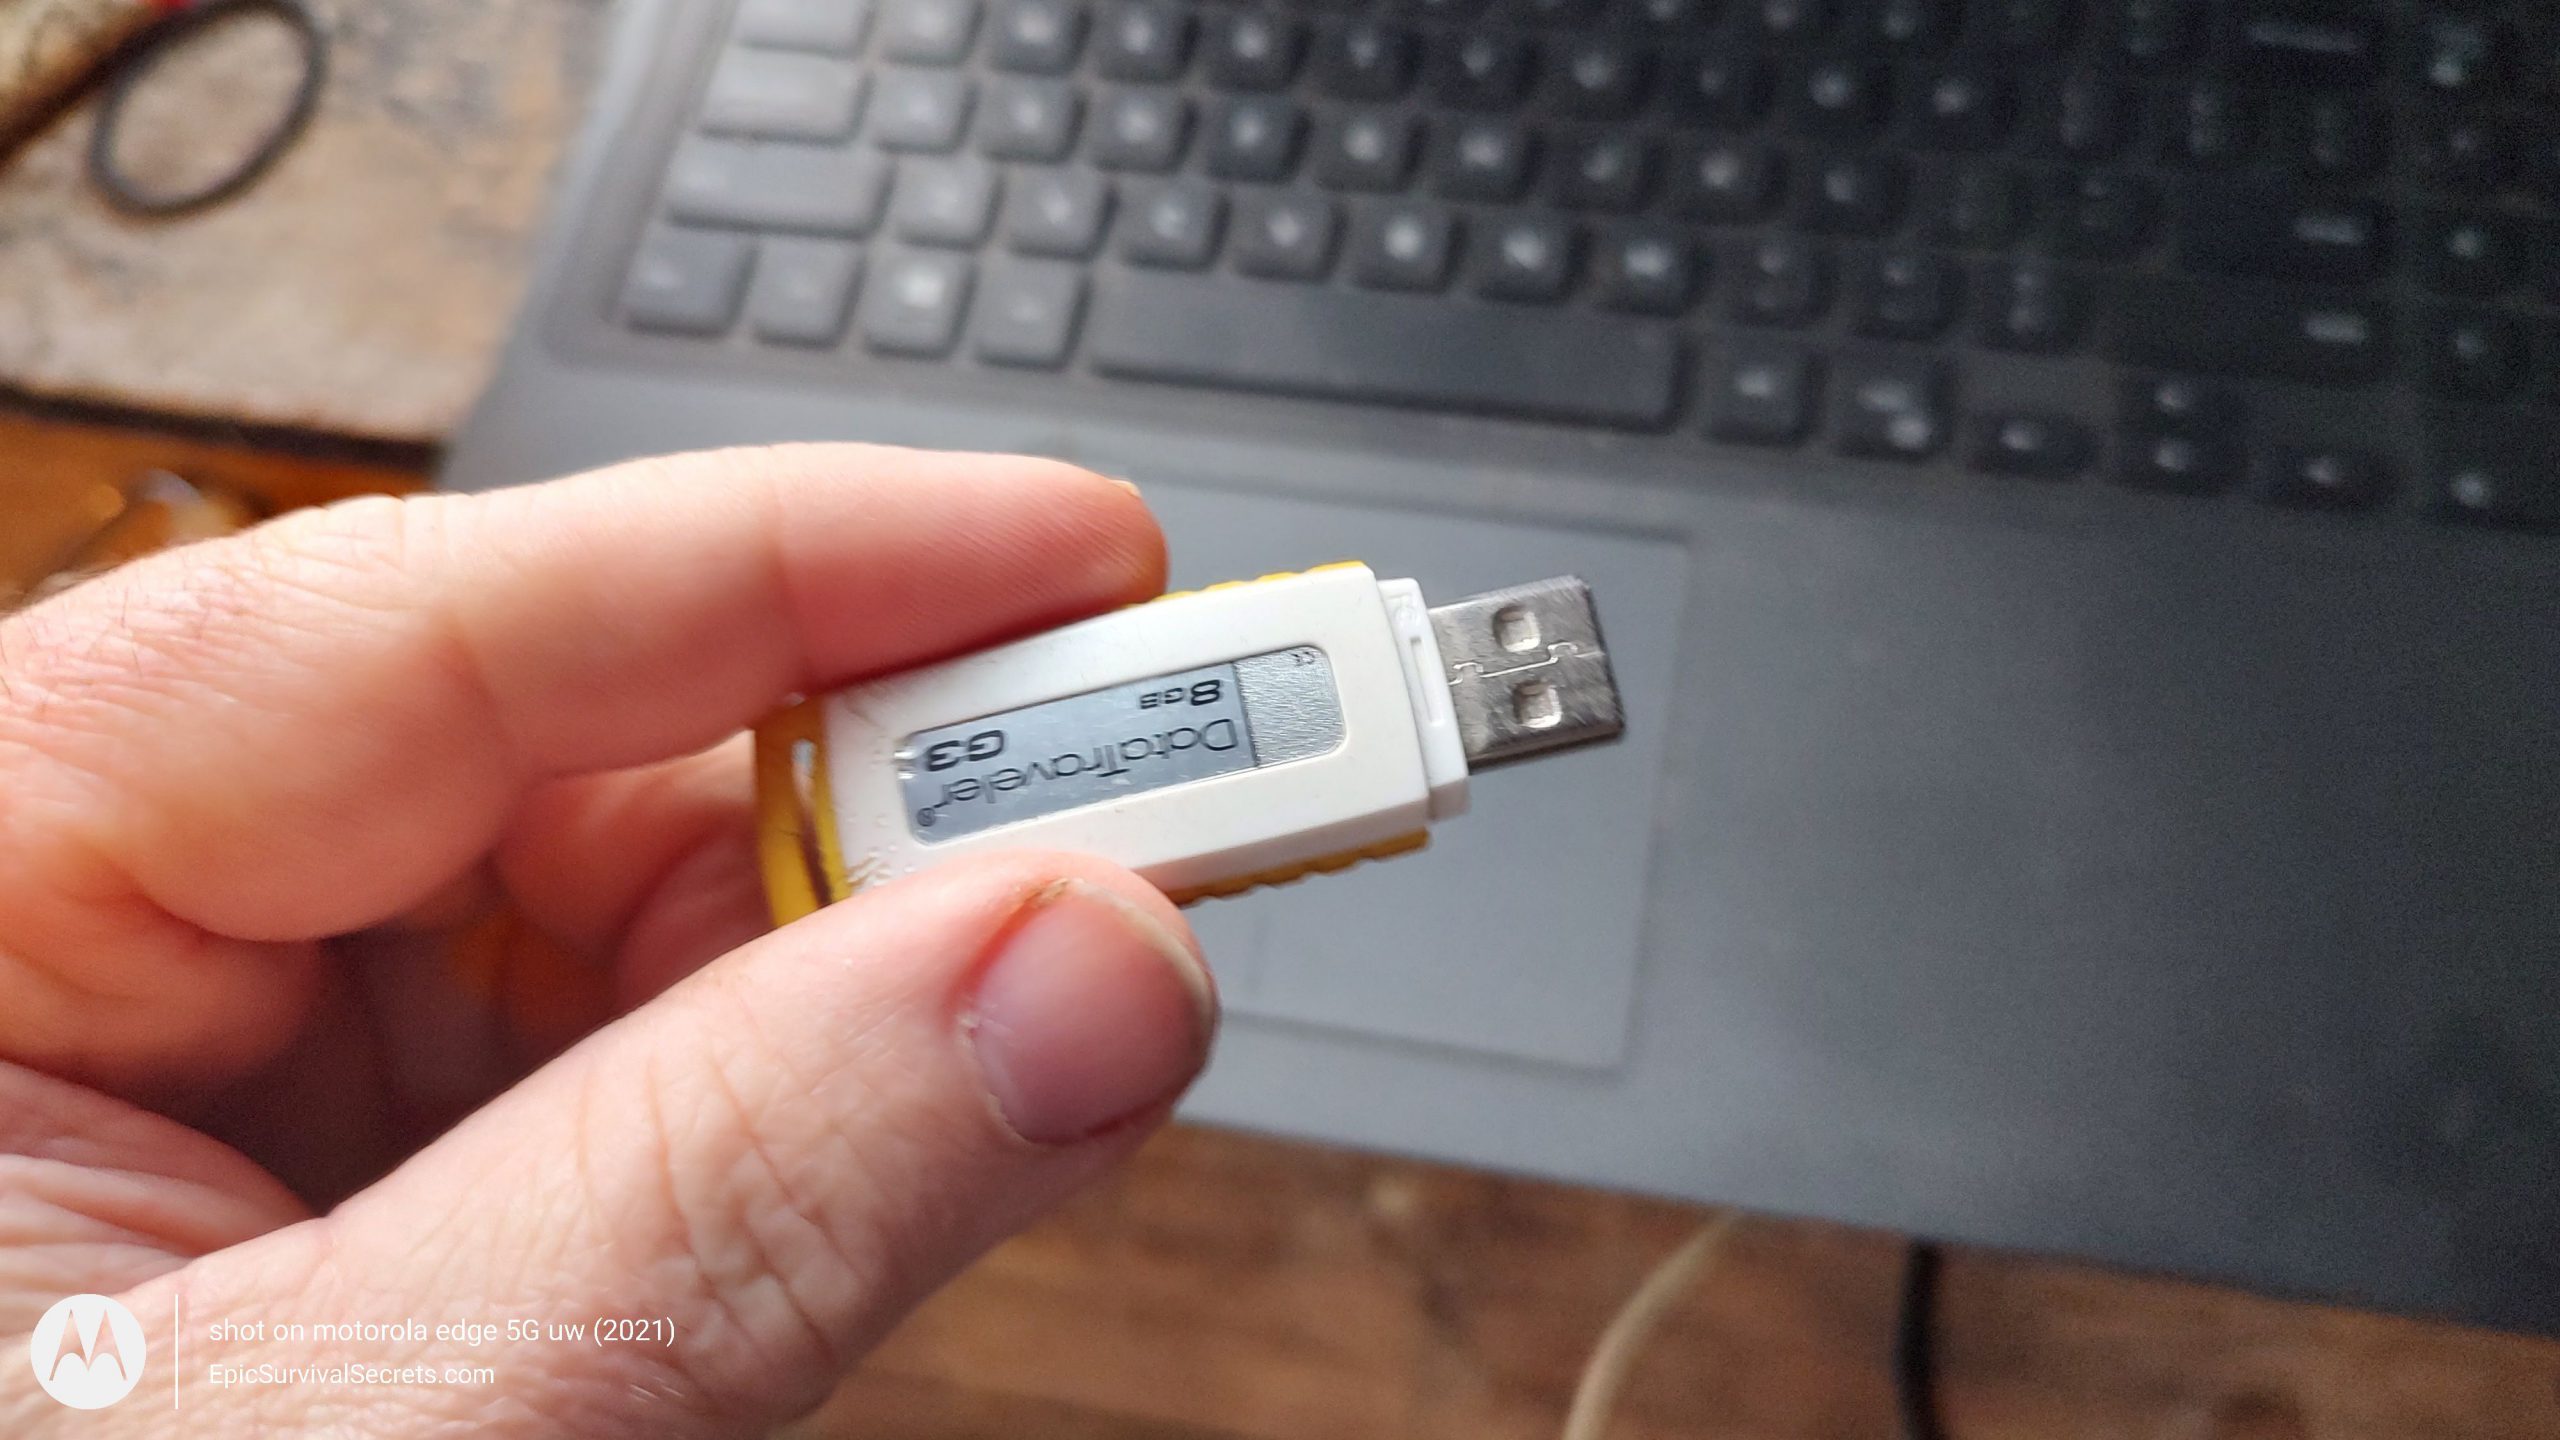
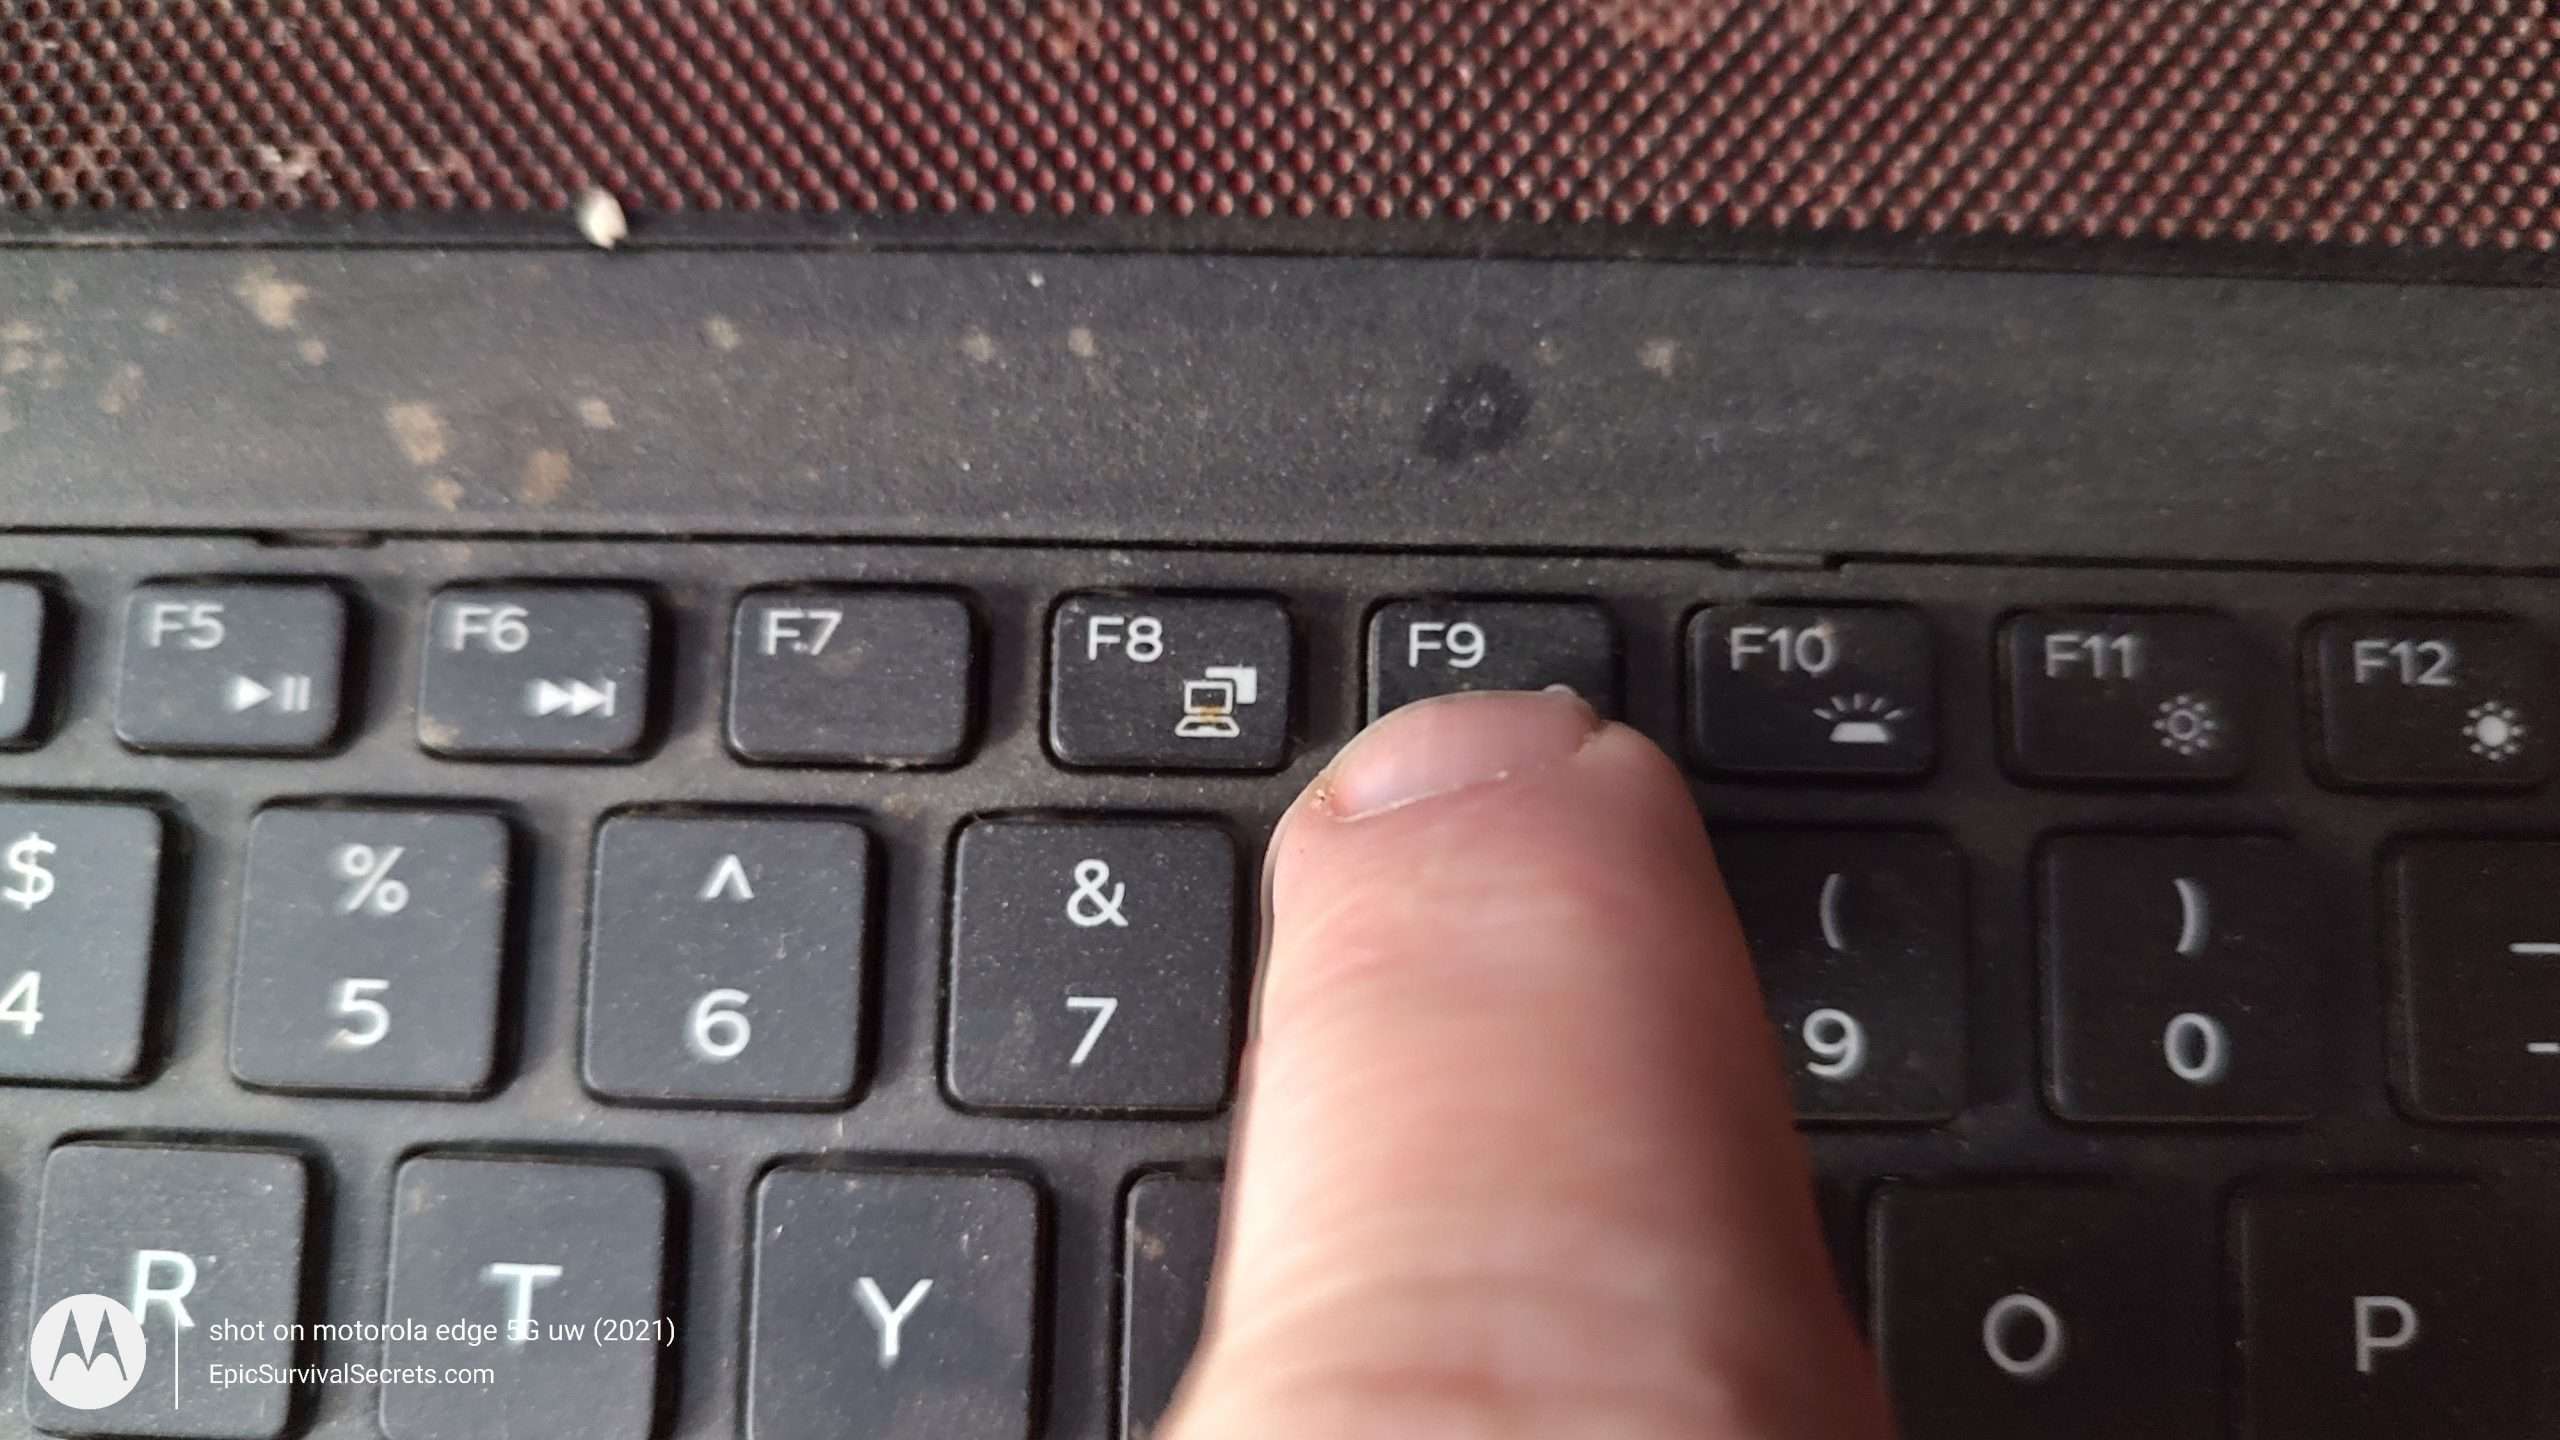
 Now turn your computer back on and while it is booting up you want to keep on pressing the keys that will open up your boot menu. More than likely, if you are on a HP, it will be the "Esc" key. If you are not sure you can reference the previous page to find your model and see what key to use. For the computer that I am using in the graphic, the boot menu key is F9.
 Now you will see a boot menu appear. It will look something like this, your will probably say Windows on the top. My USB flash drive is that USB1 - UEFI OS(KingstonDataTraveler G3 PMAP) and I need that to be on top. Using the arrows on my keyboard I am going to navigate down so I highlight my USB Flash drive.
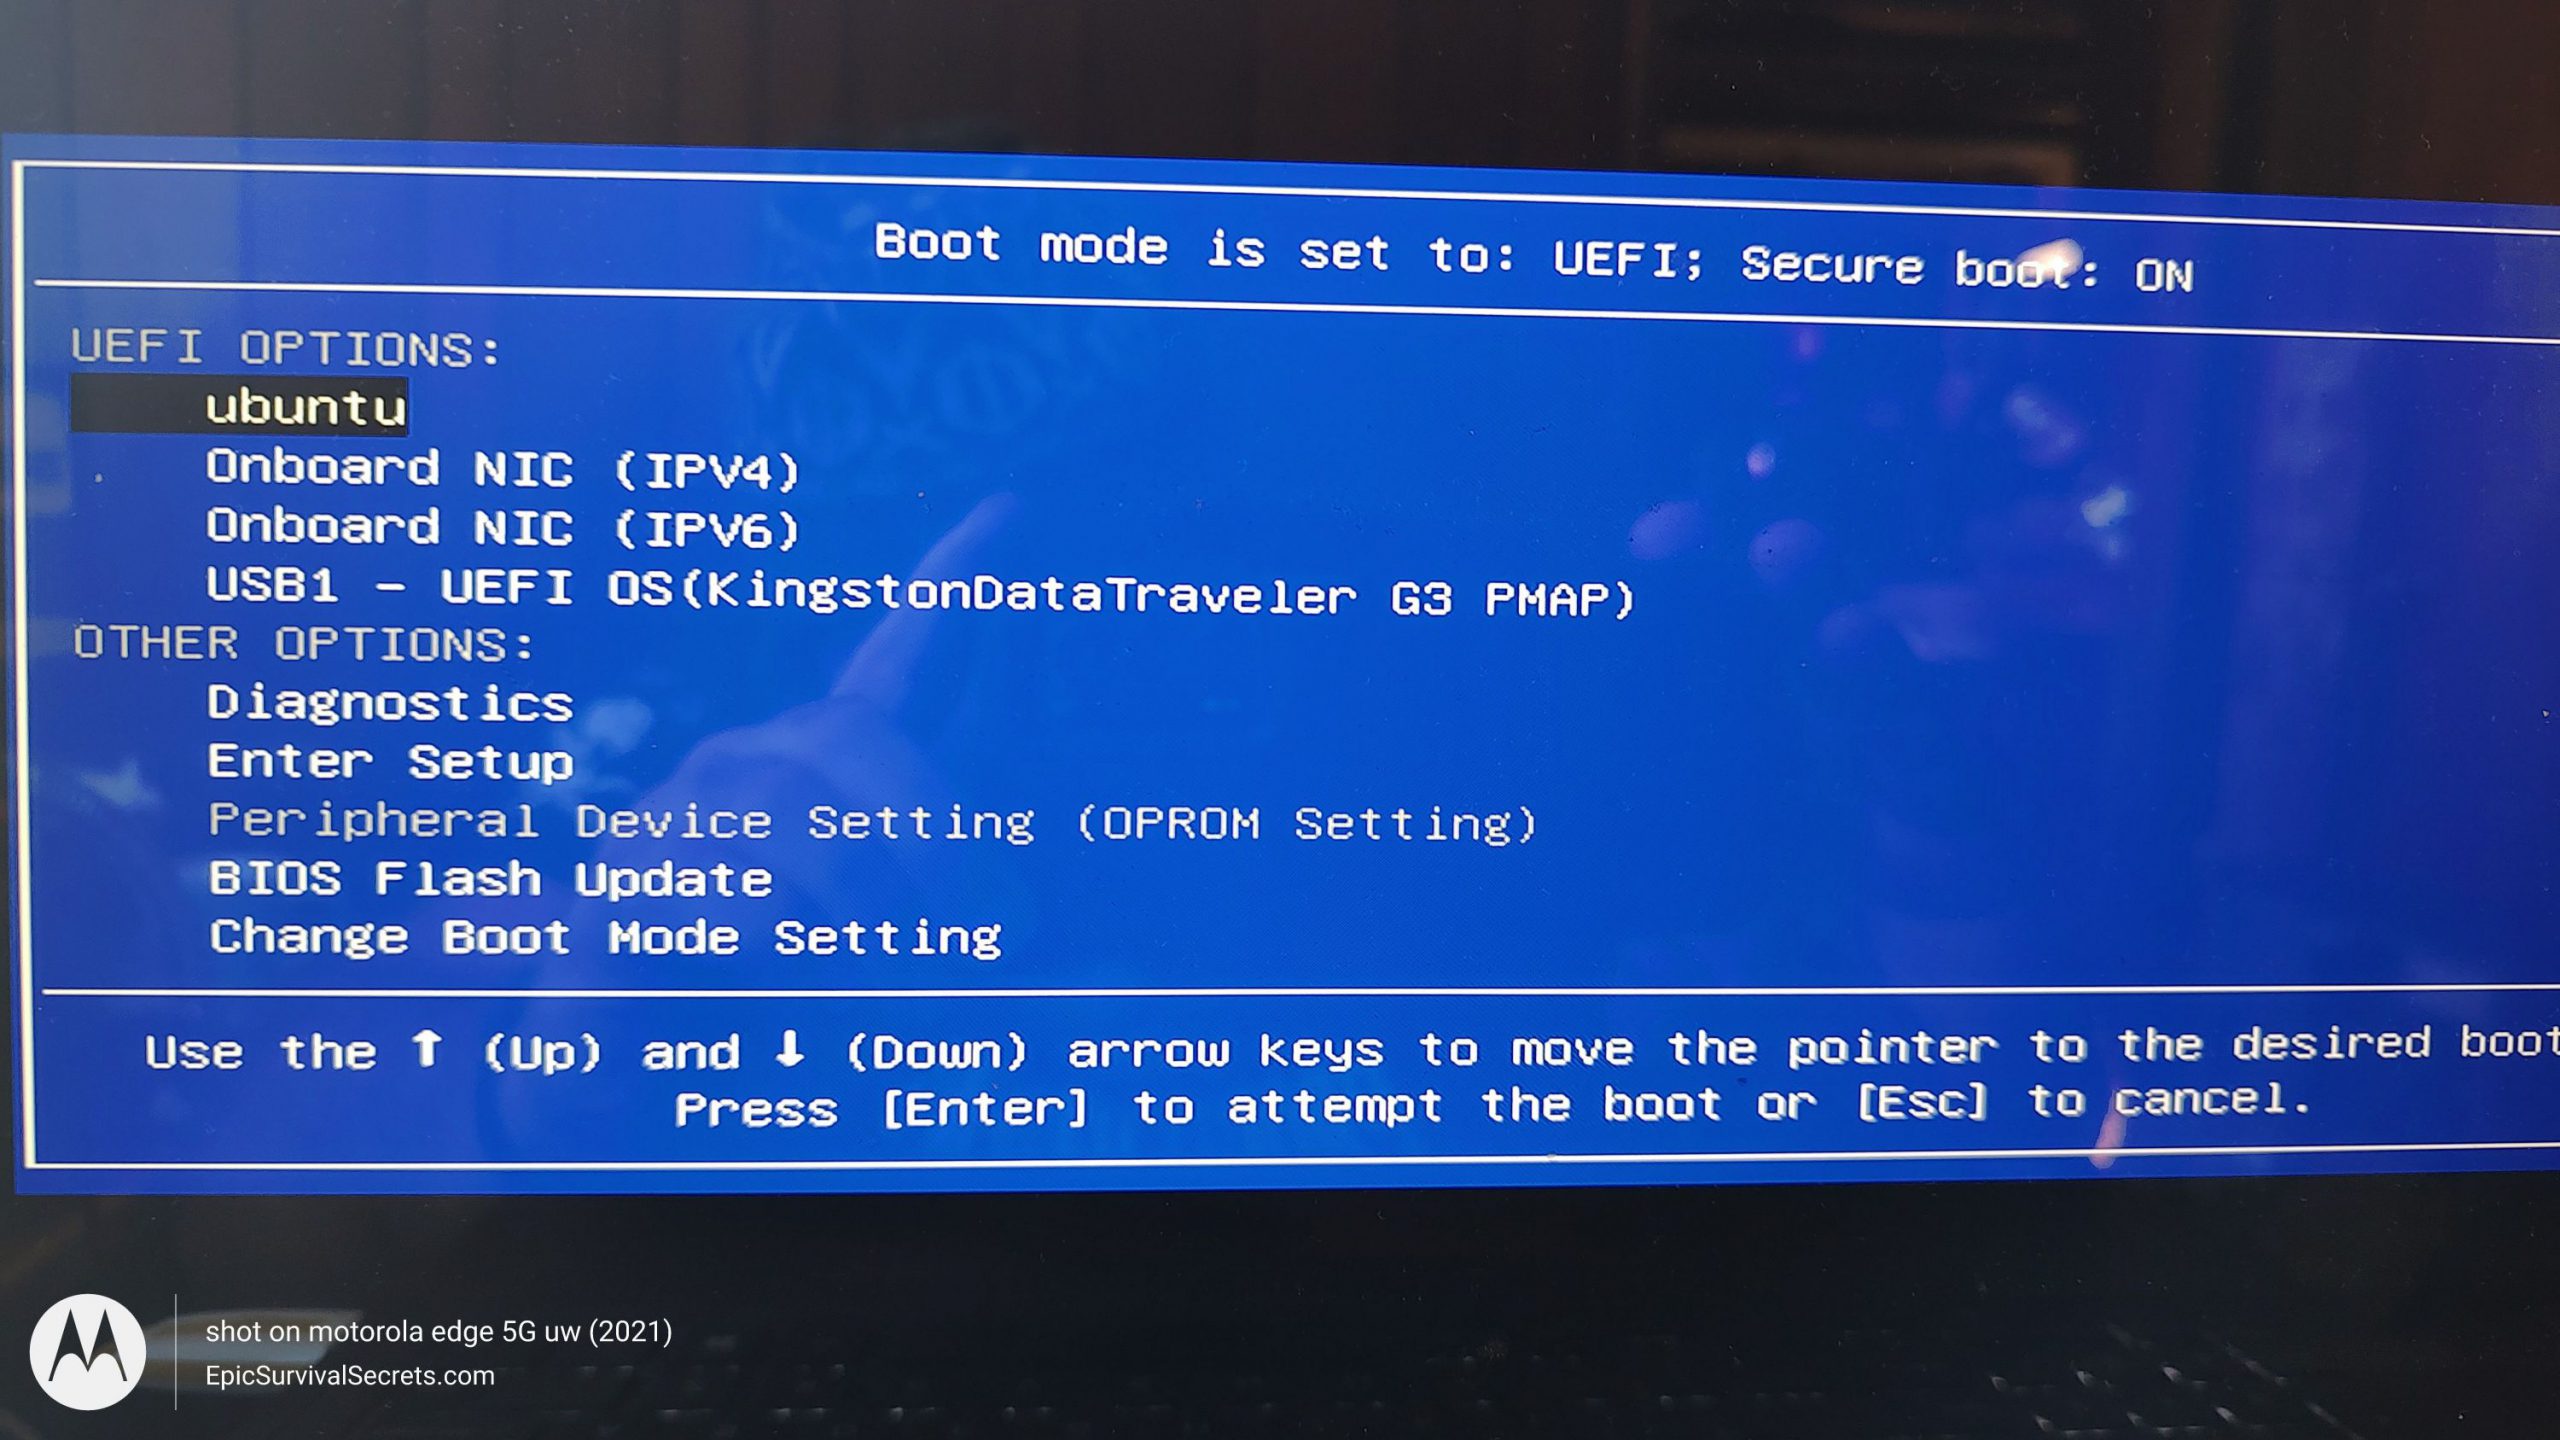 Now I am going to hit enter to boot from my flash drive.
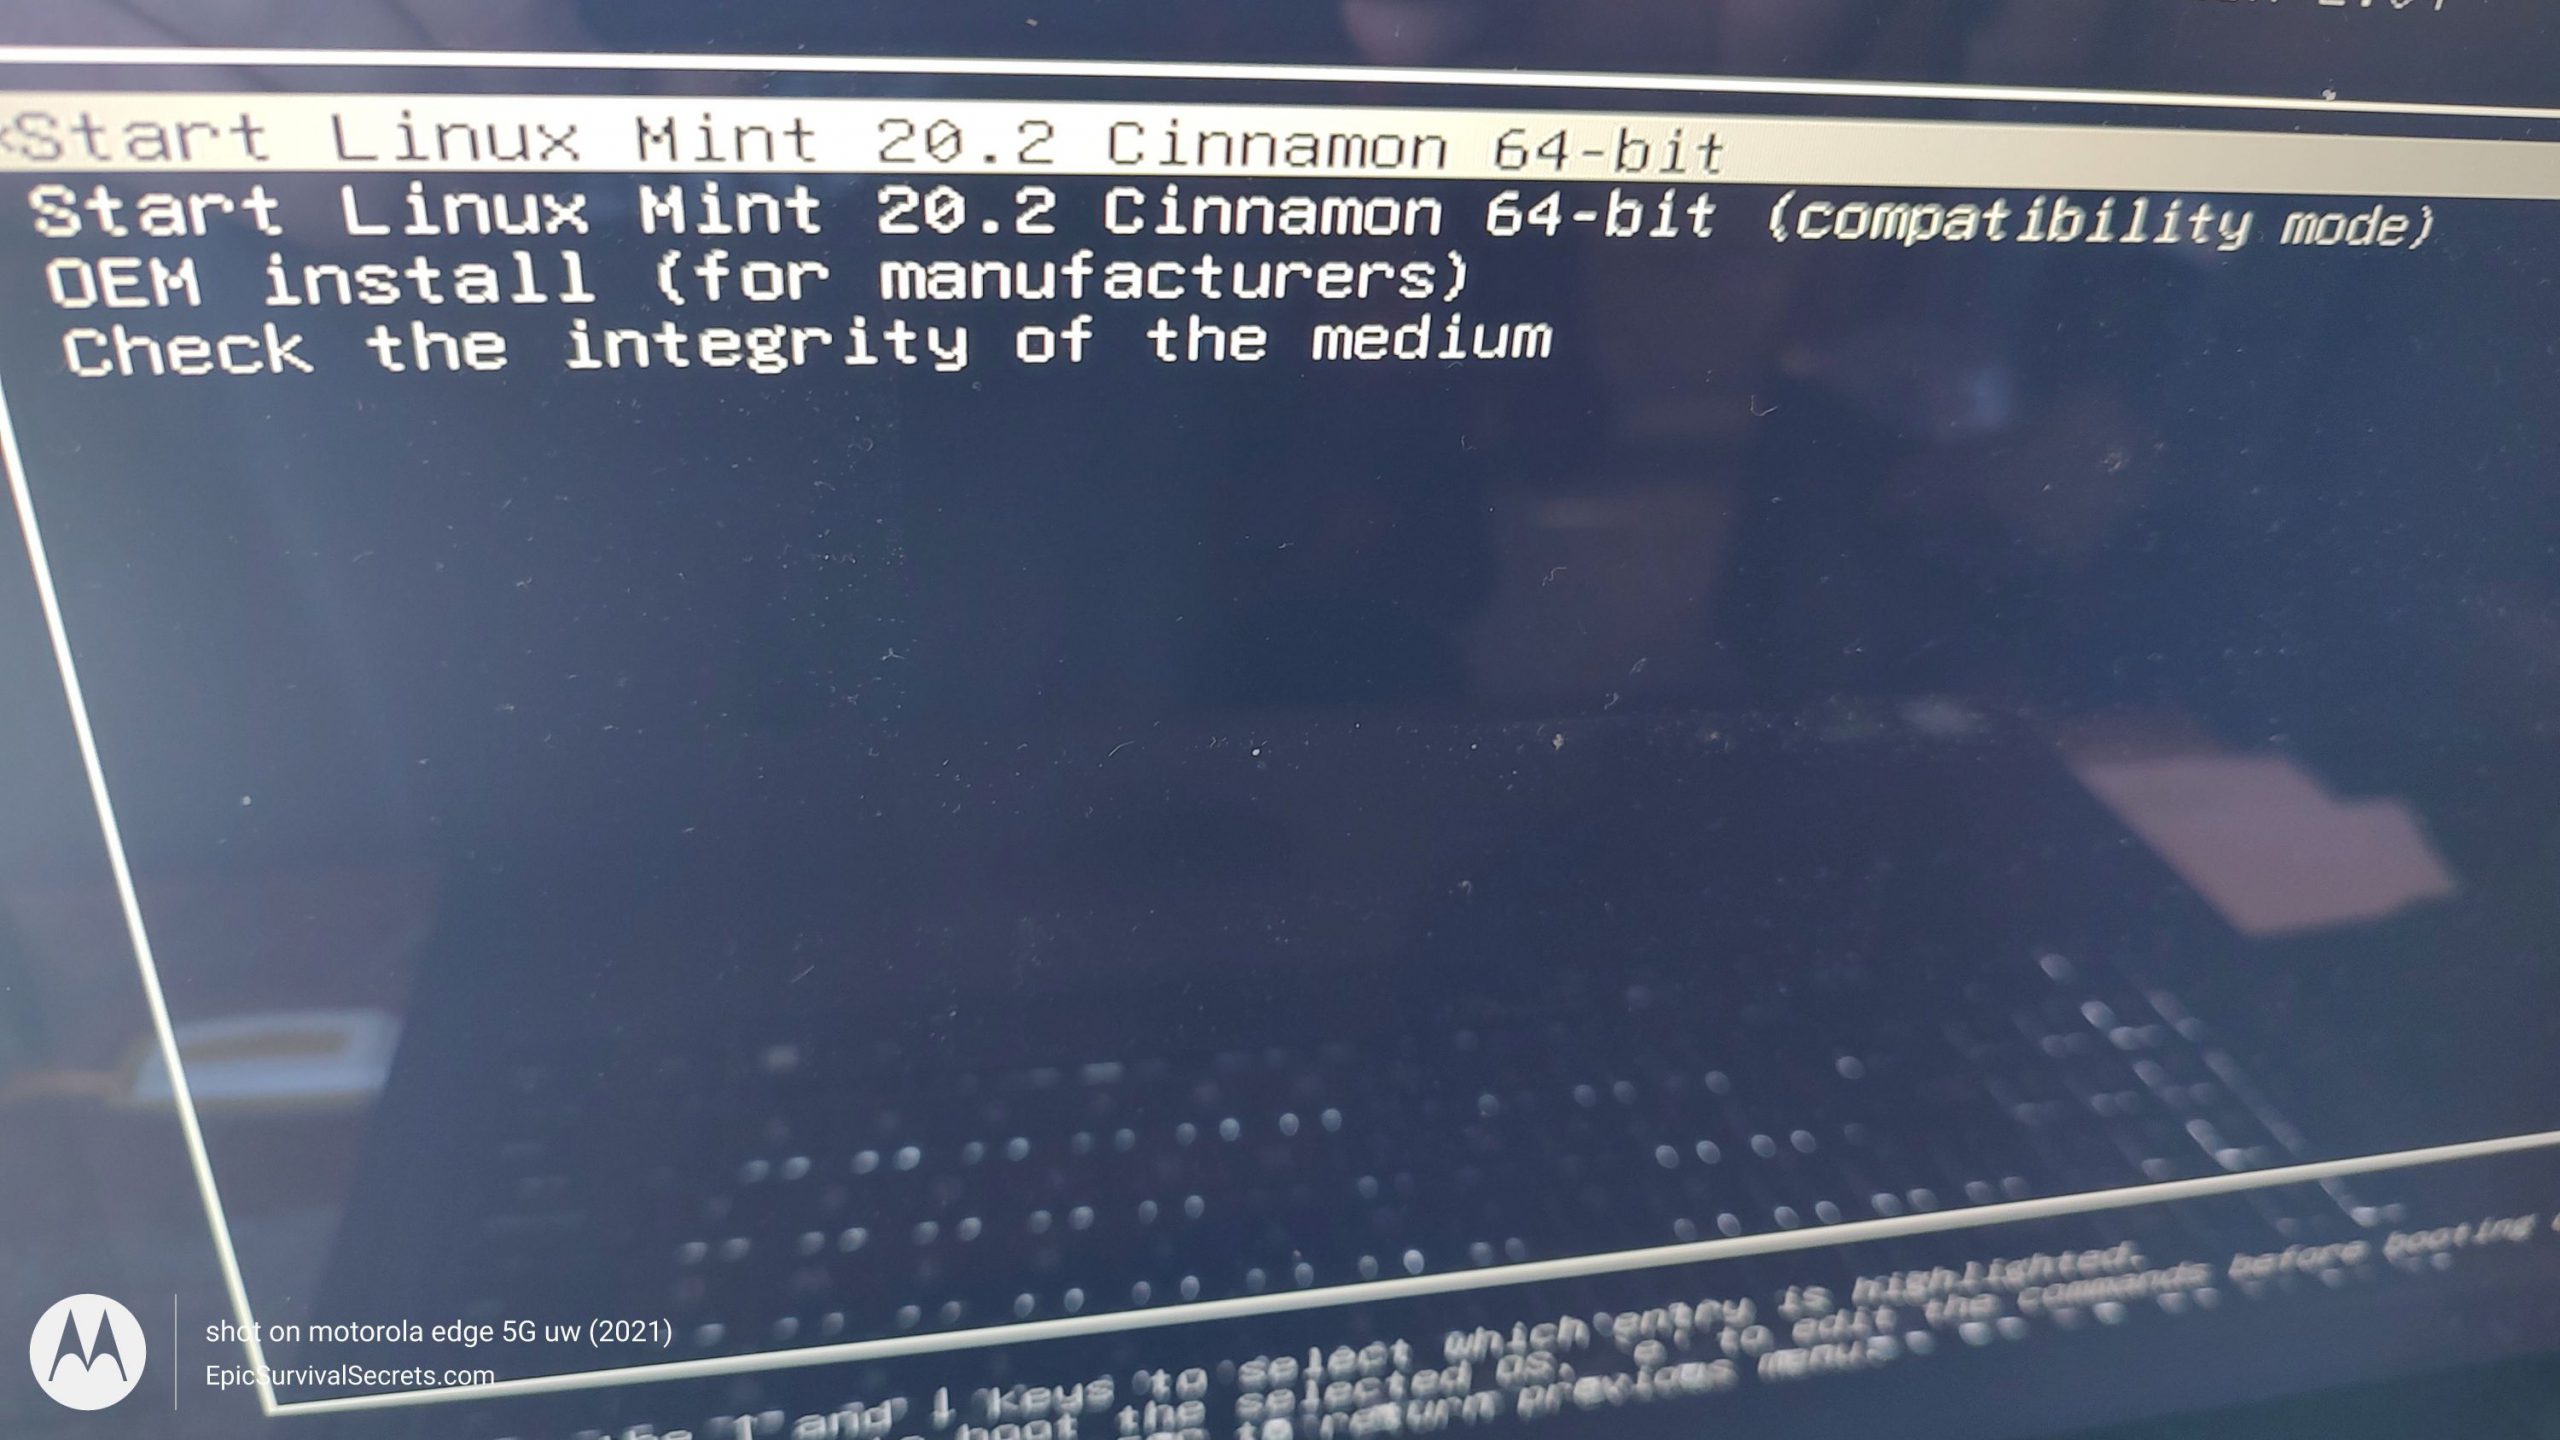
 The next thing I see is this. I am going to select the top one which states, "Start Linux Mint 20.02 Cinnamon 64-bit.
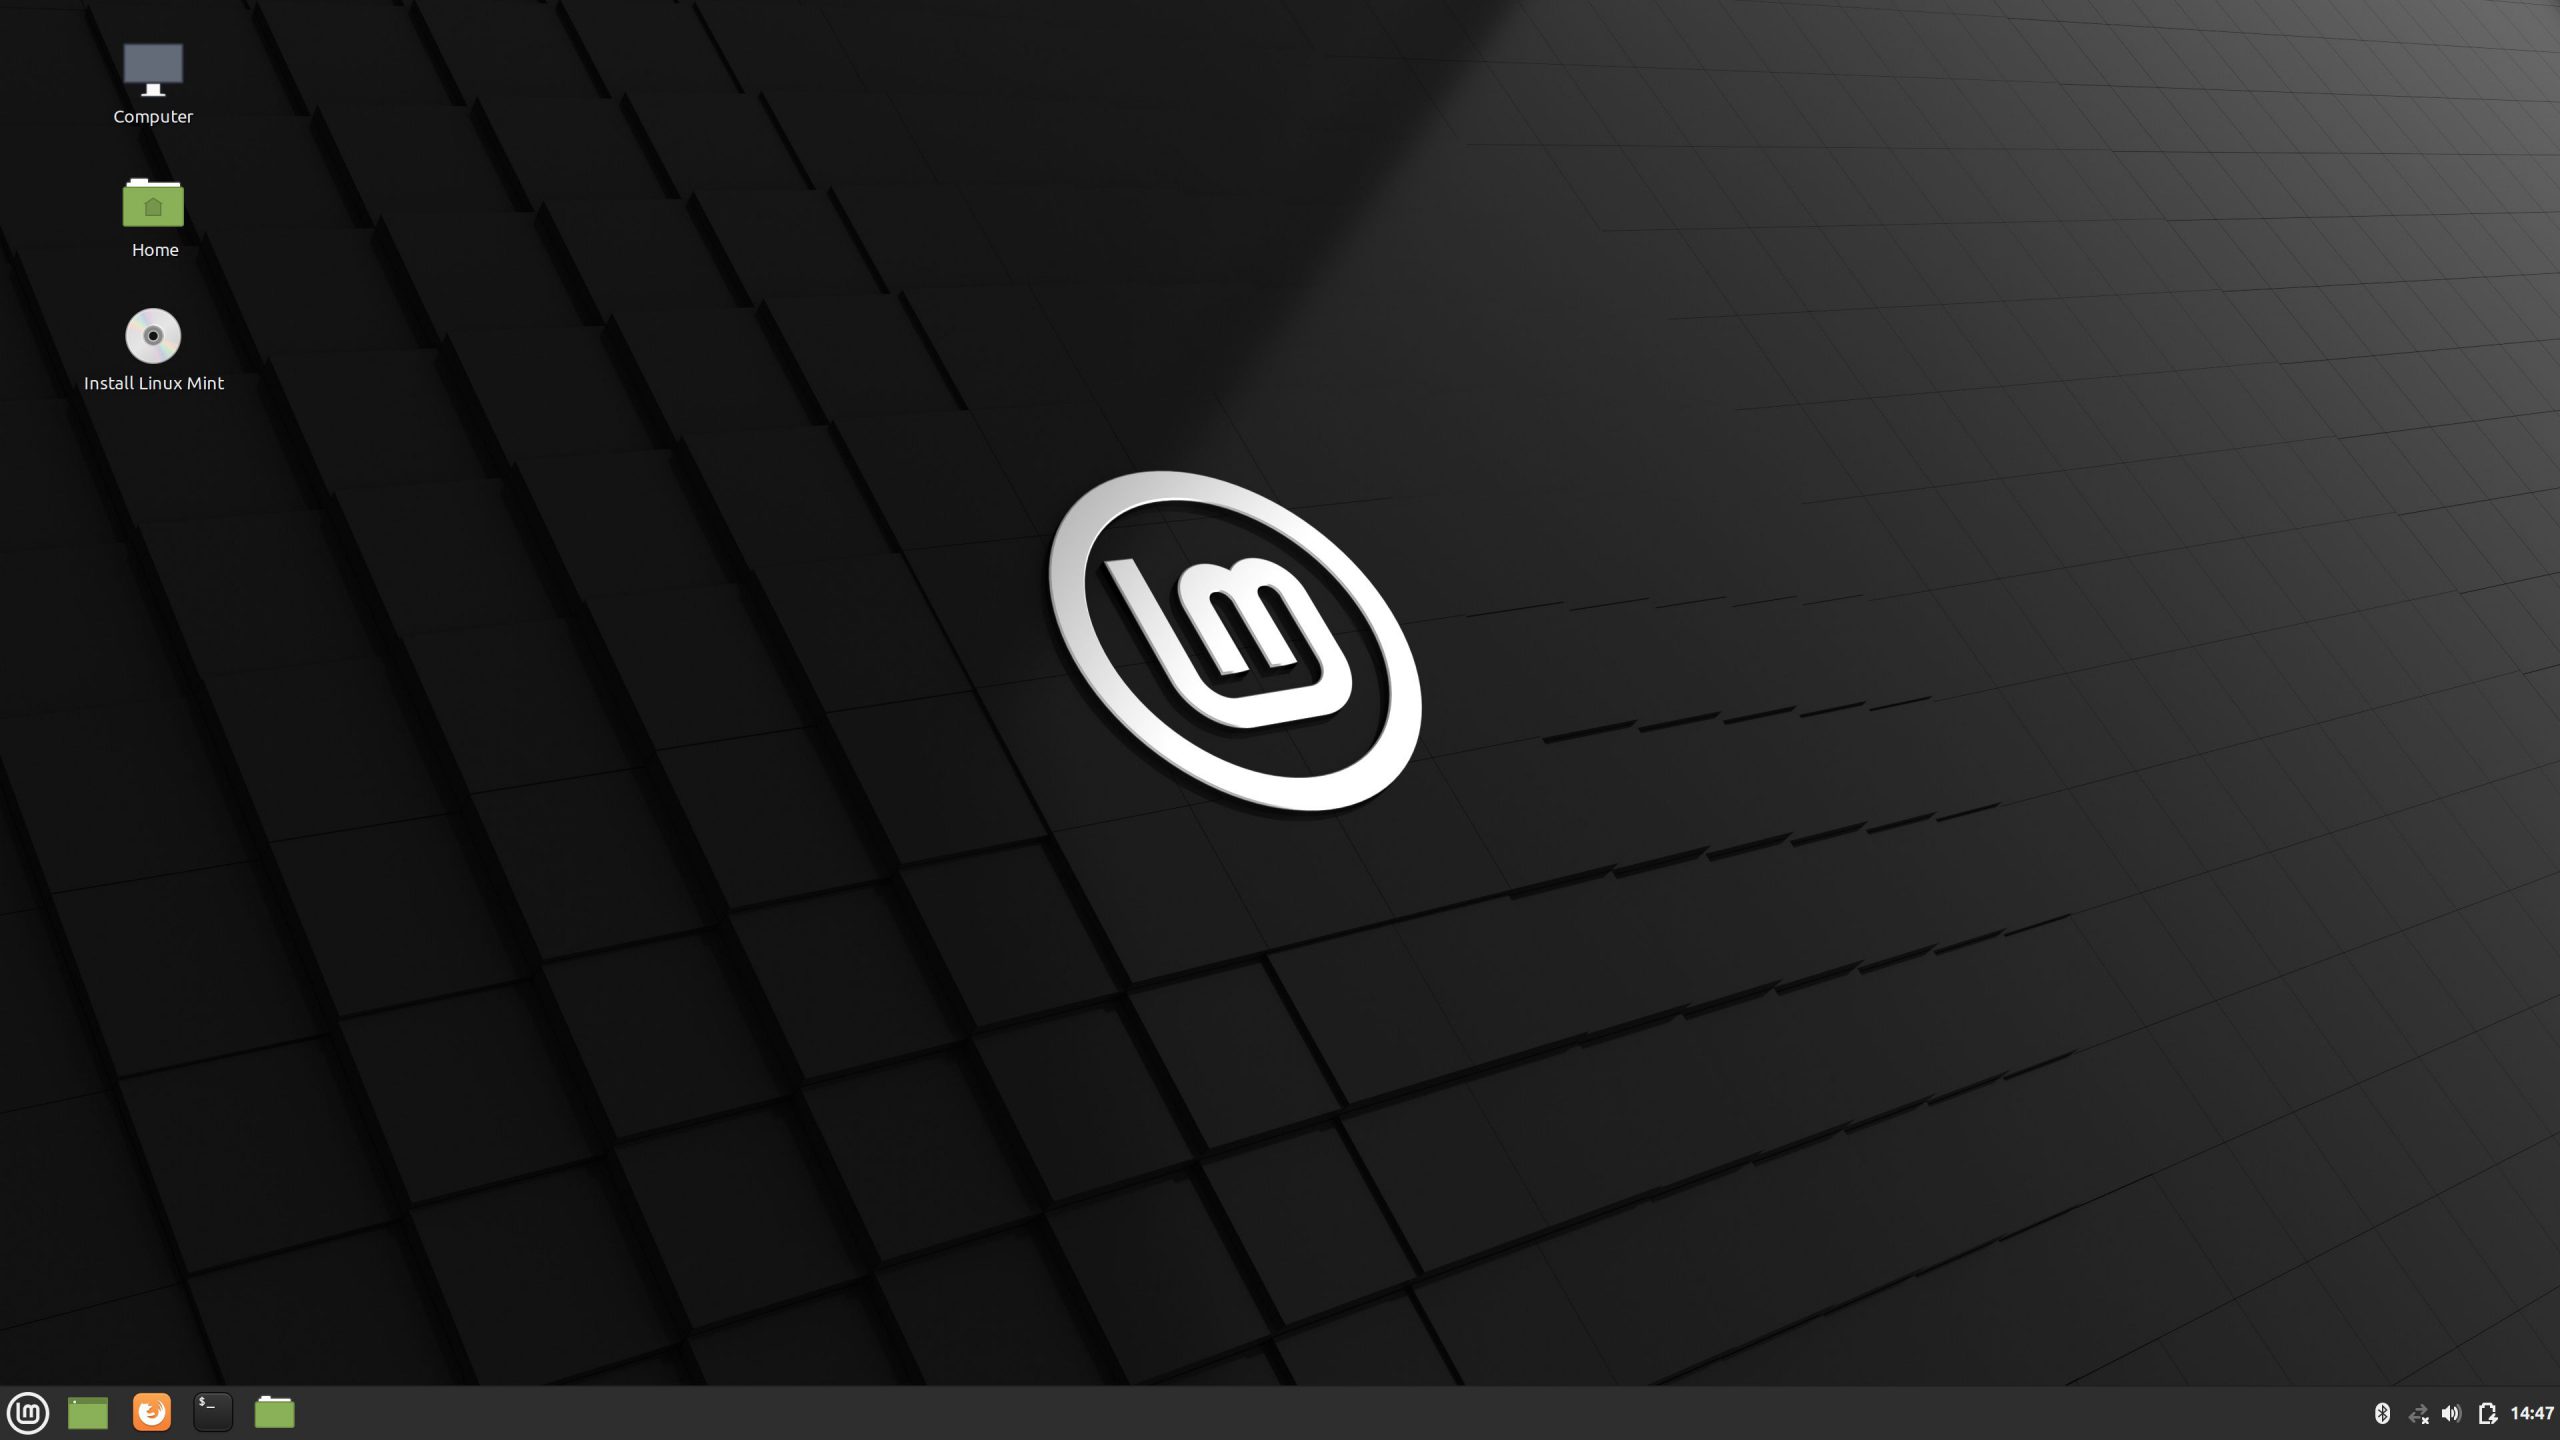
 After selecting the top I will see the Linux Mint desktop load. It looks like this. I can check the operating system out and see how it functions on my computer. The next thing I want to do is install it alongside my windows so I click the "Install Linux Mint" icon on the desktop here.
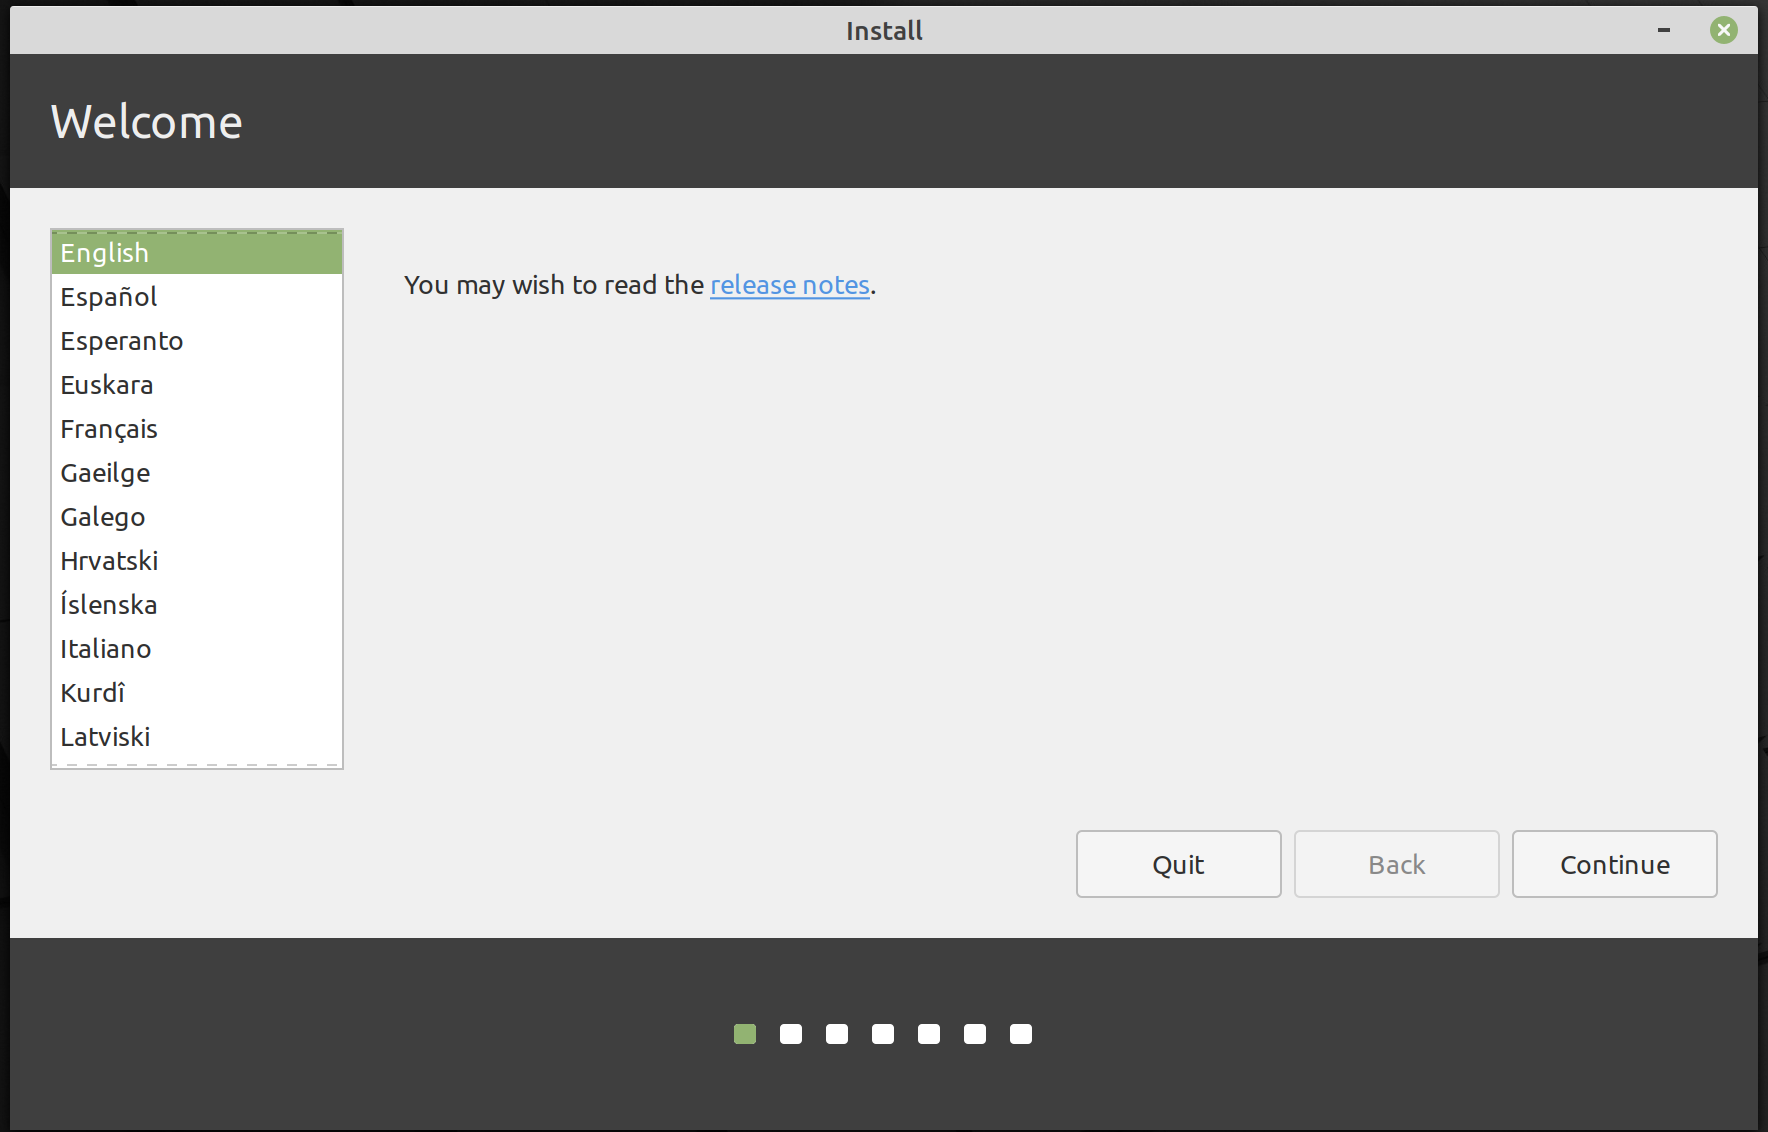
 After clicking install I will see a window appear. It says the following. I click on "English" and select the Continue button.
 Select Language
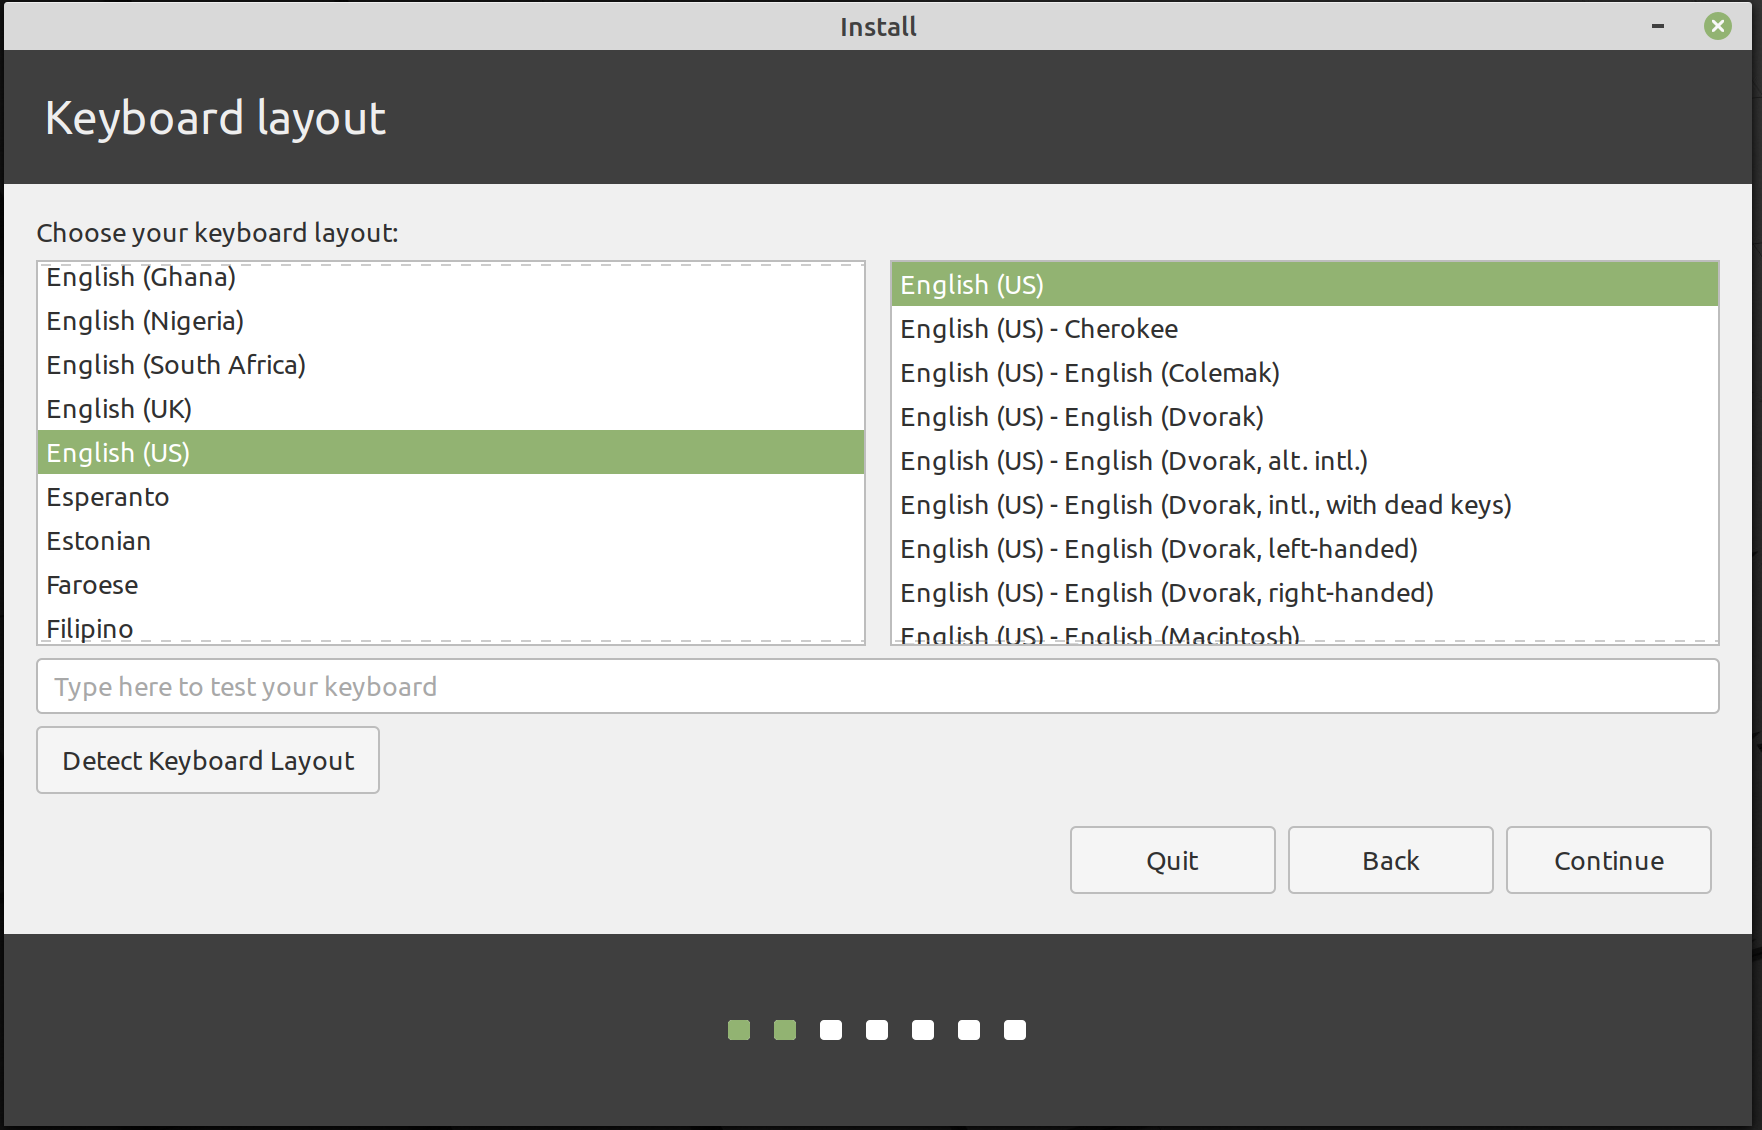
The next thing I see is a box to choose my keyboard layout. There are many but am going to choose English (US).
Select Language
The next thing I see is a box to choose my keyboard layout. There are many but am going to choose English (US).
 Type of Language
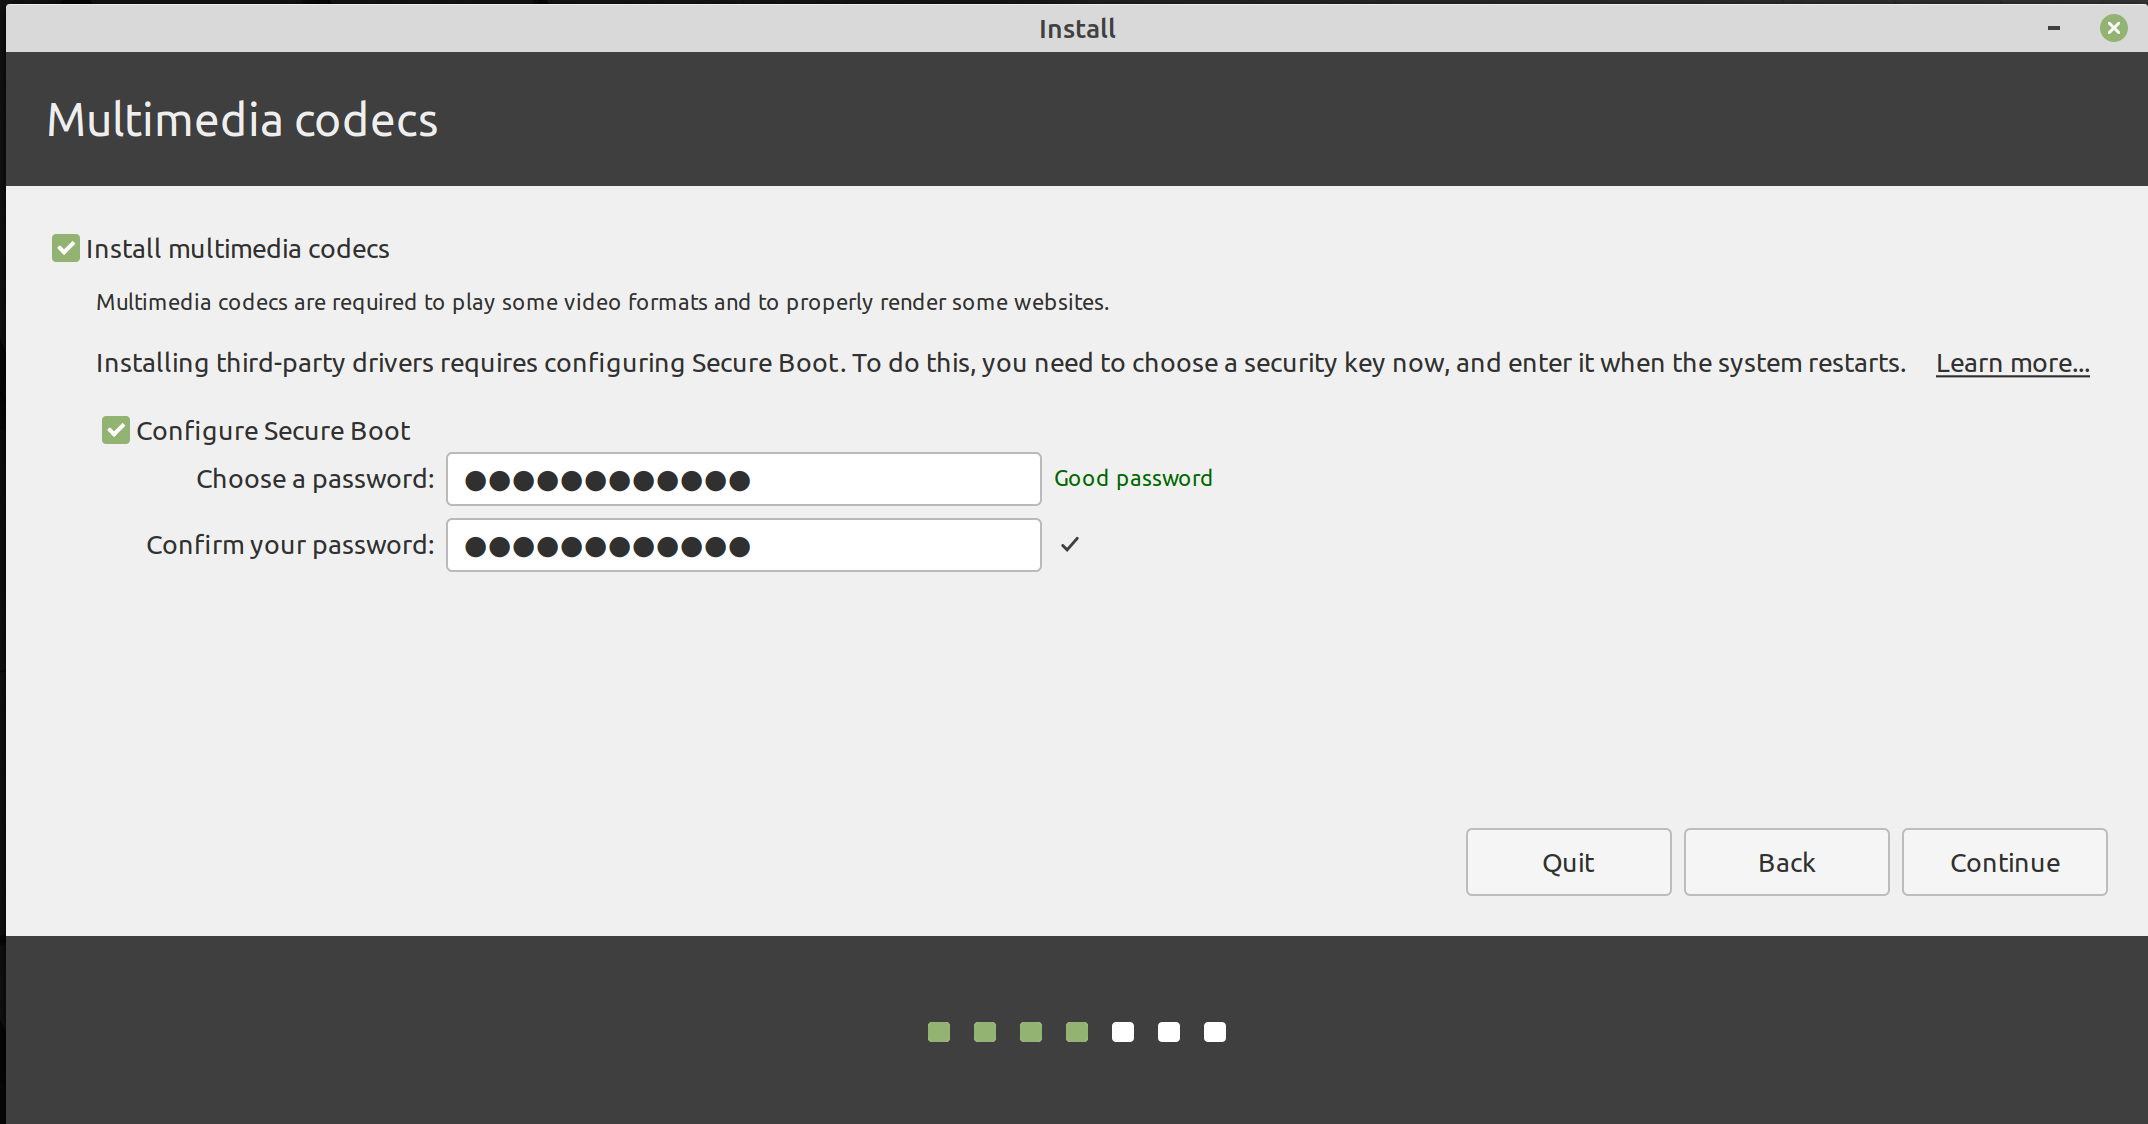
The next box I see is this. We want to install multimedia codecs because it makes our desktop more useful. We also want to be able to install 3rd party drivers. This is so if we ever want to try someone's software we can install their drivers to use their software. This could be video editing, photo editing and more. So I tick that box and also tick the box that says configure secure boot and enter a password. Then I click continue.
Type of Language
The next box I see is this. We want to install multimedia codecs because it makes our desktop more useful. We also want to be able to install 3rd party drivers. This is so if we ever want to try someone's software we can install their drivers to use their software. This could be video editing, photo editing and more. So I tick that box and also tick the box that says configure secure boot and enter a password. Then I click continue.
Installing Linux Mint to Overwrite Windows
If you only want to run Linux Mint and get rid of Windows entirely, the process is much simpler. Basically, when you get to the questions about the installation type, select Erase disk and install Linux Mint. This is the only difference from installing it alongside Windows. You do not have to allocate space if you do it this way because you are just going to delete Windows and all its files.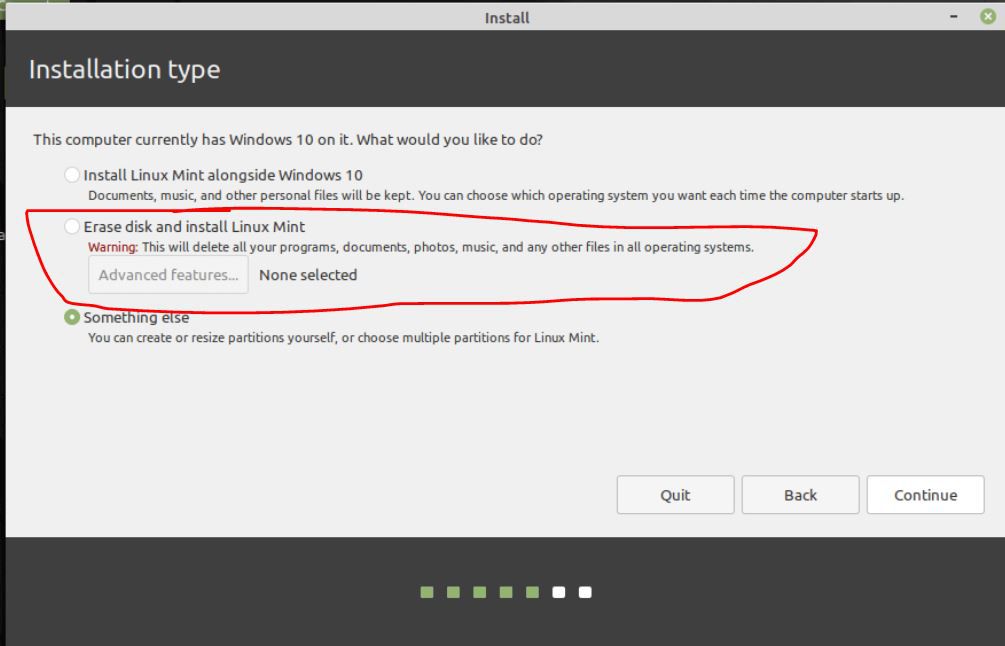 If you want to install alongside windows, please go to the next page.
Installing Linux Mint alongside Windows
There are literally hundreds of videos showing you how to do this. Here is a picture by picture instructions. You have to create 3 partition layouts in this procedure. The partitions are #ff0000;">/root, #ff0000;">/home, and #ff0000;">swap. When you get to this part, choose, "Something Else"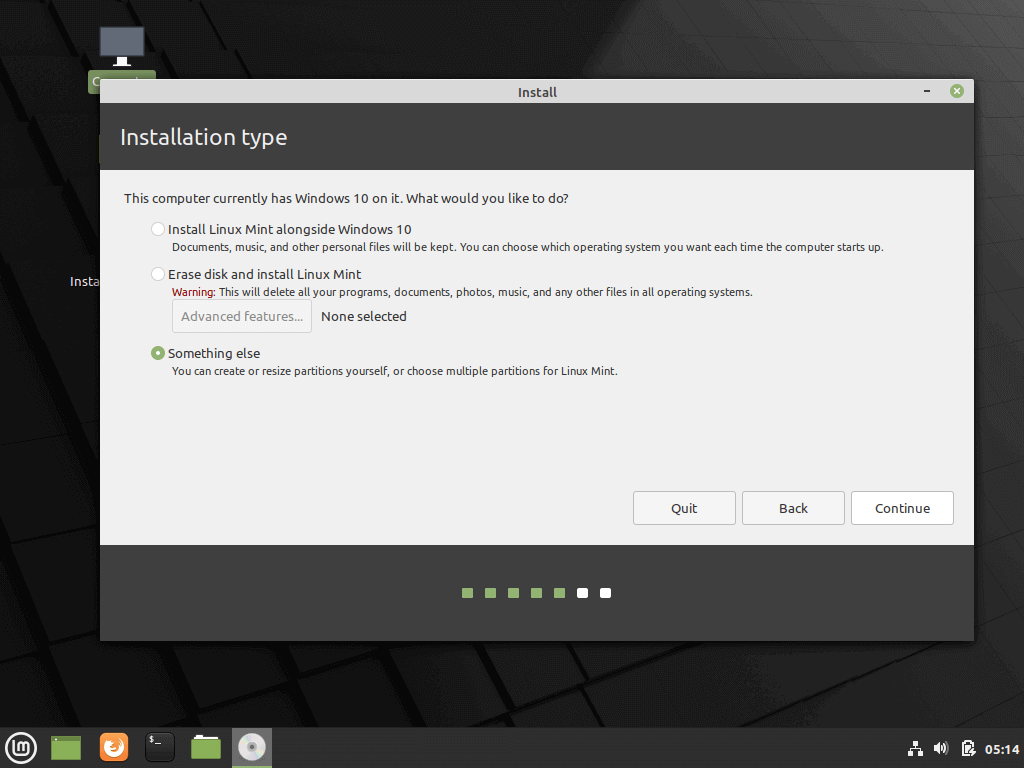 Next, find the free space you created earlier.
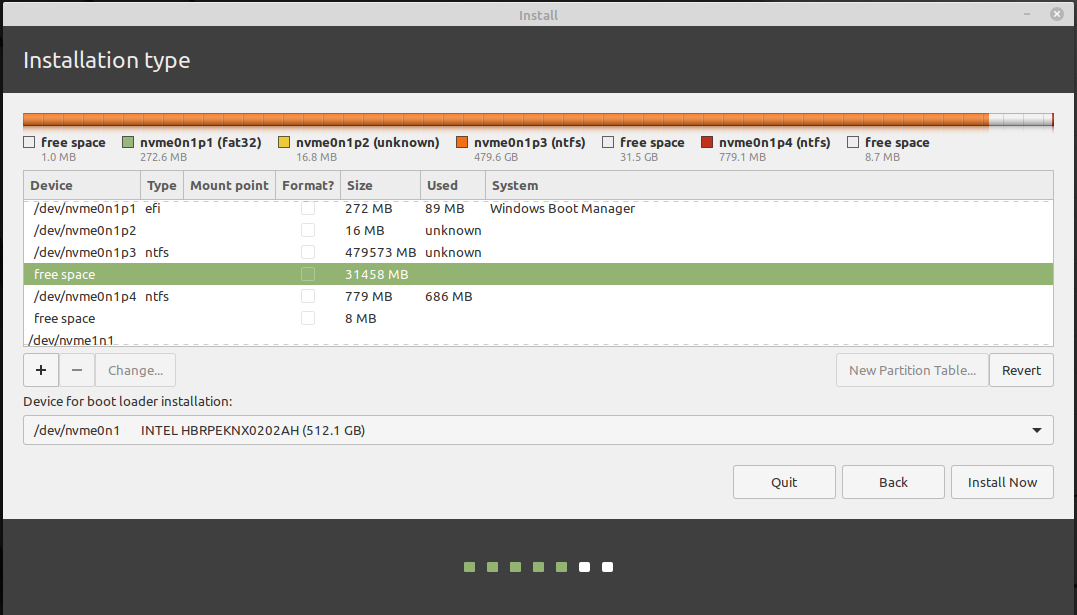 Now click the plus sign and create the settings like below.
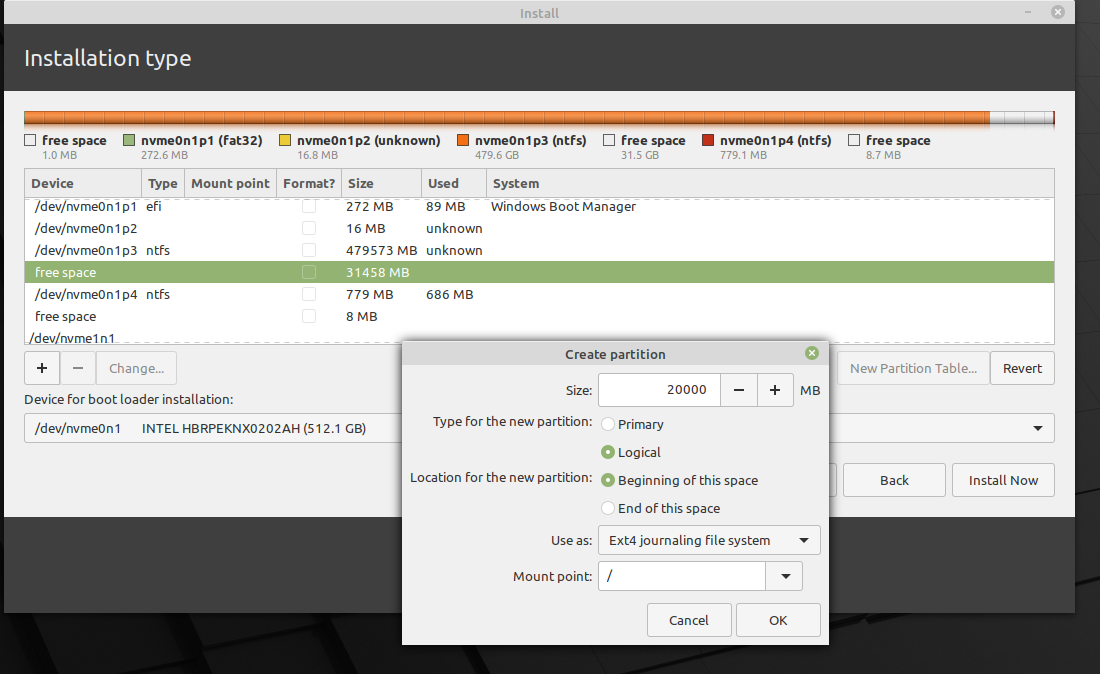 Notice that your free space went down after you created your boot.
 Now highlight the "Free Space" once again and click the plus sign and make the boot partition.
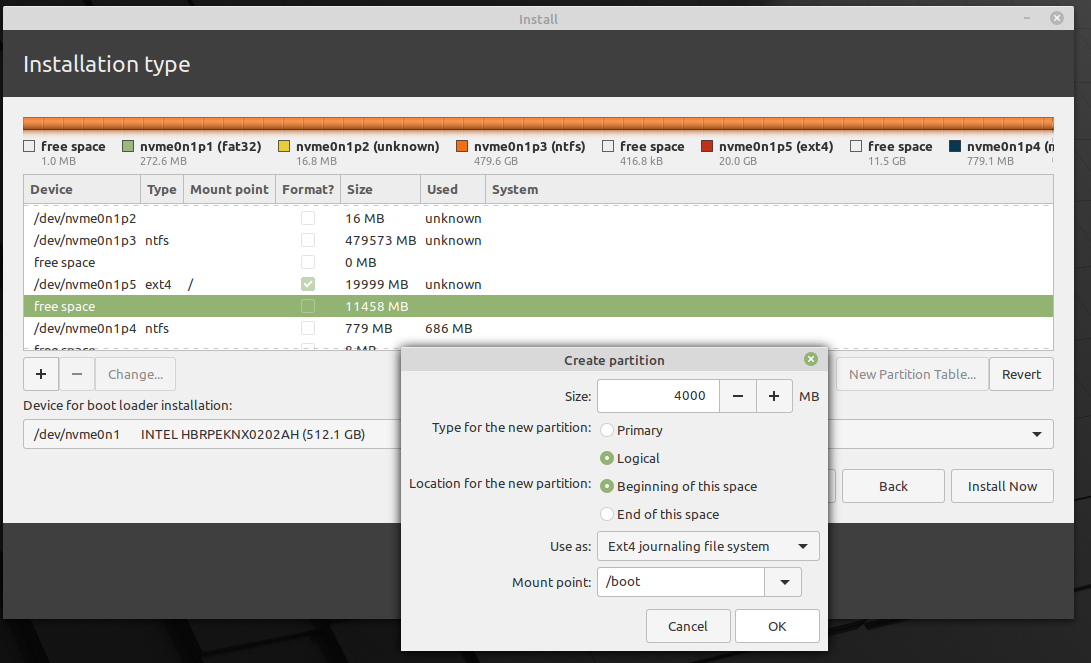 Here is what the register looks like.
 Now lets create the swap partition.
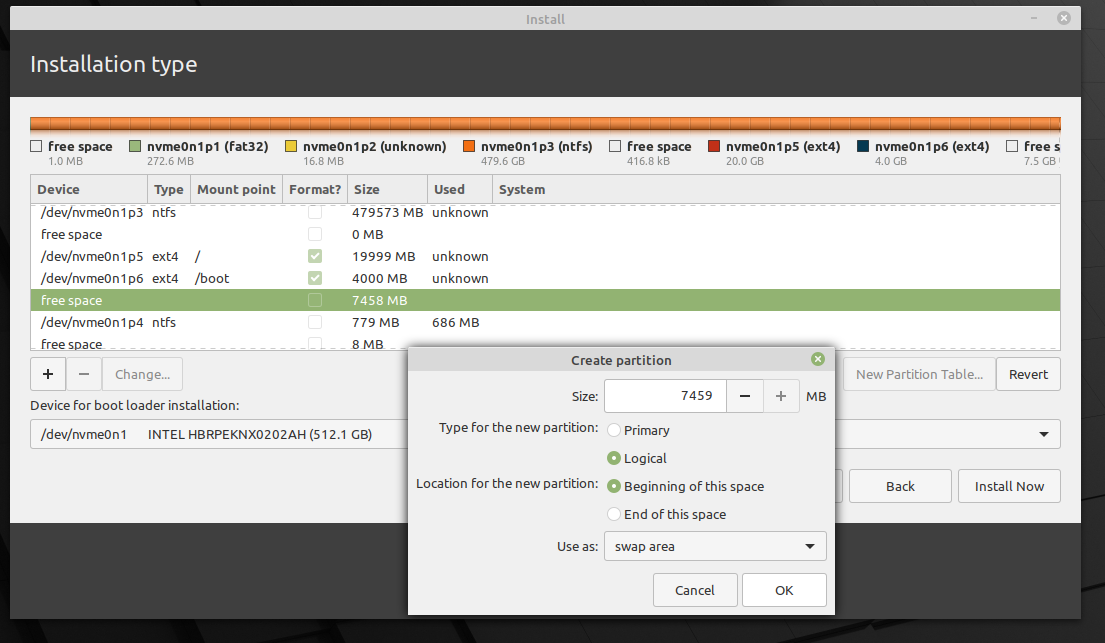 Here is what it looks like.
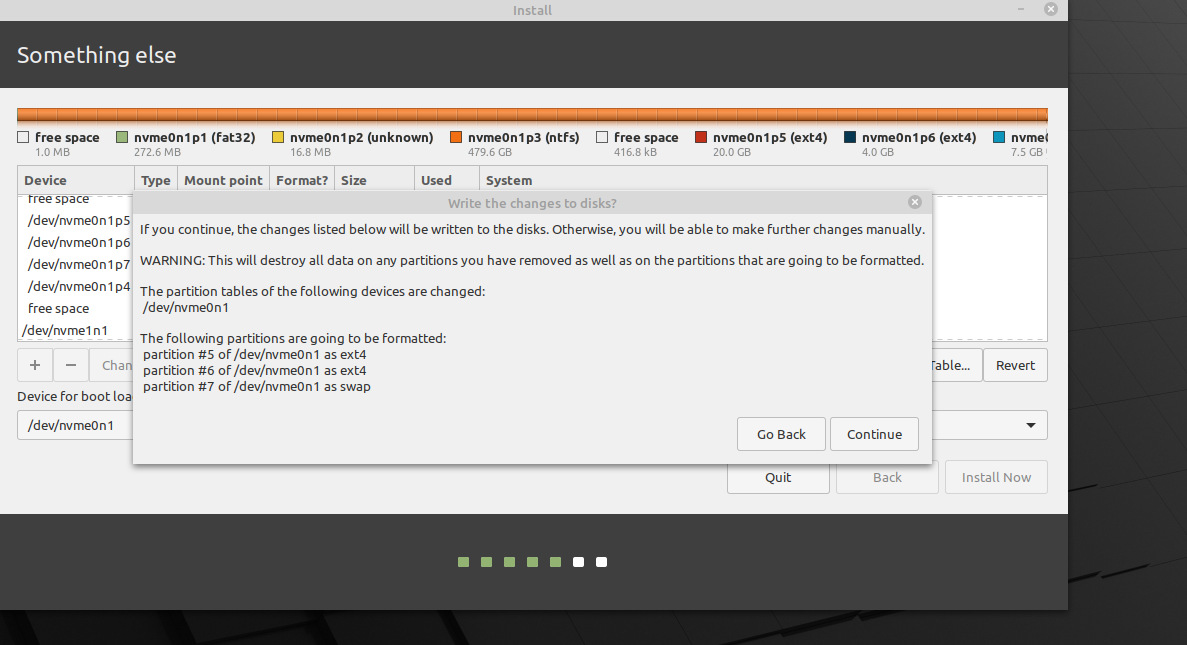
 Now click install then continue.
 You will go through the install process that looks a little like this.
 Pick a time zone
 Create a Password
 Watch The Process Happen
 All Done Now Restart Your Computer