Looking for some tips on how to sort, filter and label emails in Gmail? You're in the right place! Learn the best tips on how to sort your Gmail by date, time, sender, subject and more. Gmail default settings is what we will start with. Then we will add more sorting and filtering tips with extensions.
Gmail Basic Layout For Sorting
The basic layout of Gmail gives you some sorting options. It starts with your inbox, then stared, snoozed, important, sent, then drafts. These are actually all labels to help you sort your emails.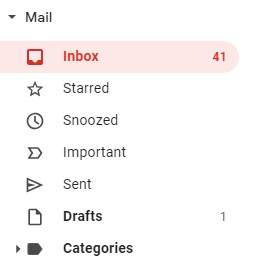
Categories in Gmail
The next thing that you will notice is that Gmail will allow you to sort by categories. If you click on "Categories" then you will see the 4 default categories included with your Gmail client. Those categories are social, updates, forums and promotions. Gmail does its best to sort these emails into these categories when they arrive at your inbox.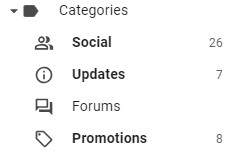
More Categories in Gmail
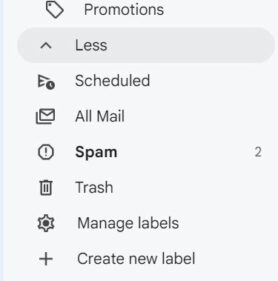
Just below "Categories" or "Promotions" you will see a "More" dropdown. Once you click on it, then it will say "Less". There you can see more labels. The default ones are Chats, Scheduled, Spam, and Trash. In the graphic below you can also see come custom labels that I added.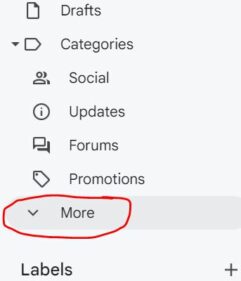 After I click "more" then I will see the other options with the "Less" arrow. This reveals what other categories that I have in my Gmail. You can see below that I have scheduled, all mail, spam, trash and then the personal things that I set up. I am also given the option to manage labels or create new labels here. Note that yours may be ordered totally different.
Organizing Main Gmail Labels
You may want to see or not see different labels in your Gmail. For example, if I rarely use the "Scheduled Gmail" label, I can hide it. This way when I open up Gmail it will not be visible. There are 2 different ways to accomplish this. Let me show you both methods.Hiding A Label Method #1
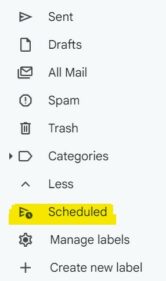
If you want to hide a label, you can simply drag it under the "more" label. Notice that when you do, the "more" label becomes the "less" label. So drag everything here that you do not want to see when you first open your Gmail client.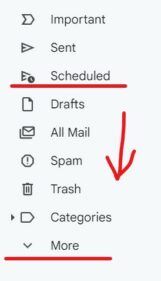
Hiding A Gmail Label Method #2
The next way of hiding labels is to click on "#settings/labels" target="_blank" rel="noopener">Manage Labels". When you do, it will open your Gmail client settings. Here you can easily see all your labels. You can choose which ones to hide and which ones to show. As you go down further on the page you can see another option which is "show if unread".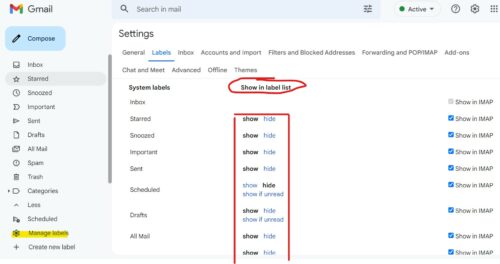 Let's talk about creating and ordering your Gmail labels on the next page.
Ordering Gmail Labels
You can order your Gmail labels just by naming them in alphabetical or numerical order. So for example, let's say that you wanted to create a "Work" label, but you wanted it on top of all the other labels that you created. You can name is 1-Work or A-work. This will put that label on top, so it is the first one you see. Here is how that is done.Create A Label
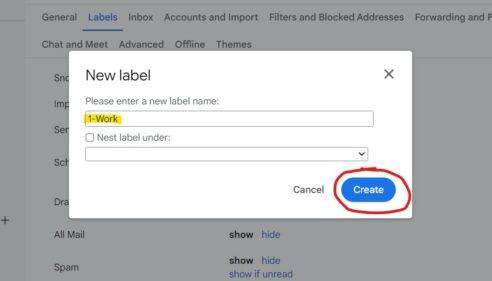
Click on "Create new label".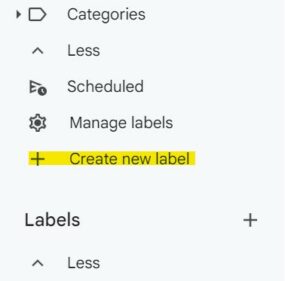 You will see a box appear, so you can name it. Give it the name of 1-Work and do not nest it under any other labels. If you nest it under another label, it will be with that label. We will discuss this next. Click the blue "Create" button.
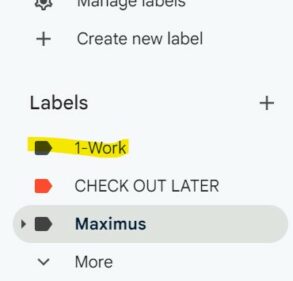
 Now you will see that it is on top of all your other created labels.
Color Coating Labels
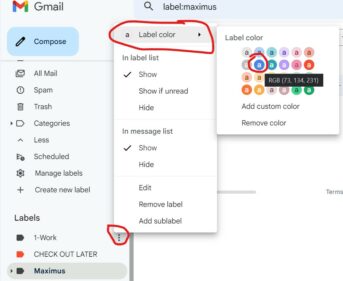
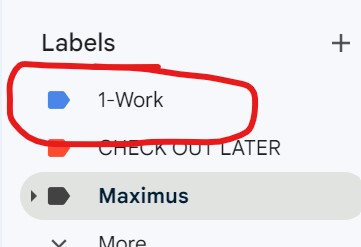
You may have notices that my label "CHECK OUT LATER" is color coated in dark orange. Here is how that is done. We will color coat that 1-Work label in blue.- Hover over the 3 verticle dots
- Click "Label color"
- Select Blue
 Here is the result.
 Now that you know how to create labels in Gmail, you want to put them to work for you so that you can stay organized. This is where "Filtering" your Gmails comes in. Lets talk about that on the next page.
Filtering Emails in Gmail
Since we already created a label called "1-Work" let's say that we want all emails that come from max@a1websitepro.com to be put into that label. There are 2 ways to do this.Filter Emails in Settings
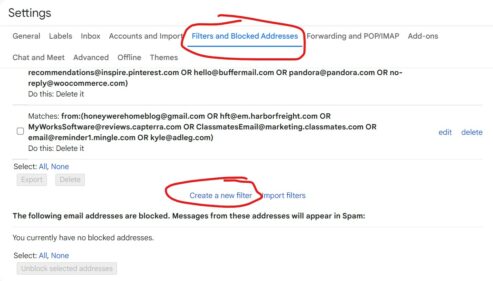
You can go to #settings/filters" target="_blank" rel="noopener">setting by clicking on the gear box at the top right of Gmail. This is also called a "cog". Then select all settings.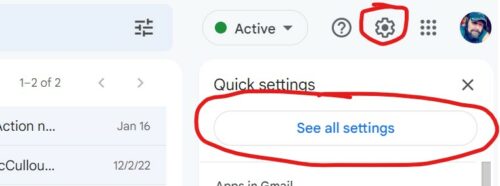 Now click on "Filters and Blocked Addresses". Scroll down the page and you will see a link called, "Create a new filter". Click on that.
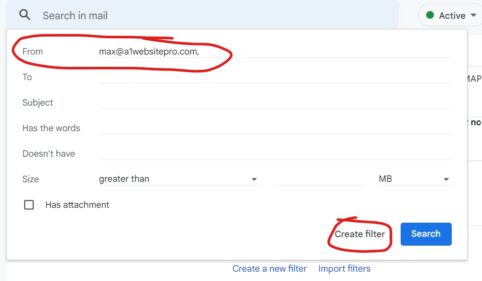
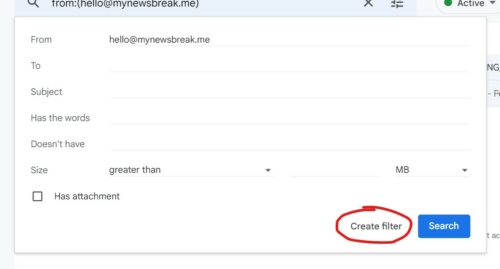
 A filter box will pop up. Here you can tell Gmail what to look for. We want everything that comes from max@a1websitepro.com to go into our "1-Work" label. So where it says "From" we are going to enter the email address max@a1websitepro.com. We do not have to worry about the rest of the settings. It should look like this. Then click on "Create Filter".
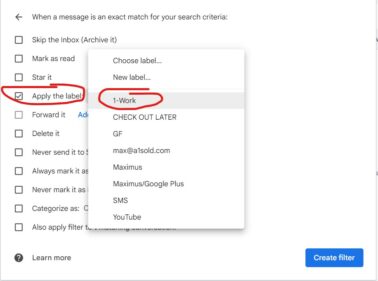
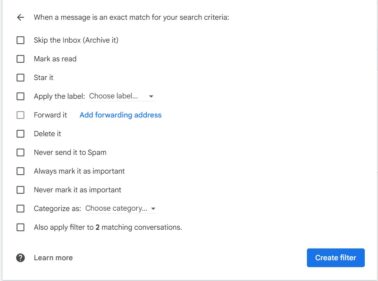
 When you click on "create filter", another box will appear. Tic the box that says "Apply the label" then select 1-Work.
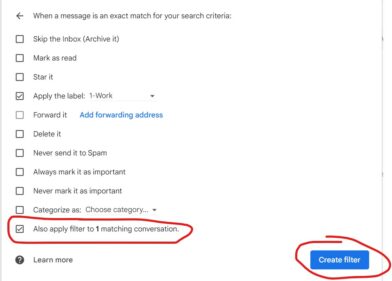
 You can also apply this filters that are already in your Gmail by selecting, "Also apply filter to 1 matching conversation". Then click on the blue button, "Create Filter".
 Now all the emails that come from max@a1websitepro.com will be applied to that label so you can easily find it.
Filter Gmails Directly In The Email
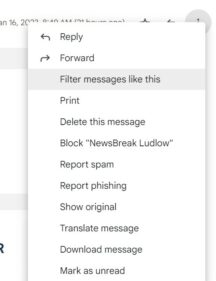
There is another way to do this when you are checking your emails in Gmail. Open up an email that you want to filter. You will see 3 vertical dots at the top right of the email. Click on those dots.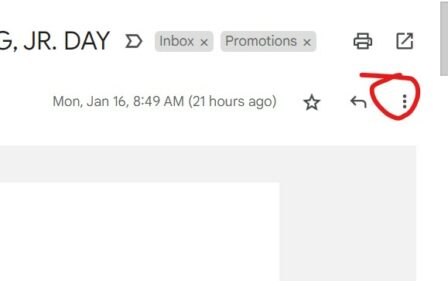 You will see an option to "Filter messages like this".
 It will put in the person's email address automatically. Click, "Create filter".
 Here you will have several options. You can see the options in the graphic below. Select your options and create the filter.
 I hope you enjoyed this tutorial on Gmail Tips and Tricks Sort, Filter, and Label Emails. If you did please share it with your friends. Please be sure to subscribe for my next tutorial. Thanks for reading.