
Create featured image with GIMP for WordPress, YouTube or any other social media platform. The process is easy you just need to know the dimensions or ratios. I am going to share those with you here. First though, I am going to show you how to create it yourself. If you are in a hurry scroll to the bottom of this post and download the GIMP template.
Create Featured Image With GIMP Dimensions
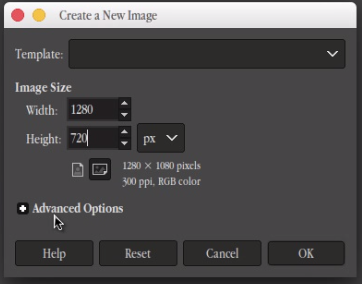
First to create a featured image with GIMP you need to get the dimensions correct. With your GIMP 2.10 program open go up to "file" and then "create new".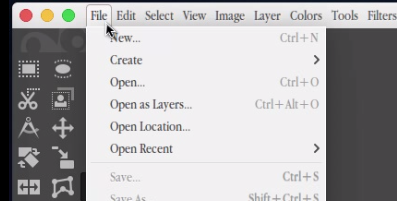 You will then get a dialog box prompting you to put in the dimensions for your graphic. Make sure you enter in 1280 for the width then 720 for the height. The measurement is in pixels "px".
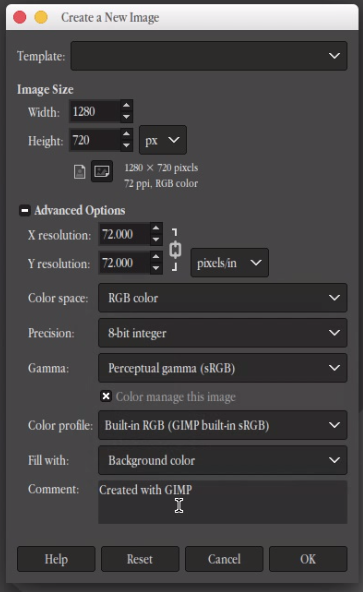
 Click on the "Advanced Options" because 300 DPI is too much. When you click on the advanced options then you will see where you can change the resolution. Change the resolution to 72DPI for both the X and the Y positions, {vertical and horizontal}. After that click the OK button.
Editing The Image
Now you are ready to do some editing to the image. To see how we created the featured images for this website with GIMP please watch the video tutorial.WordPress Featured Image
For WordPress featured image we all may have a different size. I change my dimensions for my website to match YouTube because with every post that I make I try to create a YouTube video for it. So as far as the images on my website here I try to make them all a 16:9 ratio. Here is a peek at what my image sizes look like at a 16:9 ration in my settings > media.