Have you looked at your old posts lately? Some of them may be outdated and some of them you read them and think to yourself, "I could do better!". One thing that you do NOT want to do is delete them! In the last post we learned how to properly change our
permalink structure and 301 redirect people to the new URL. In this lesson we are going to learn how to go back and give new life to our old posts. Ready, set here we go!
Begin the process of replacing the old post
Read over your old post and decide what you want to keep and what you want to improve upon. Whatever you do, DO NOT delete it! Go up and add a new post on your blog. Copy all the information that you have in your old post to your new post.
Write your new post
Now write your new post. Make sure that you
optimise it for SEO purposes to give it new life if you want. Its not necessary but if you're like me you can't help yourself, lol. When you are done and satisfied with it then publish it like you do every other blog post.
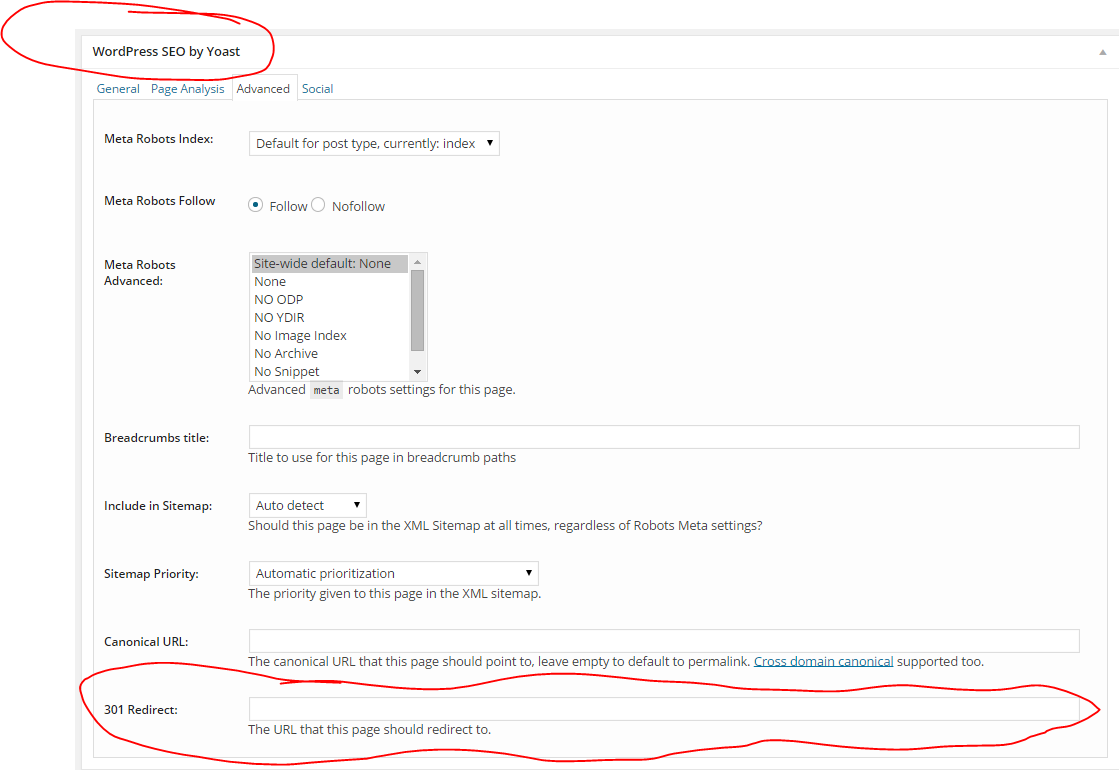
301 Redirect the old post
Now go back and 301 redirect the old post by using the
Yoast Plugin. If you don't have it don't worry its a 2 minute plugin install. You should see a Yoast edit box below where your editing your old post. Click on the "Advanced" tab and scroll to the bottom. Paste in the "NEW" url for the new post that you just published.

Congratulations, you are done! :-)
Here is a video to help!
301 Redirect Old Posts
https://youtu.be/3aXX-Ytr-n0

 Congratulations, you are done! :-)
Here is a video to help!
Congratulations, you are done! :-)
Here is a video to help!