Welcome to WordPress Child Theme Tutorial Creation. Here are some of the benefits to creating a child theme in WordPress.
#childtheme #php #php-lessons
Why Create A WordPress Child Theme?
- It takes less time to create.
- You can take advantage of parent theme functions.
- You can take advantage of parent theme CSS styles.
- You can also use the parent theme JavaScript.
- You can use the already made pages from the parent theme like:
- category.php page
- tag.php page
- single.php page
- page.php page
- and more! :-)
Preliminary Steps to Creating a WordPress Child Theme
This tutorial will be easier to follow if you install WAMP if you are on a PC. If you are on a MAC then you want to #xamp-for-macintosh" target="_blank" rel="noopener noreferrer" contenteditable="false" style="cursor: pointer;">install XAMP.A Good HTML Editor
We will be using #notepad-plus-plus-or-notepad-" target="_blank" rel="noopener noreferrer" contenteditable="false" style="cursor: pointer;">notepad plus plus for this tutorial. It is free and can be used on PC's. However if you are using MAC then I suggest that you download Textmate.Step #1 WordPress Child Theme Creation Tutorial
The first thing that you want to do is go to WordPress.org and download the latest version of WordPress.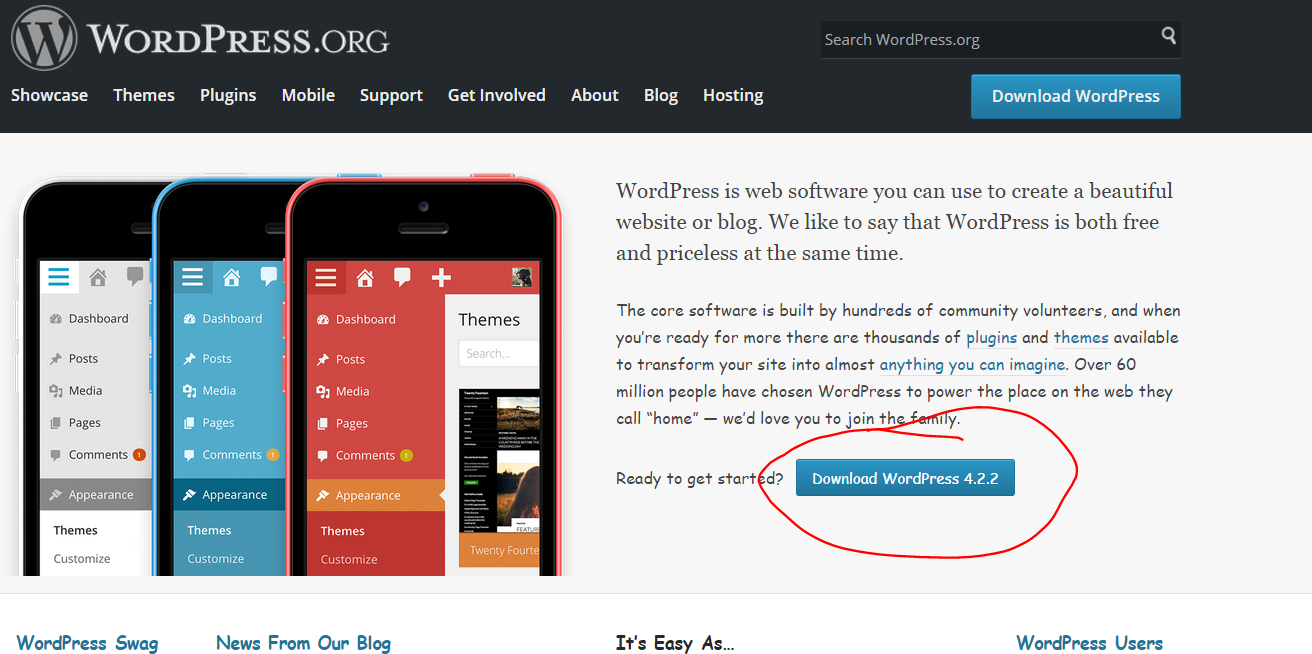 download latest version of WordPress
This WordPress download will include all the files that you need to install WordPress into your WAMP or XAMP server.
Extract all the WordPress files into a folder.
download latest version of WordPress
This WordPress download will include all the files that you need to install WordPress into your WAMP or XAMP server.
Extract all the WordPress files into a folder.
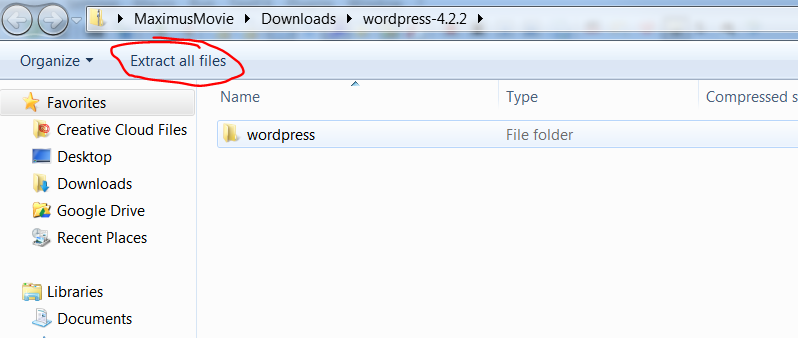 extract wordpress files
Now double-click the folder where you extracted the latest version of WordPress too. It will open up several files and folders. It will look like this.
extract wordpress files
Now double-click the folder where you extracted the latest version of WordPress too. It will open up several files and folders. It will look like this.
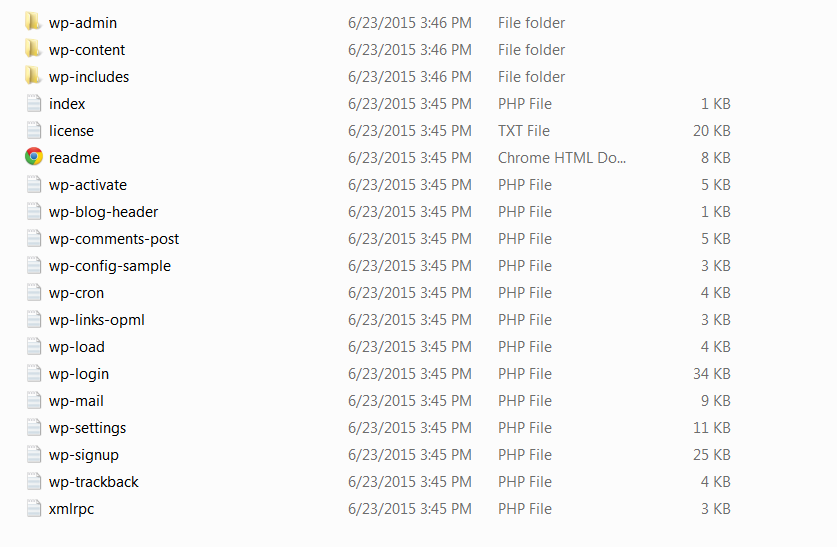 What WordPress Files Look Like After Extraction
Step #2 WordPress Child Theme Creation Tutorial Folder Arrangement
Navigate to your www folder in your WAMP. Make sure that you leave that folder open that has all the files. Create a new folder in your www folder. We will call this folder "child" to keep it simple. Then drag and drop all the WordPress files into the "child" folder.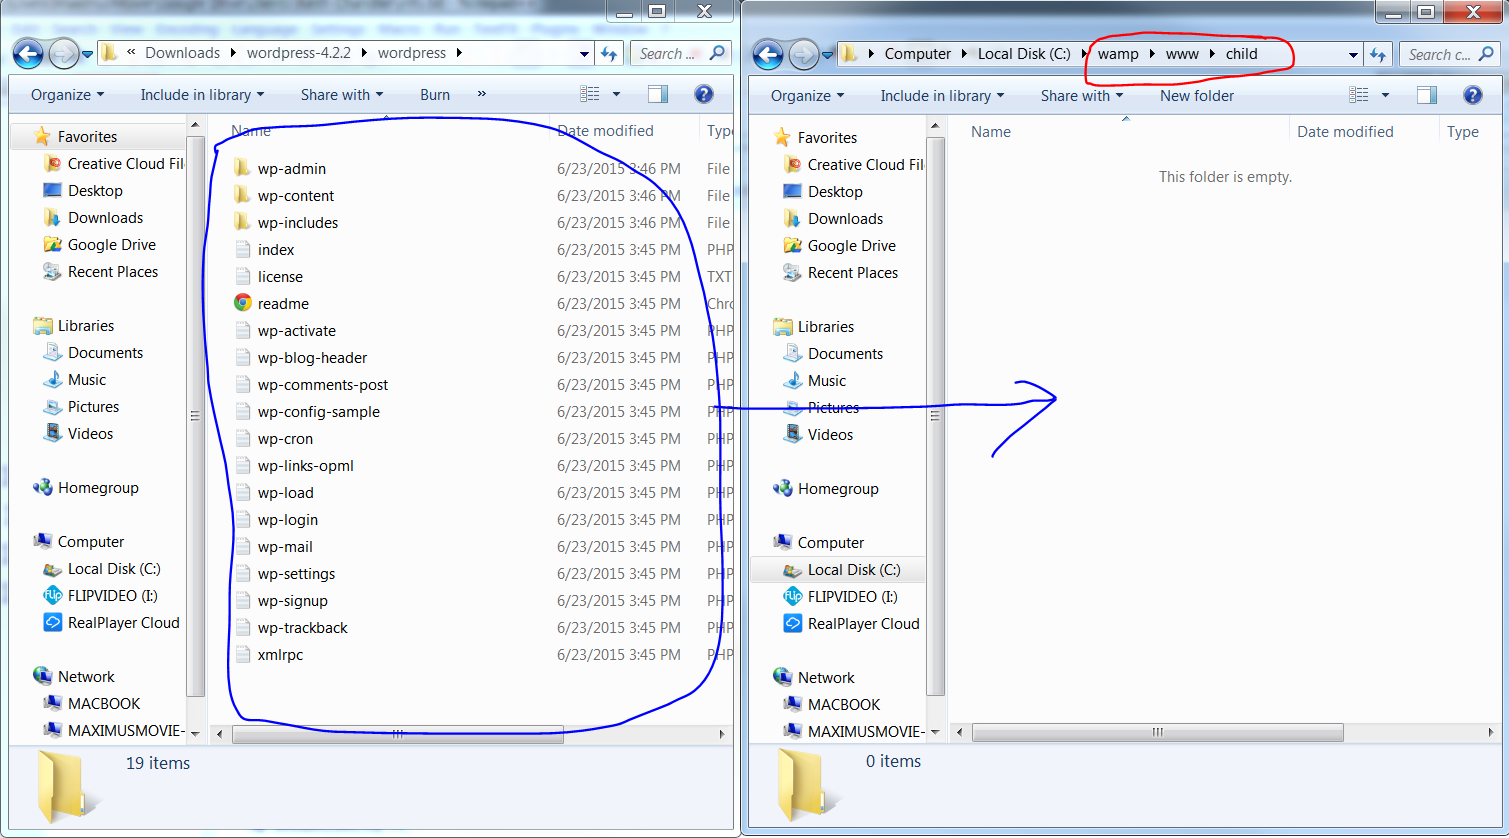 drag and drop all the WordPress files into the child folder
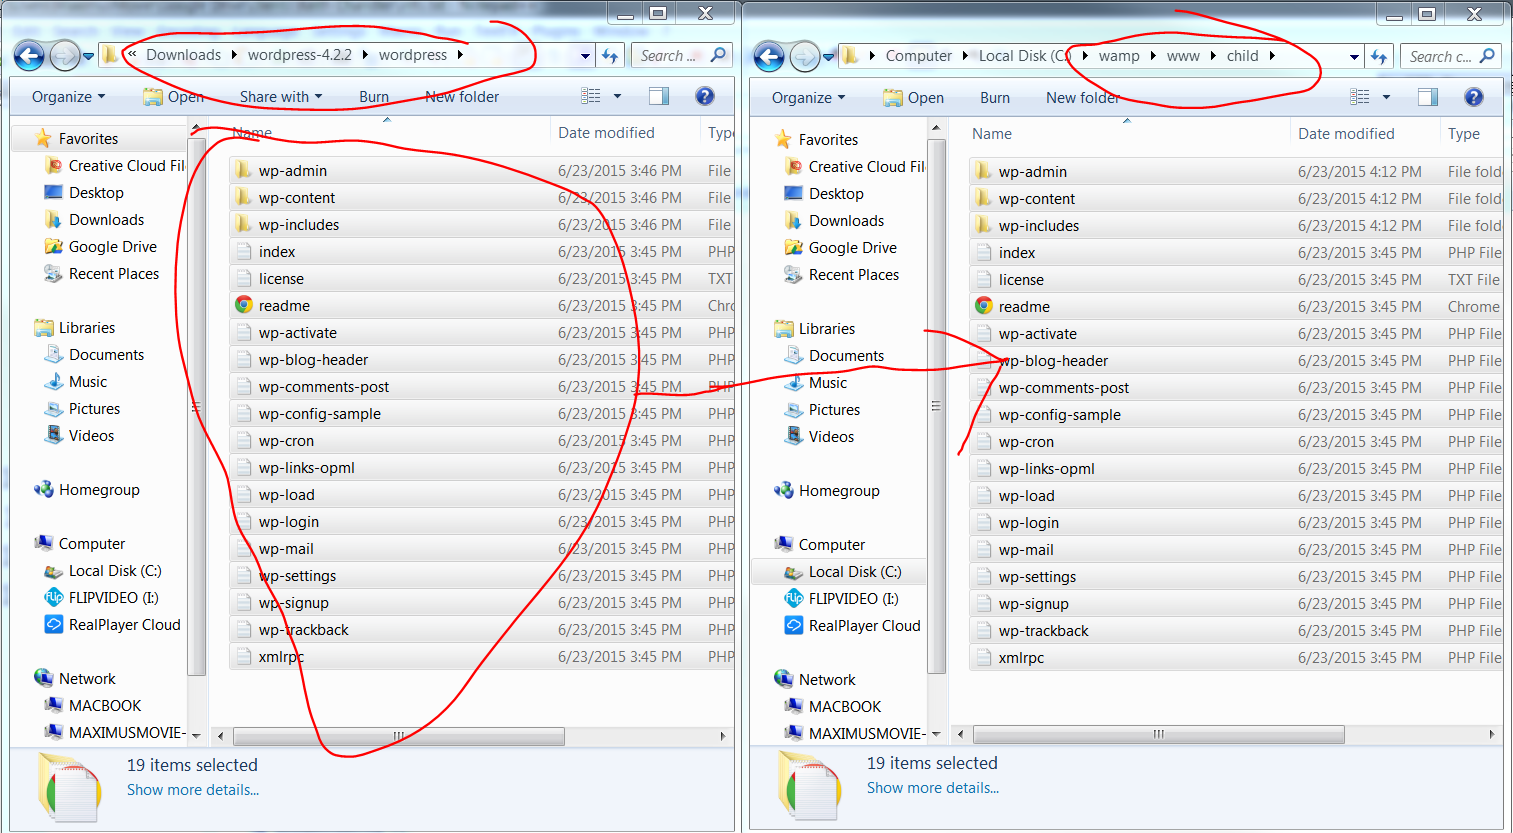 Drag and Drop WordPress Files
Step #3 WordPress Child Theme Creation Tutorial Make Database
Now we need to create a database for WordPress to use. Make sure that your WAMP or XAMP server is running on your computer. Go to http://localhost/ in your favorite browser. {you should go right there if you click on the link ;-)}You will come to a page that looks like this.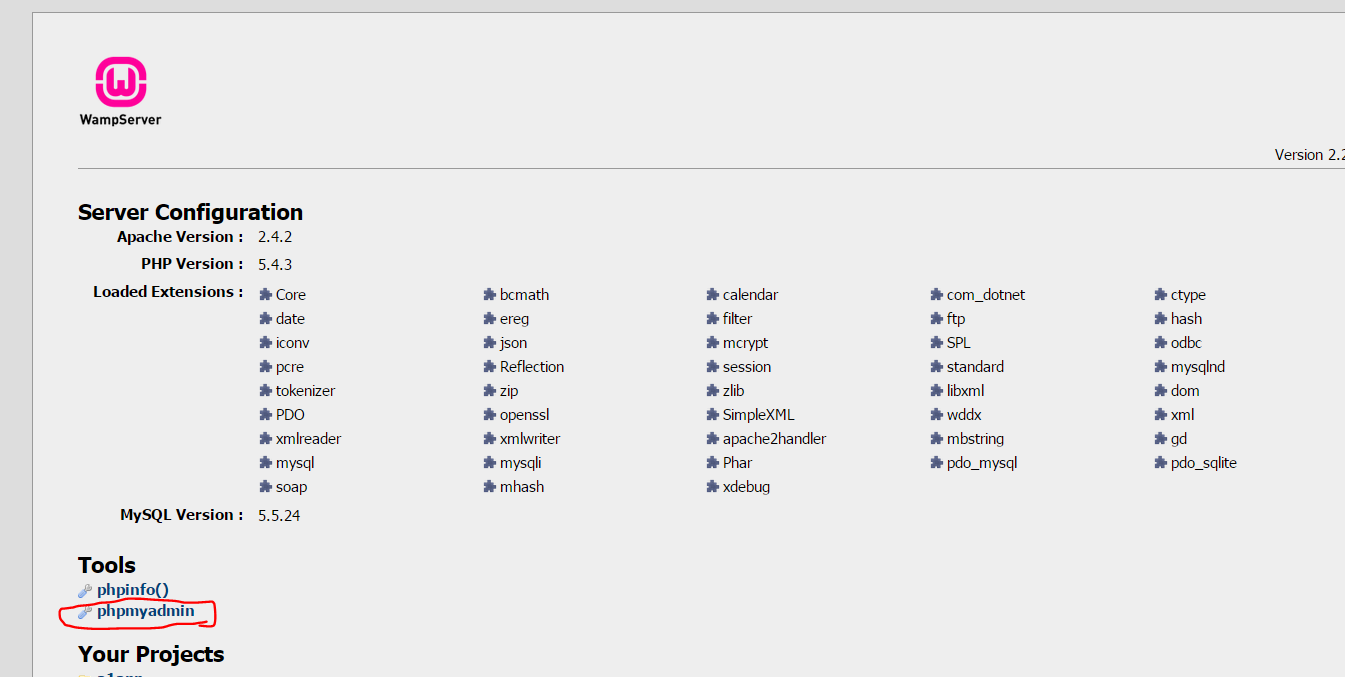 phpmyadmin
You want to click on phpmyadmin or click this link if you are on a PC. http://localhost/phpmyadmin/. This will bring up phpmyadmin so that we can create a database for WordPress to use. Under "create a database" enter in the word "child" Then click the create button. Now you are done creating the database that WordPress will use! :-)
phpmyadmin
You want to click on phpmyadmin or click this link if you are on a PC. http://localhost/phpmyadmin/. This will bring up phpmyadmin so that we can create a database for WordPress to use. Under "create a database" enter in the word "child" Then click the create button. Now you are done creating the database that WordPress will use! :-)
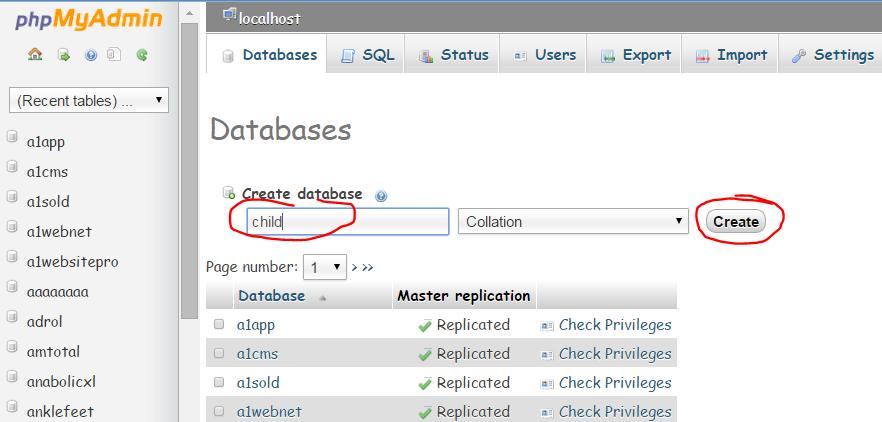 Create A Database in phpMyAdmin
Step #4 WordPress Child Theme Creation Tutorial Installation Process
Now go back to your localhost and look for "child". Click on it when you see it. child
Now you will go through the regular WordPress installation. I will walk you through it. Here are the steps.
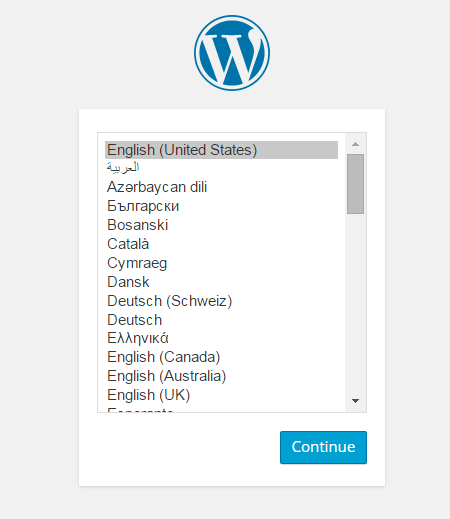
Pick a Language. We will choose english.
child
Now you will go through the regular WordPress installation. I will walk you through it. Here are the steps.
Pick a Language. We will choose english.
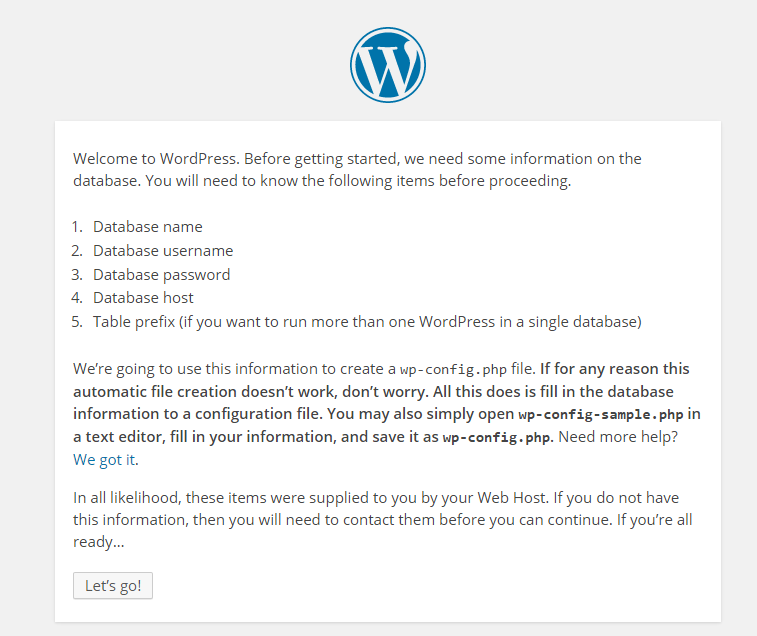
 WordPress will ask you for the database information. Dont worry I will walk you through it. :-)
 Get Database Info ready
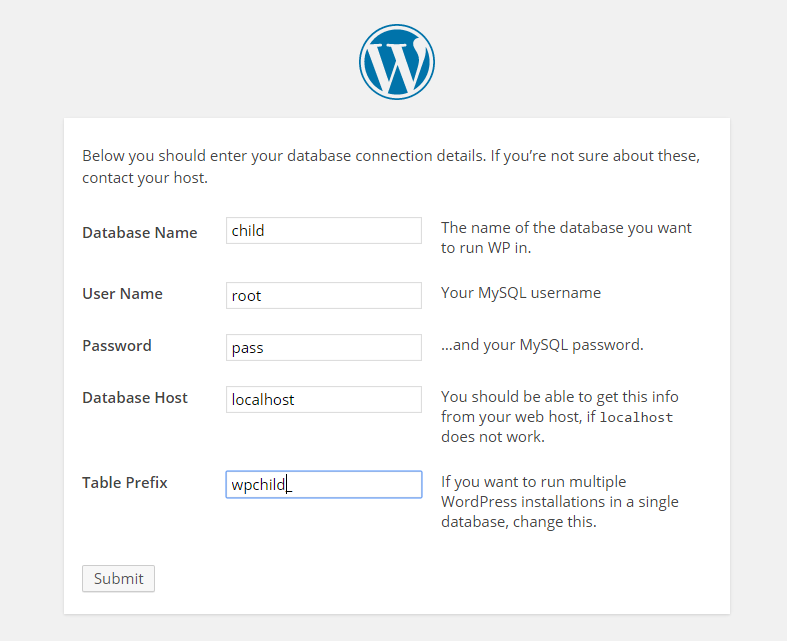
There is some information that you are going to need to give WordPress to make the installation happen. This is an important part so pay attention.
Get Database Info ready
There is some information that you are going to need to give WordPress to make the installation happen. This is an important part so pay attention.
- Database name should be child like the graphic below.
- The username for WAMP is root all lowercase letters.
- The password will be nothing, leave it blank. I have a special setup on my system where you have to use pass as the password. If you set up a password to use your databases you will have to use it here.
- Database host will be localhost.
- Give the Table Prefix a unique name and don't forget the underscore at the end _. We named our table prefix wpchild_.
 Database Info For WordPress Installation
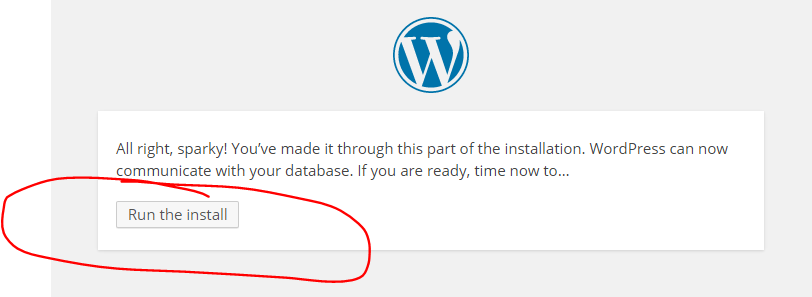
If everything is done properly then you will come to a page that looks like this. Click on Run the Install.
Database Info For WordPress Installation
If everything is done properly then you will come to a page that looks like this. Click on Run the Install.
 Run The Install
The next page will be where you set the name of your site and an admin login. You can put in your own parameters or copy the ones that I put in below. After you have entered in all your info click on Install WordPress.
Run The Install
The next page will be where you set the name of your site and an admin login. You can put in your own parameters or copy the ones that I put in below. After you have entered in all your info click on Install WordPress.
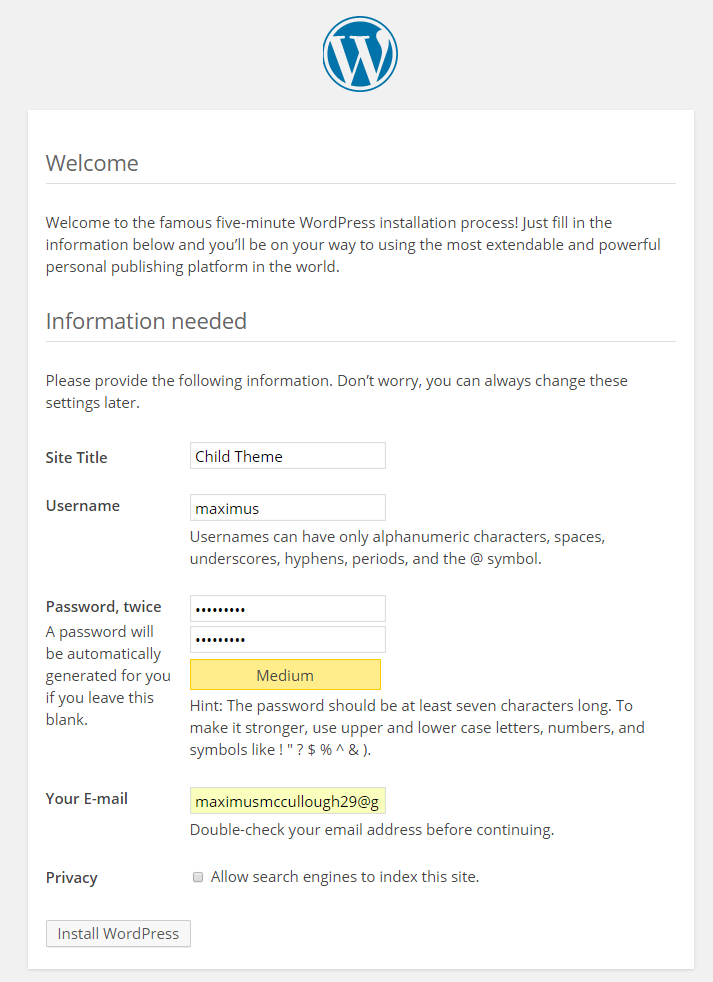 Setting Up WordPress Parameters
You will then get a screen that looks like this. Click the button to login.
Setting Up WordPress Parameters
You will then get a screen that looks like this. Click the button to login.
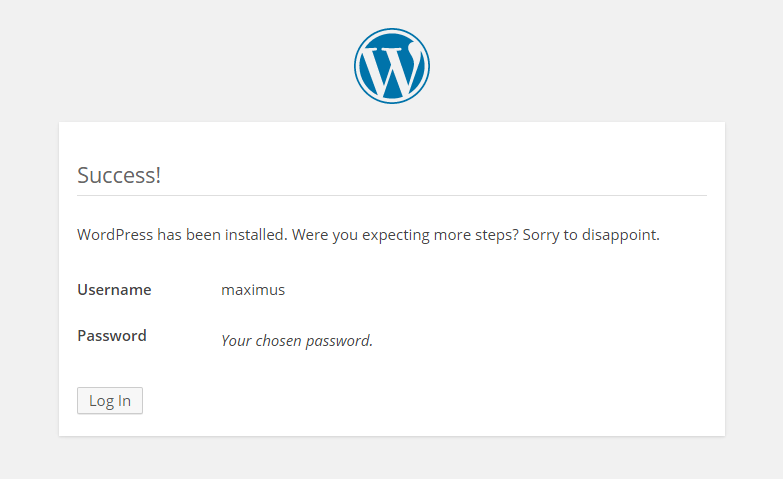 WordPress Login Prompt
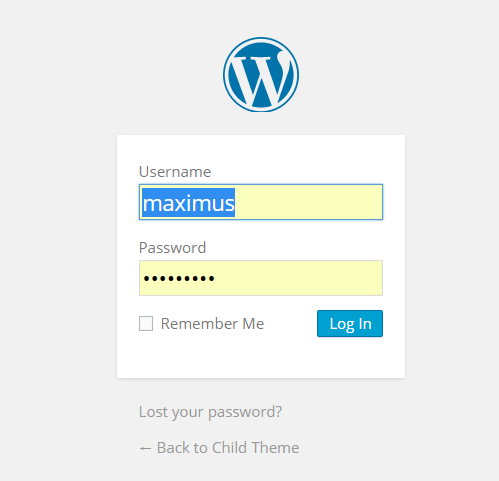 Log Into WordPress
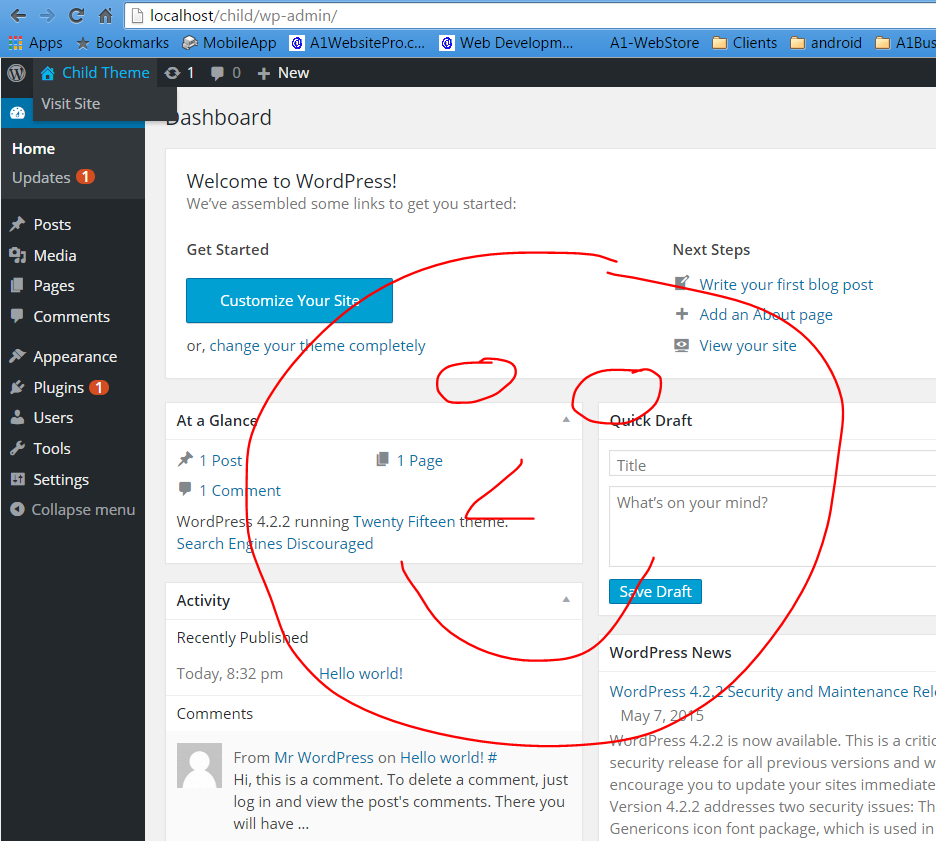 WordPress Dashboard
Step #5 WordPress Child Theme Creation Tutorial Picking The Parent Theme
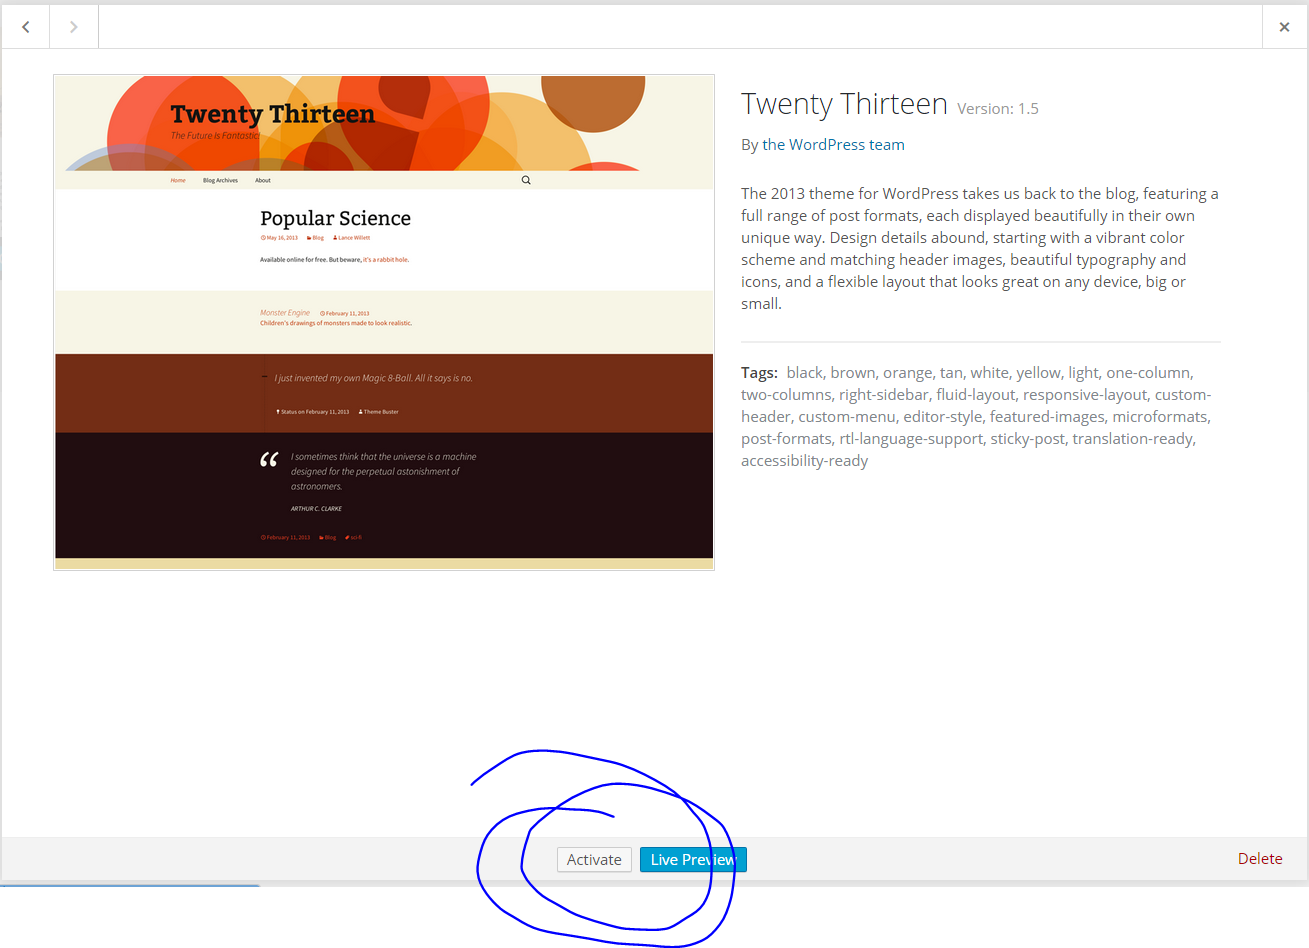
Usually a web developer will have some type of mockup. This is an image of what the client wants their theme to look like. For parent themes I like to use one of the themes that come with WordPress. Depending on the mockup I try to see what parent theme matches it close. I will worry about editing the files and styles later. We are going to use Twenty Thirteen as our parent theme for this project. This also means that we are going to delete all the other themes that are included with the download. Navigate to http://localhost/child/wp-admin/themes.php or in your dashboard go to "Appearance", "Themes". You will see this. Activate twenty thirteen by clicking on it.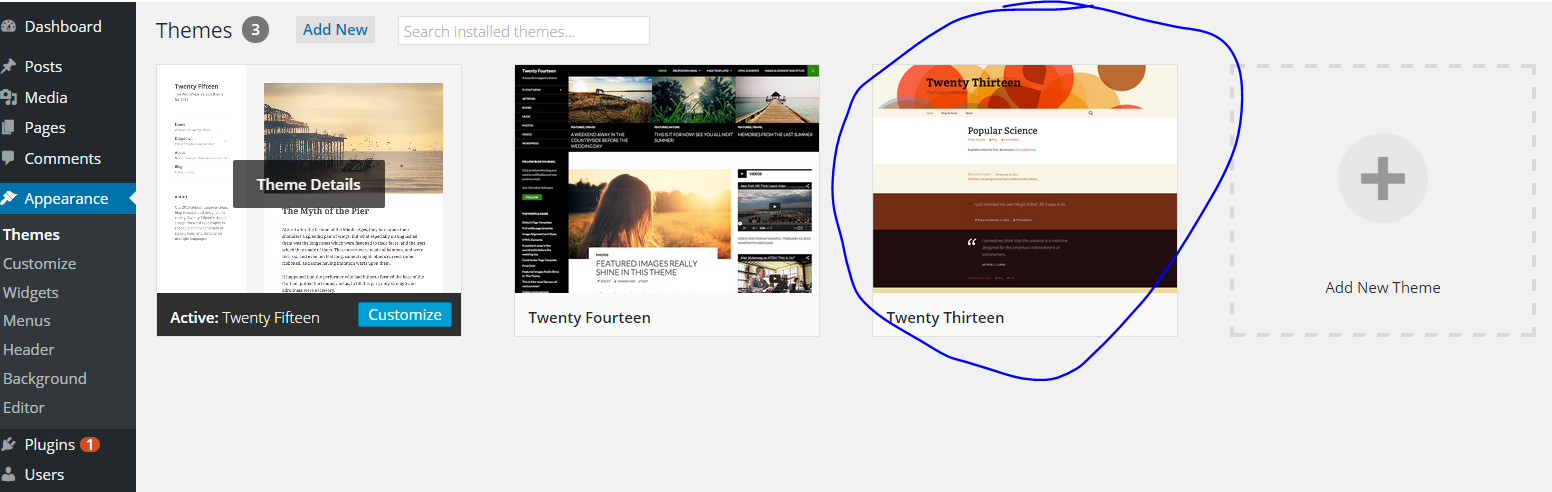 Activate 2013
Then you will see this. Click on the activate button.
Activate 2013
Then you will see this. Click on the activate button.
 Activate Twenty Thirteen
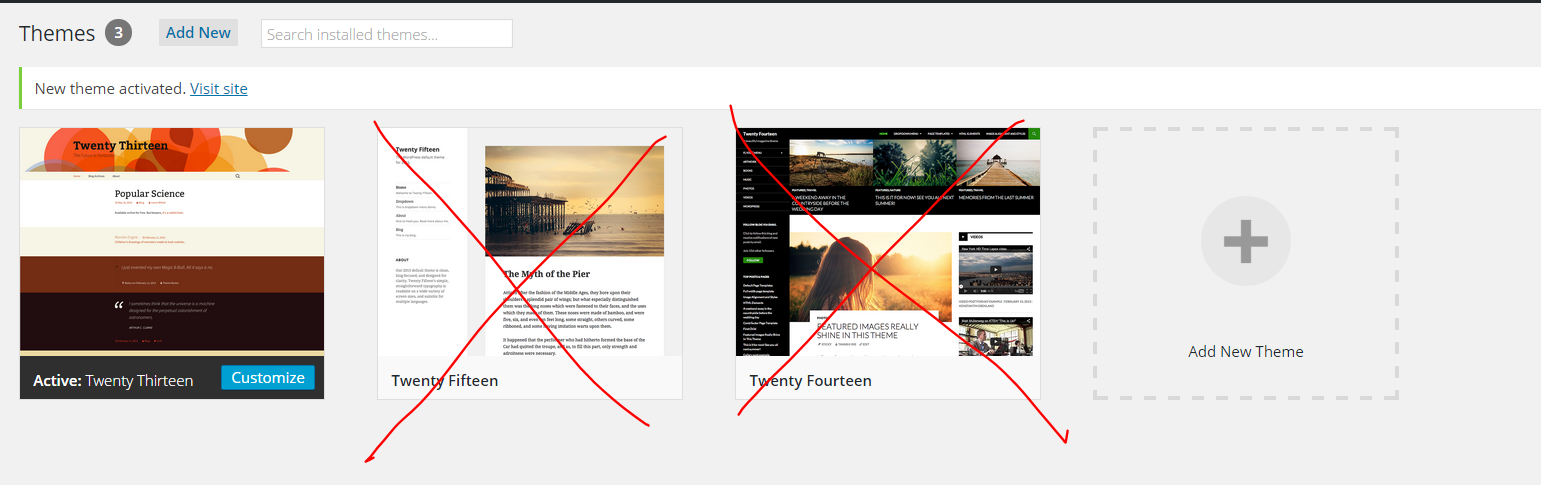
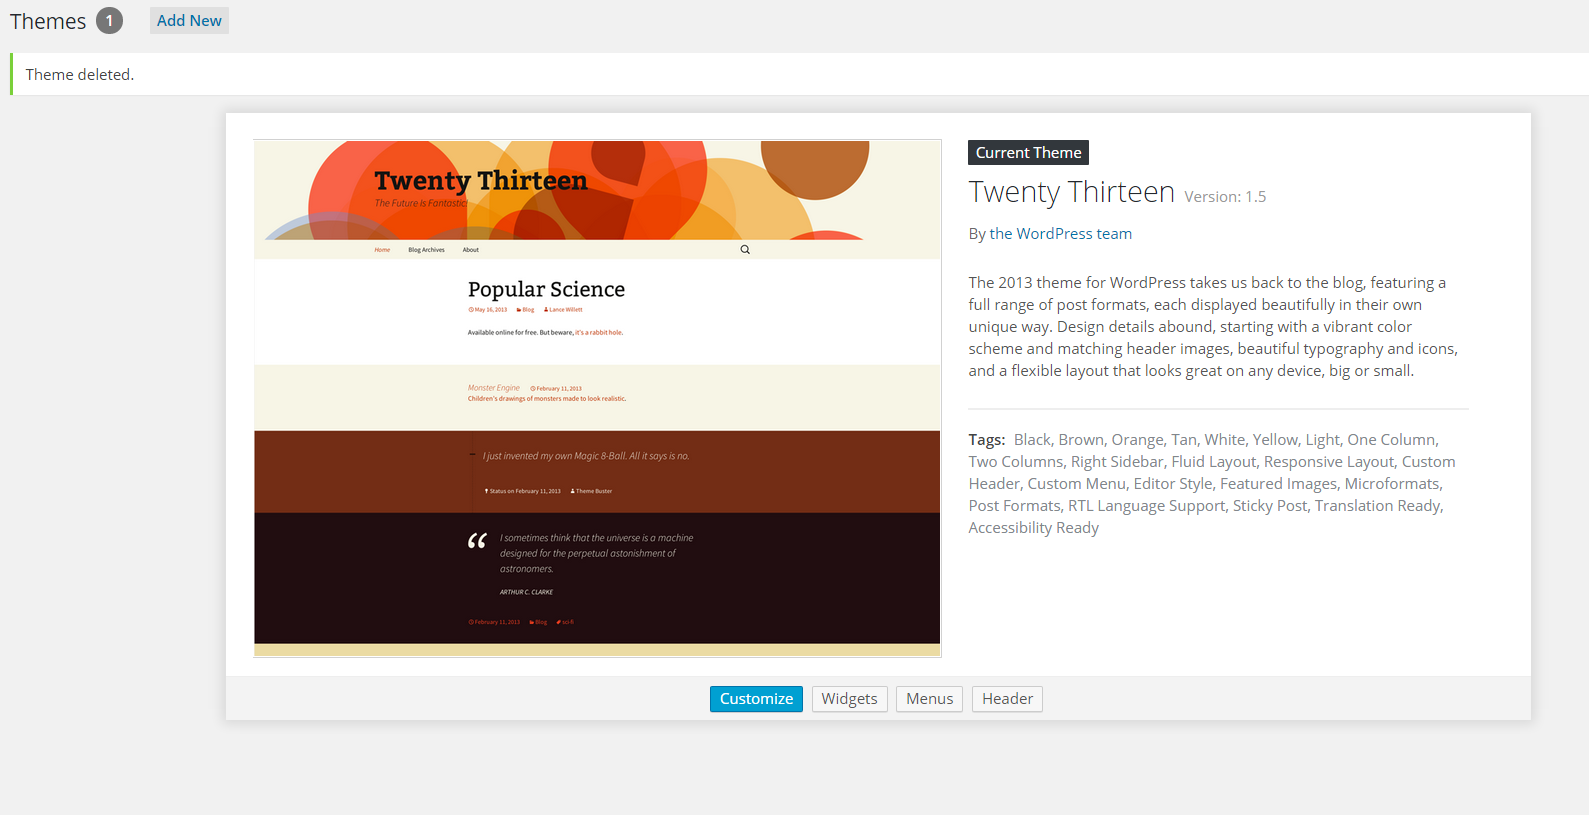
Now go and delete the other 2 themes that are in there.
Activate Twenty Thirteen
Now go and delete the other 2 themes that are in there.
 Delete Themes
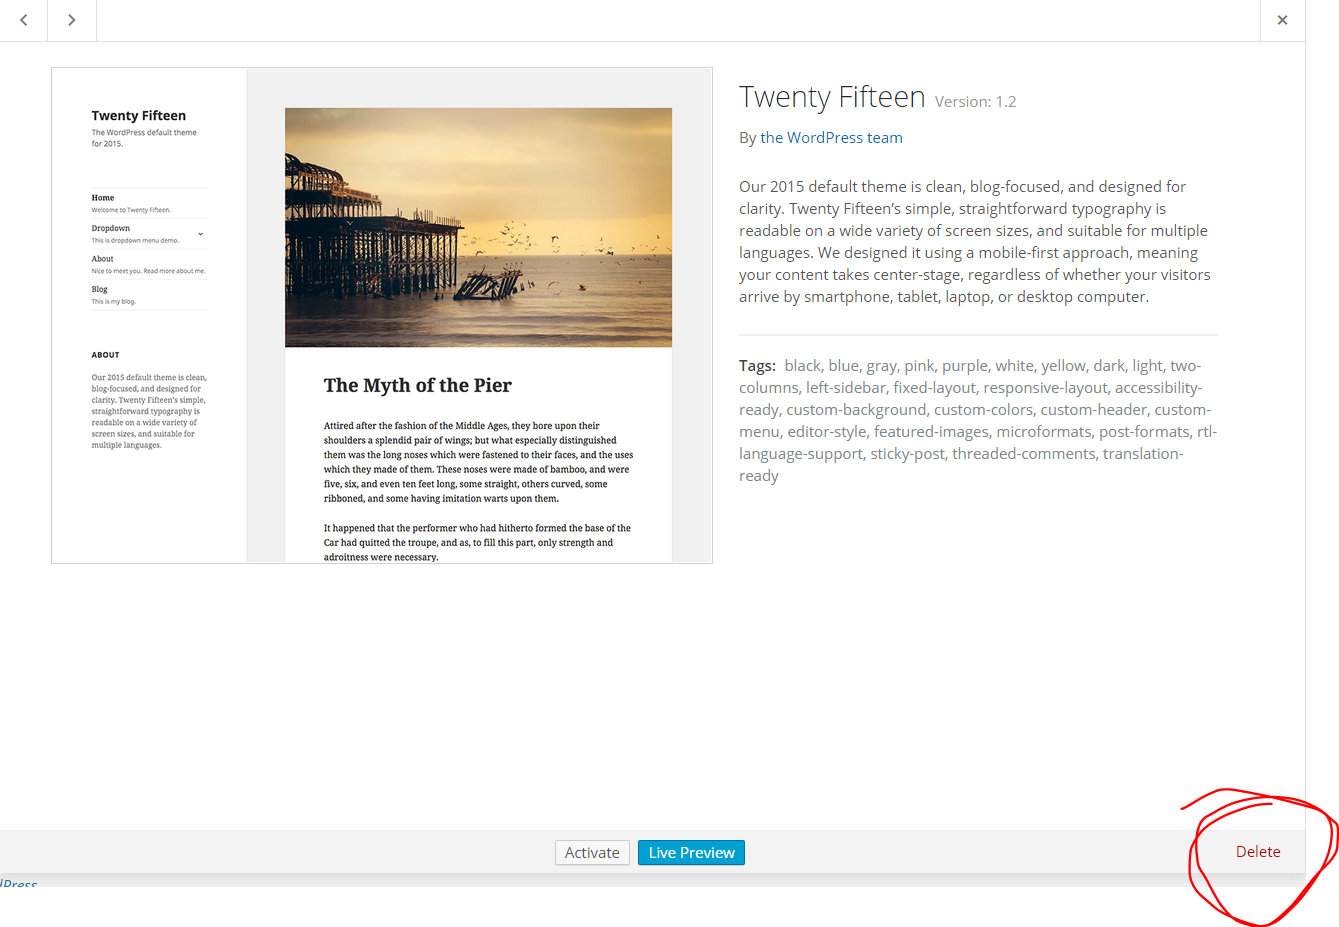
Click on the the theme and hit the delete button.
Delete Themes
Click on the the theme and hit the delete button.
 Delete Theme
Now you will only have one theme in your themes folder. It should look like this.
Delete Theme
Now you will only have one theme in your themes folder. It should look like this.
 Twenty Thirteen WordPress THeme
Step #6 WordPress Child Theme Creation Tutorial The Style Sheet
We are now ready to start the coding process for child themes. Go to your folders in your WAMP server under www. Find the child folder that we created. Open the wp-content folder.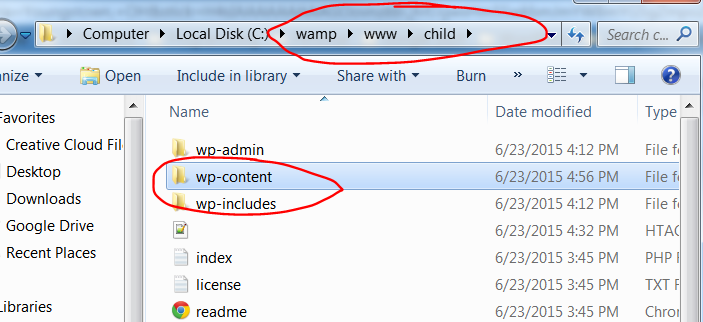 wp-content folder in WordPress
You will then see a themes folder, open it up.
wp-content folder in WordPress
You will then see a themes folder, open it up.
 WordPress Themes Folder
After you open up the themes folder you will see the twenty thirteen folder which will be our parent theme for our project.
WordPress Themes Folder
After you open up the themes folder you will see the twenty thirteen folder which will be our parent theme for our project.
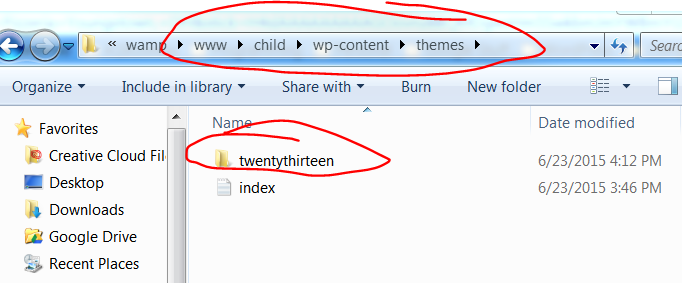 Parent Theme
Create a new folder within the themes folder and call it child.
Parent Theme
Create a new folder within the themes folder and call it child.
 child theme folder
Now open up the child folder and add a file in it called style.css. At the top of the file you will need to enter your info. If you are having issue your can download the style.css file here.
child theme folder
Now open up the child folder and add a file in it called style.css. At the top of the file you will need to enter your info. If you are having issue your can download the style.css file here.
/*
Theme Name: My Child Theme
Theme URI: https://a1websitepro.com
Description: This is a cool child theme I made with Maximus McCullough
Author: Maximus McCullough
Author URI: http://maximusmccullough.com
Template: twentythirteen
Version: 1.0.0
License: GNU General Public License v2 or later
License URI: http://www.gnu.org/licenses/gpl-2.0.html
Tags: cool child theme
Text Domain: twenty-thirteen-child
*/
Now go to your themes in your dashboard and you will see another theme in there.
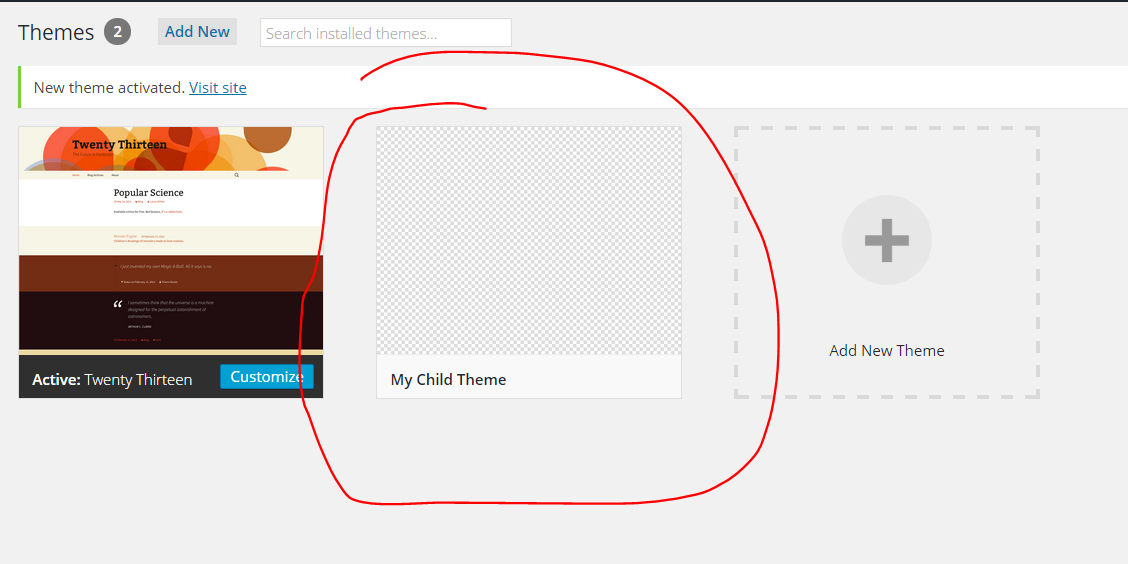 WordPress Child Theme Creation
Go ahead and activate the theme.
WordPress Child Theme Creation
Go ahead and activate the theme.
 Activate Child Theme
Step #7 WordPress Child Theme Creation Tutorial The Functions.php file
When you look at the front end of the website it will not look right. It will look something like this. This is because we have to enqueue the scripts.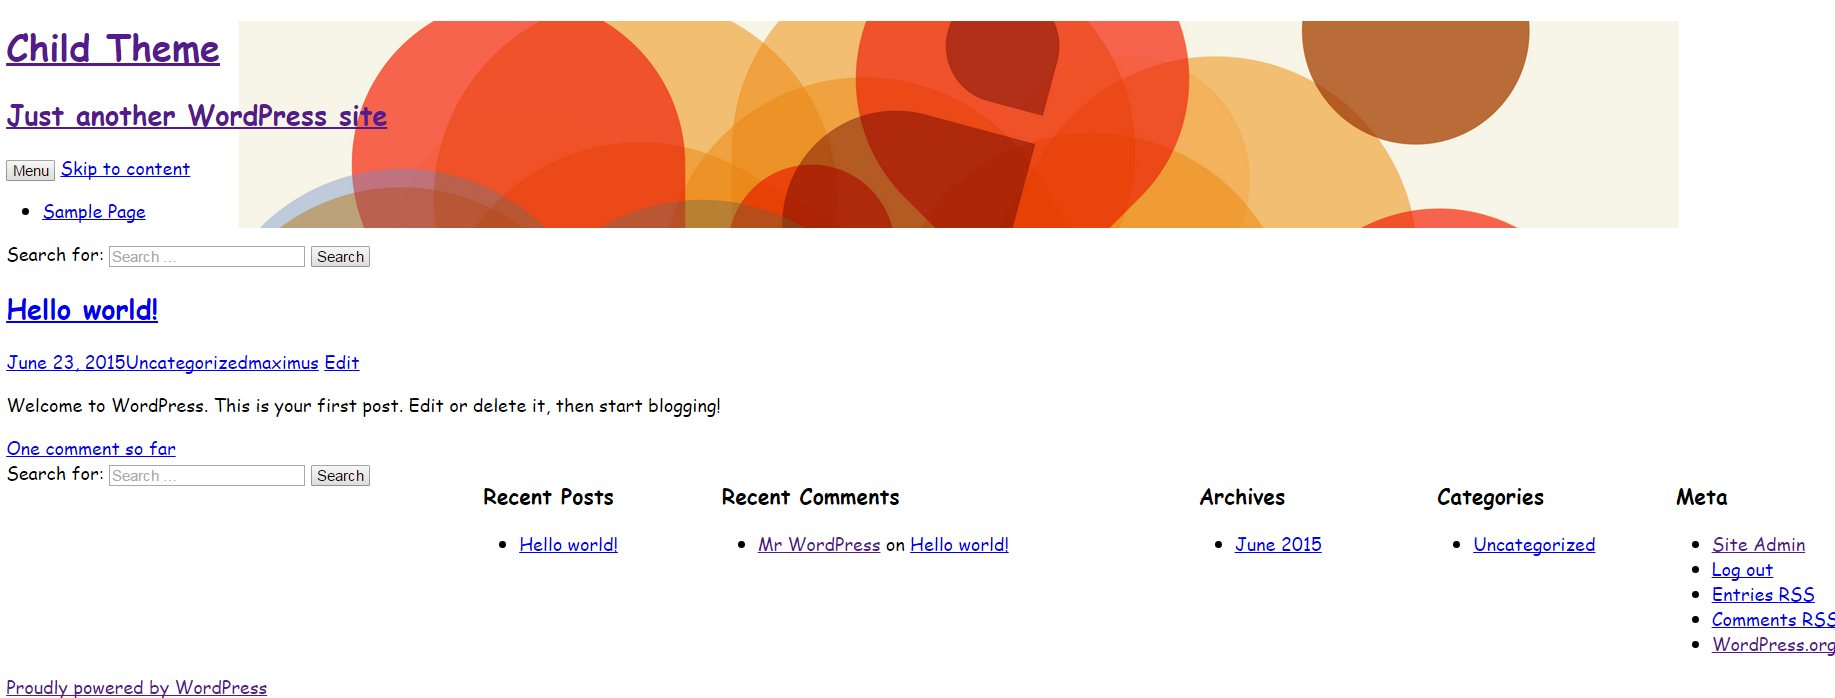 Child Theme WordPress Creation
Go back to your child folder and create a functions.php file. You have to have the following code in the file. Open up the php but do not put in the closing tag. Here is a download of the functions.php file if you are having trouble.
Child Theme WordPress Creation
Go back to your child folder and create a functions.php file. You have to have the following code in the file. Open up the php but do not put in the closing tag. Here is a download of the functions.php file if you are having trouble.
<?php

add_action( 'wp_enqueue_scripts', 'theme_enqueue_styles' );
function theme_enqueue_styles() {
wp_enqueue_style( 'parent-style', get_template_directory_uri() . '/style.css' );

}
After you put the functions.php file in then your parent theme will respond correctly. Take a look at the front of the site after you save your functions.php file.
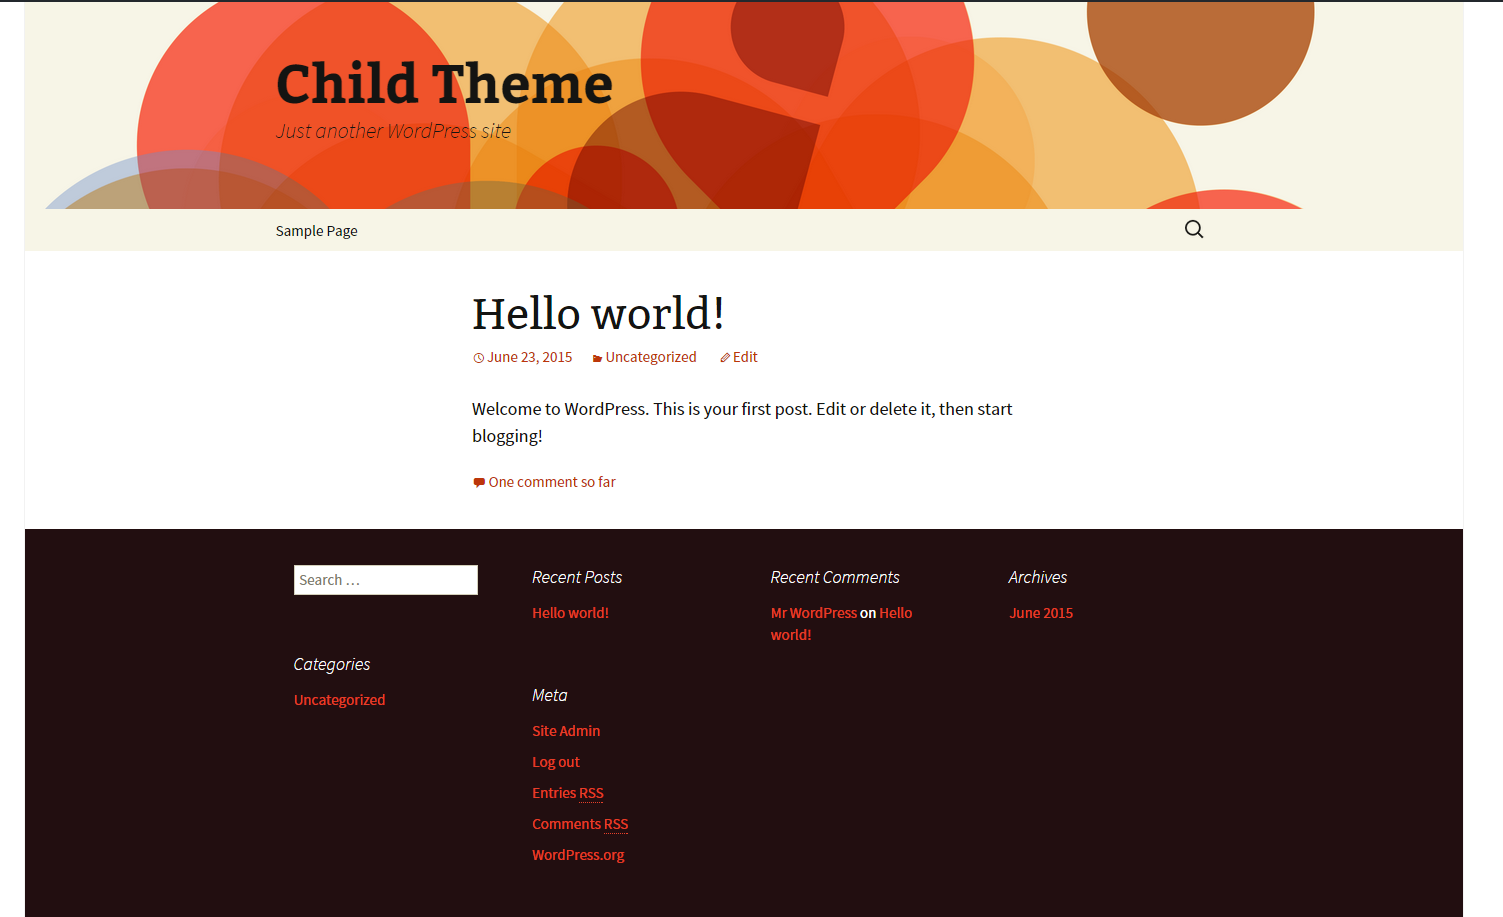 After Functions.php file is included
Step #8 WordPress Child Theme Creation Tutorial Editing the Style Sheet
Now we can start editing the style sheet to how we want the website to look. You will start adding CSS codes after the closing CSS comment line#339966;">*/. Add the following CSS codes to your stylesheet.css. Make sure that you save every time in your editor so you can see the changes on the website.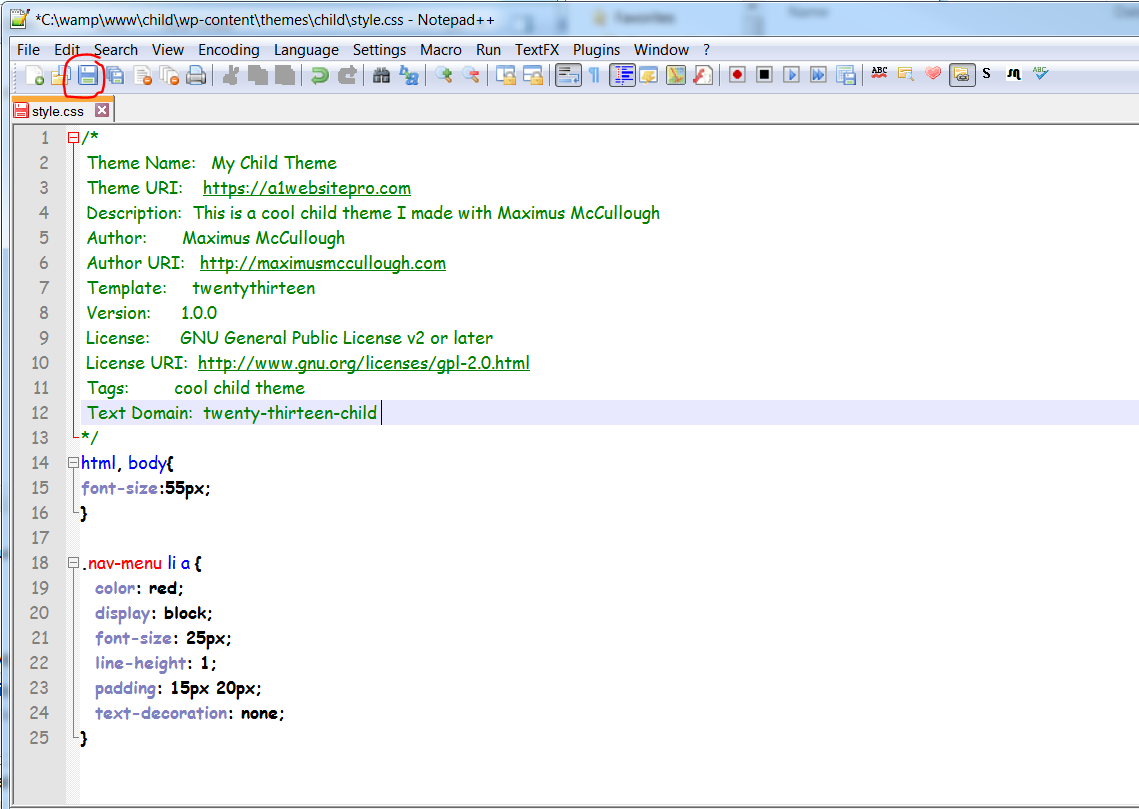 Editing Child Theme With Notepad Plus Plus
html, body{
font-size:55px;
}

.nav-menu li a {
color: red;
display: block;
font-size: 25px;
line-height: 1;
padding: 15px 20px;
text-decoration: none;
}
You will notice that you fonts are larger and your menu is red.
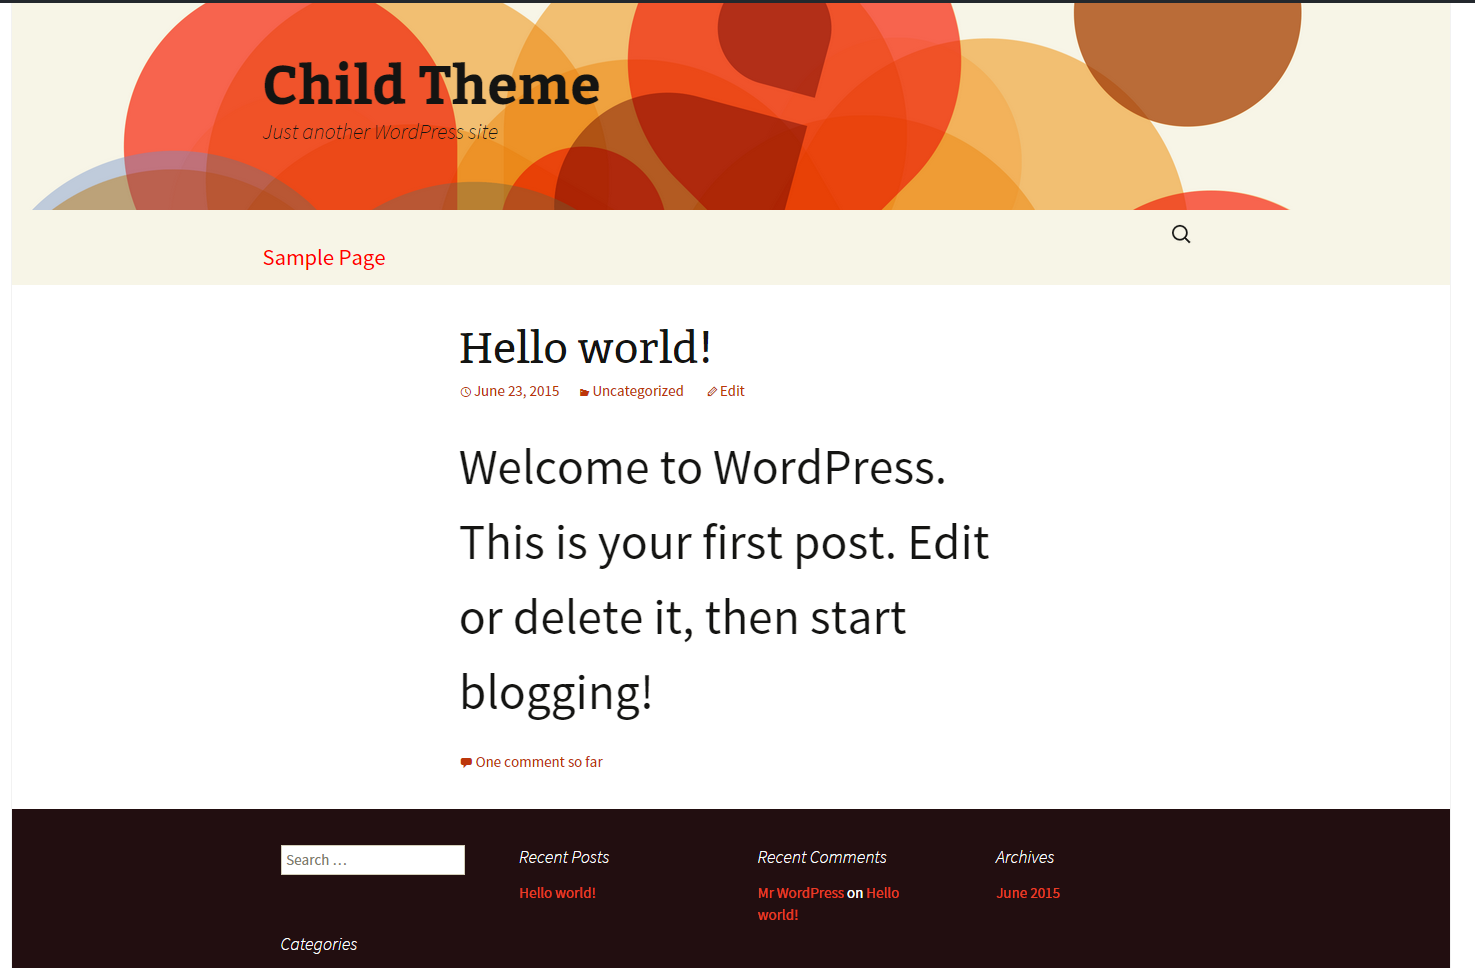 Editing Child Theme in WordPress
This concludes our first WordPress Child Theme Tutorial Creation. There will be a few more to come before you have a complete understanding of child themes in WordPress.
Editing Child Theme in WordPress
This concludes our first WordPress Child Theme Tutorial Creation. There will be a few more to come before you have a complete understanding of child themes in WordPress.