
This is a tutorial on how to enable pretty permalinks in Amazon Web Hosting services. In order to do this you have to enable mod_rewrite in your Apache server. Otherwise you will get a page not found error.
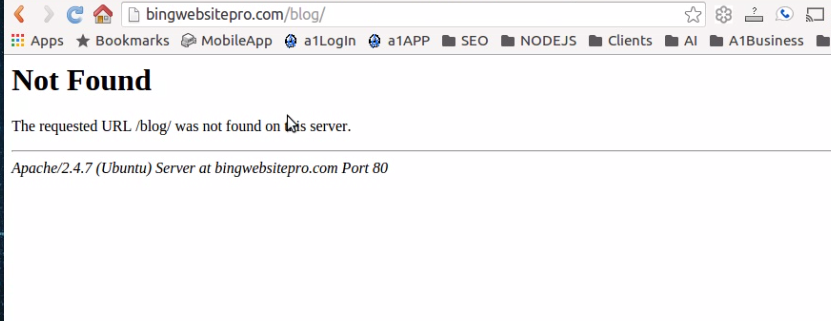 page not found
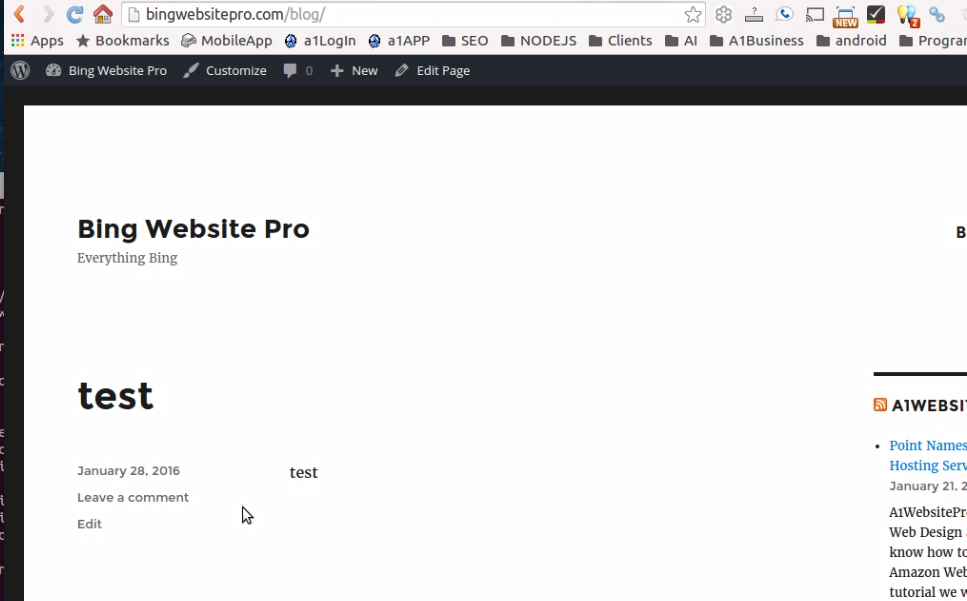 After Enabling Mod Rewrite
Log Into Amazon via SSH
Fist you want to log into your amazon via ssh. If you log into you aws console you can get the login syntax. You want to change the last part to your IP address. Here is an example, notice I changed everything after the @ symbol to match my elastic ip address.ssh -i "extra.pem" ubuntu@52.72.50.12
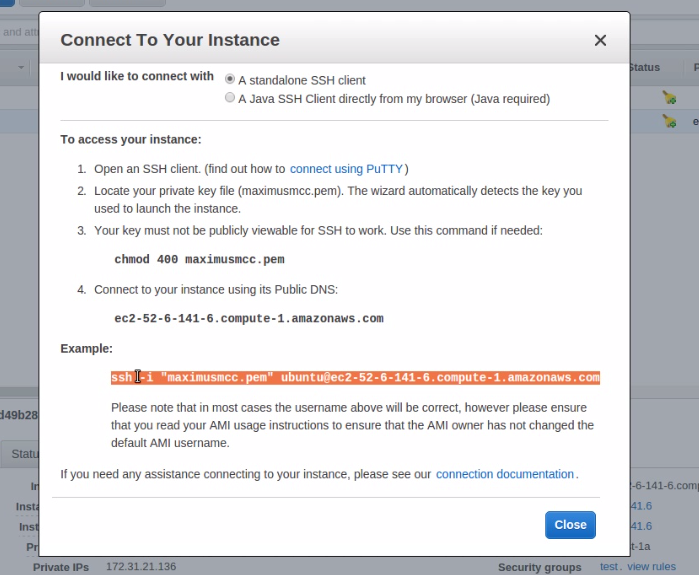 Grab SSH Connection details
Create and Edit Htaccess File for WordPress
Navigate to your WordPress files. Make sure that you are logged in as root. To log in as root just type in the following.sudo suNavigate to your root folder by typing in the following.
cd /Now navigate to your WordPress files by typing in the following.
cd /var/www/html/You should now see a lit of all your WordPress files. Type in the following command to create a htaccess file.
touch .htaccessNow enter in vim to edit the htacces file.
vim .htaccessHit the letter "i" on your keyboard. Now you are ready to paste in the following information.
<IfModule mod_rewrite.c>
RewriteEngine On
RewriteBase /
RewriteRule ^index\.php$ - [L]
RewriteCond %{REQUEST_FILENAME} !-f
RewriteCond %{REQUEST_FILENAME} !-d
RewriteRule . /index.php [L]
</IfModule>
Now hit the escape key on your keyboard and type in the following and hit enter.
:wrThis writes the information to your htaccess file.
Editing Apache Config File
Now you will have to edit the Apache config file. Navigate to sites-available by entering the following lines into your terminal.cd / cd /etc/apache2/sites-availableYou will see a file in there called 000-default.conf. Type in the following to edit this file.
vim 000-default.confNavigate to the bottom of the file and insert the following code before the </VirtualHost> closing tag. This is to enable the htaccess file on the server to AllowOverride All.
<Directory /var/www/html/>
Options Indexes
FollowSymLinks
AllowOverride All
</Directory>
Enable Mod Rewrite
now we have to enable the mod rewrite rule. This will enable the pretty permalinks that we want on our WordPress. Enter the following commands in your terminal.cd / sudo a2enmod rewrite
Restart Apache Server
Finally you will have to restart the Apache server for the changes to take effect. Type in the following comment into your terminal.sudo /etc/init.d/apache2 restartCongratulations now your pretty permalinks should be enabled in WordPress. :-)