Child themes on WordPress for beginners part 2 CSS is a continuation of WordPress child theme creation tutorial. So if you have not completed that tutorial, you may want to look at it before you do this one.
#childtheme #php #php-lessons
What We Are Going to Learn
- Browser to target CSS.
- Identify id's to make changes. "#"
- Identify Classes to make changes. "."
- Simple CSS commands and syntax.
- Preview Changes
- Make changes via CSS permanently in Child Theme .
Target CSS With A Browser
I like to use the Google Chrome browser to help me in targeting CSS for child themes. However, you can also use Firefox, Safari, Opera or even Internet Explorer.All Browsers Are Not The Same
Keep in mind that just because something works in Chrome, it may not work in Firefox or Internet Explorer. For this reason, I keep several browsers on my computer, so I can see what the website is going to look like in each browser. Here are a couple of differences.Main Command
/* main command for all browsers */
box-shadow: 5px 5px 5px #b6ebf7;
Differences in Firefox
/* for Mozilla Firefox */
-moz-box-shadow: 5px 5px 5px #b6ebf7;
Differences in Chrome and Safari with Same effect.
/* for Safari & Google Chrome */
-webkit-box-shadow: 5x 5px 5px #b6ebf7;
}
Identify ID's Within a Web Page
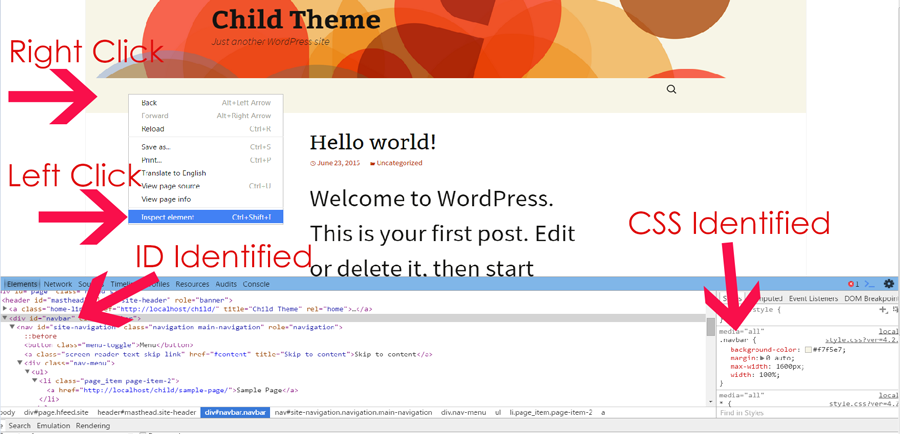
Web pages are made up of HTML. HTML is filled with tags and some of those tags are called DIV ID's. Within the Google Chrome browser, you can right-click on a section in your web page and get that div id.- Right-click the section you want to change
- Left click "Inspect Element".
- A window will pop up at the bottom of the browser. It will be highlighted to show the div id.
- The real CSS will be revealed to the right in a box.
 div-id-identified
Identify Classes Within A Web Page
You will identify classes and any other elements on a web page using the same method.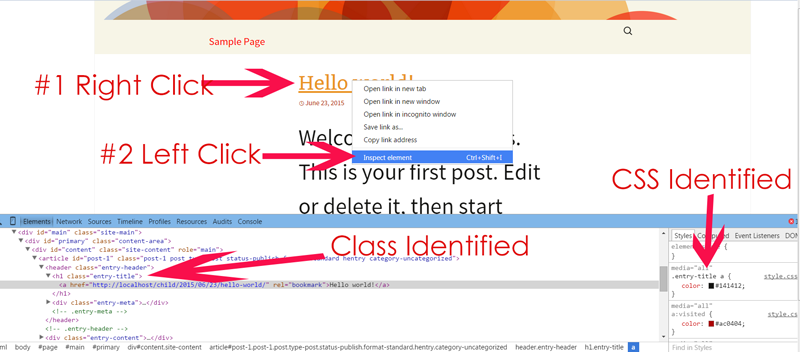 class-id-identified
Simple CSS Commands And Syntax
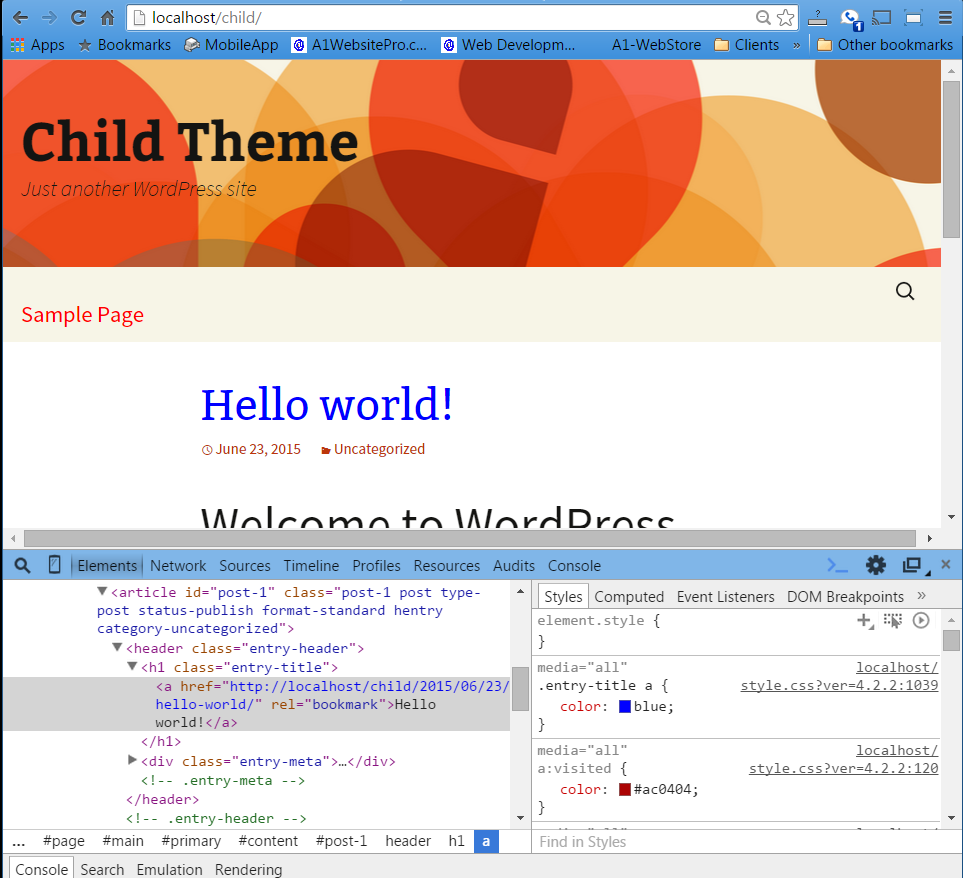
If you look at the box on the right in the top graphic, you can see a properly formatted CSS syntax. The fact that is starts with a period (.) lets us know that this is a class we are dealing with. Id's start with a number sign (#) then the name. Then we have the name of the class, which is entry-title. However, you will also see the letter "a" which means that this is a link. So to target it properly, you have to have the "a". Like so: .entry-title a. Next, we have curly brackets that hold the commands for the CSS. {} Within these brackets, we can give any CSS commands that we want..entry-title a {
color: #141412;
}
Preview Changes
The great thing about working in the Chrome browser is that you can preview changes before you make them. You can also do the same in other browsers. Let's say that I wanted to change the color of the title.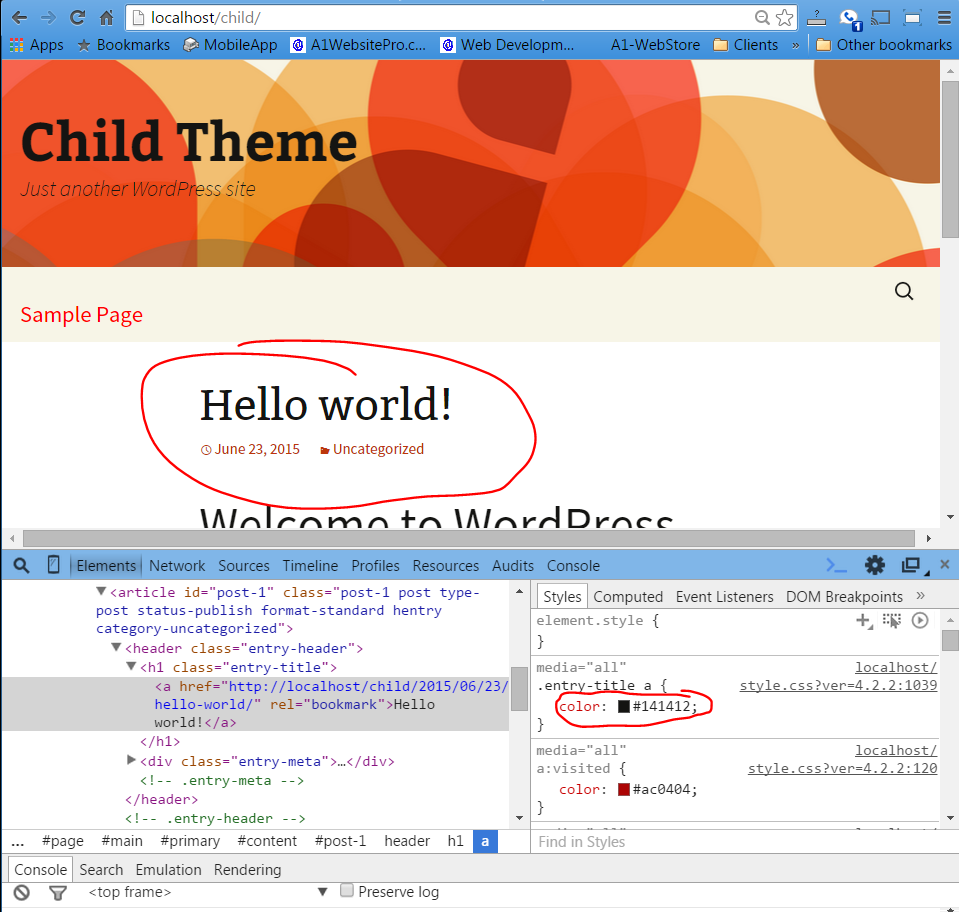 change color in CSS
All I would have to do to preview what the color would look like is click my mouse beside color. Then type in the word "blue". You will see now the title of the page becomes blue.
change color in CSS
All I would have to do to preview what the color would look like is click my mouse beside color. Then type in the word "blue". You will see now the title of the page becomes blue.
 change color to blue in css
Make changes via CSS permanently in Child Theme
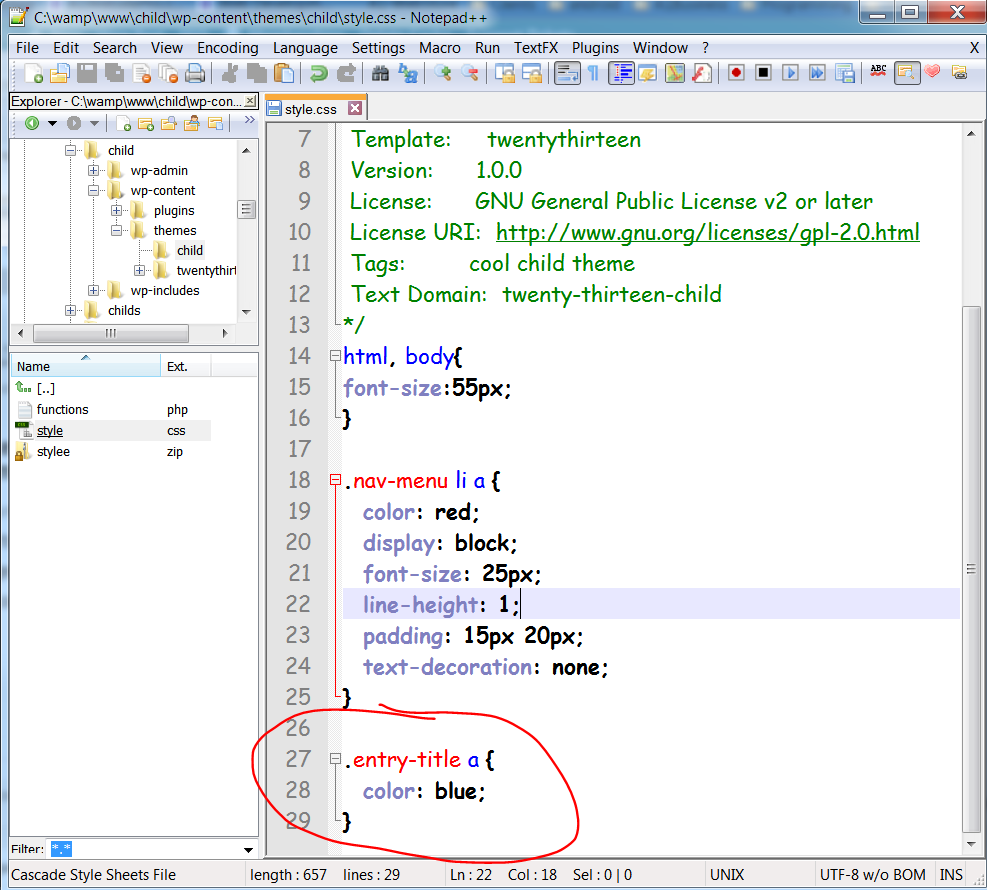
If you refresh the above page then you will see that is reverts back to the original color. In order to save the changes you will have to highlight and copy all the CSS code and paste it into your style sheet. Then save it and it will become a permanent addition to your child theme.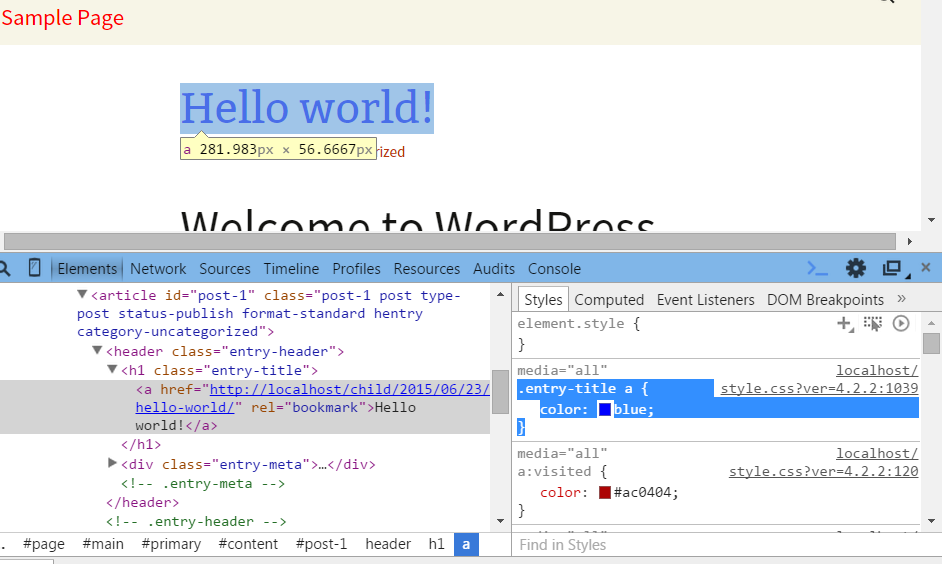 copy css command
 save into your stylesheet