After you have installed XAMPP then you will want to test that everything is working. In this tutorial we are going to make sure that we have everything working properly before we dive into the programming. You will also want to come back here in future tutorials to repeat these steps.
TURN EVERYTHING ON IN XAMPP
Turn everything on in the XAMPP application. Click on your XAMPP ion. You will see a window appear. We will start in the open window which is the "General" options window. Click on the start button. This will get the application started.
 The little red dot will turn to orange then to green when it is ready. You will also notice that the Stop, Go to Application & Open terminal are now clickable. We will be launching the terminal in these tutorials to get you use to using the terminal. This will really speed up your workflow and efficiency.
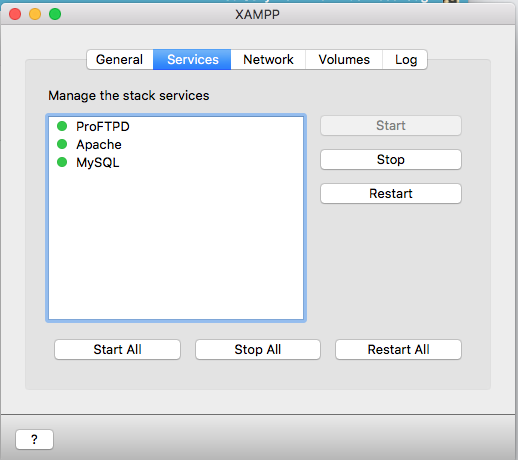
 The next item we will click on is "Services". This will give us the options to start the server so that our Apache, MySql and PHP are working. Do not worry about ProFTPD at this time. That if a File Transfer Protocol that we will not be using in these tutorials because we will be working with everything locally. It is OK to have it running but we will not need the ProFTPD for these lessons. Click the "Start All" to start the services.
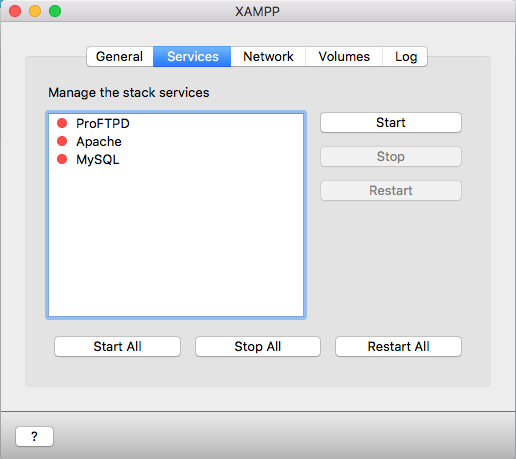 When you click on the "Start All" button you will see the red icons turn to orange then to green. This indicates that the server is ready.
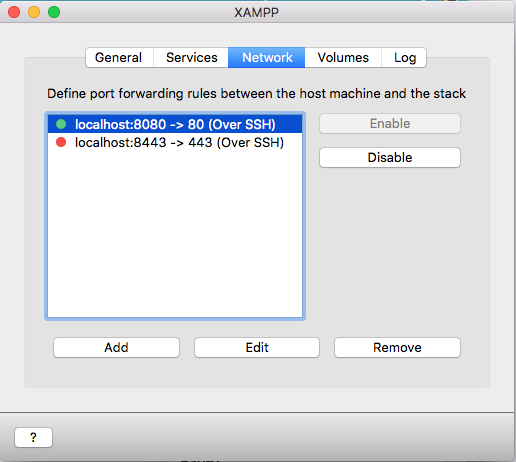
 Enabling the network is our next step. Click on "Network" at the top of the box. We will enable localhost:8080 -> 80 (Over SSH). If you have any issues getting the webpages to display then you can enable localhost:8443 -> 443(Over SSH). This step turns on port 80 or port 443 on our local machine.
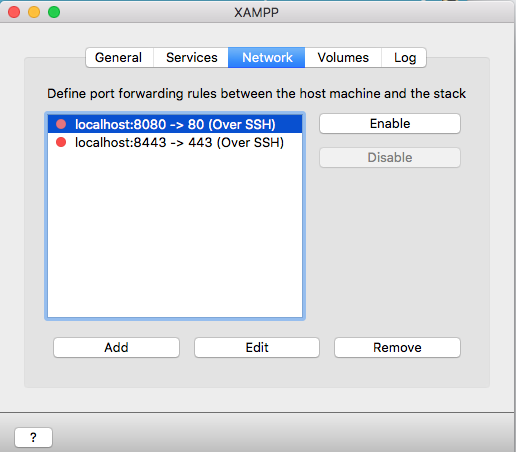 You will see the red dots turn to green dots. Port 443 is generally associated with SSL's or secure socket layers. For testing and development purposes in our tutorials we will not need this feature.
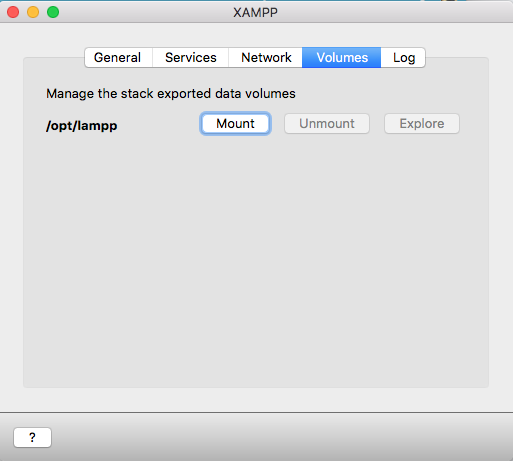
 The next thing we will want to do is mount the application. Notice the location is /opt/lampp. Click on the "Mount" button.
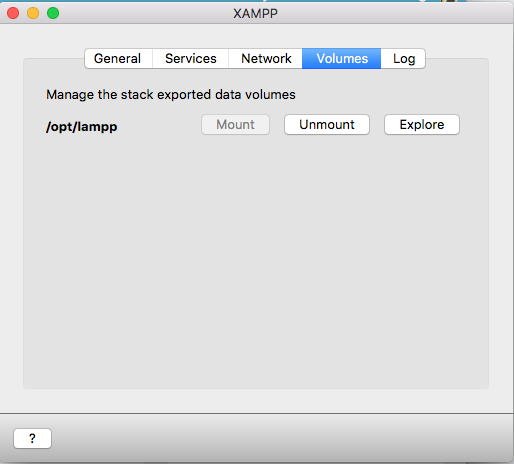
 After clicking on the "Mount" button you will see that the "Unmount" and "Explore" buttons become clickable. Unmount simply turns off the the mount and the ability to explore the files and folders. Explore will bring up an explorer window where you can add files and folders. We will be visiting this feature later.
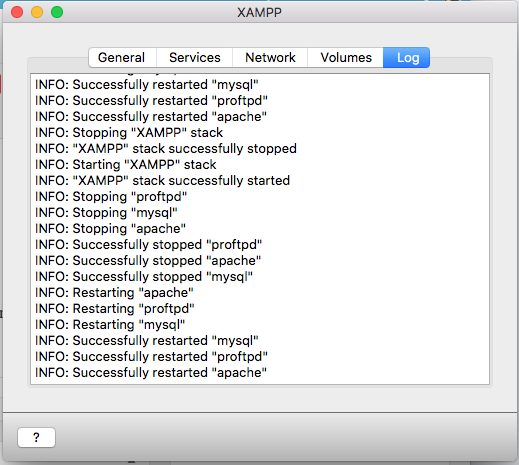
 Finally the last options is "Log". This keeps track of your actions on the server. It can also help you debug a problem later if you run into issues.
ADDITIONAL STEPS ON MAC FOR XAMPP SETUP
Go to "Volumes" then click on the "Explore" button. This will open a window. Find where it says htdocs and right click on that folder.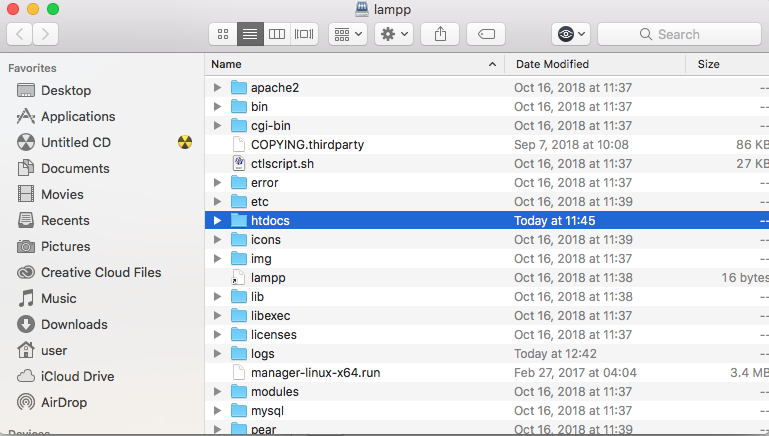 Click on "Get Info".
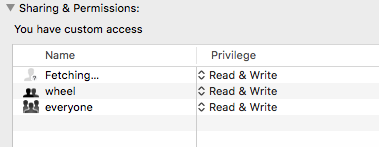
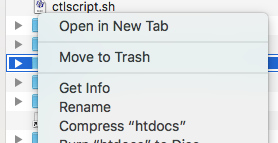 A box will pop up that looks like this. You will want to scroll down to the bottom and click the lock in order to unlock the permissions.
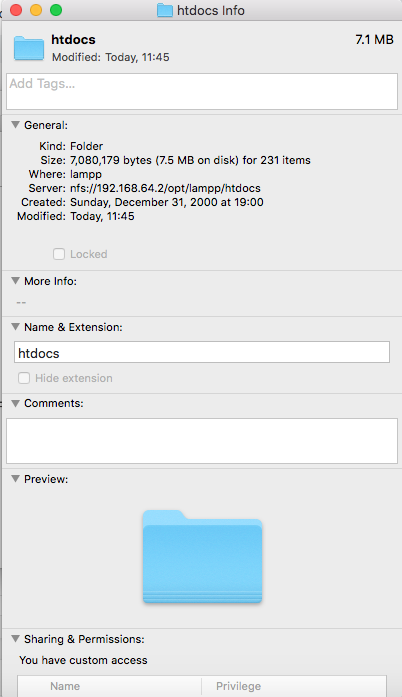
 You will get a box to enter your username and password. This will unlock the file permissions for that htdocs folder. Make sure under sharing and permissions that you have "read & write" selected for the folder.
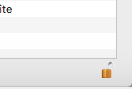
 After you set everything to "Read & Write" click on the lock again to lock up your folder.
 >
>  .
This will give us the option to create files and folders in the htdocs. If we left the settings the way they were we would not be able to create file or folders.
.
This will give us the option to create files and folders in the htdocs. If we left the settings the way they were we would not be able to create file or folders.
Summary on XAMPP Testing
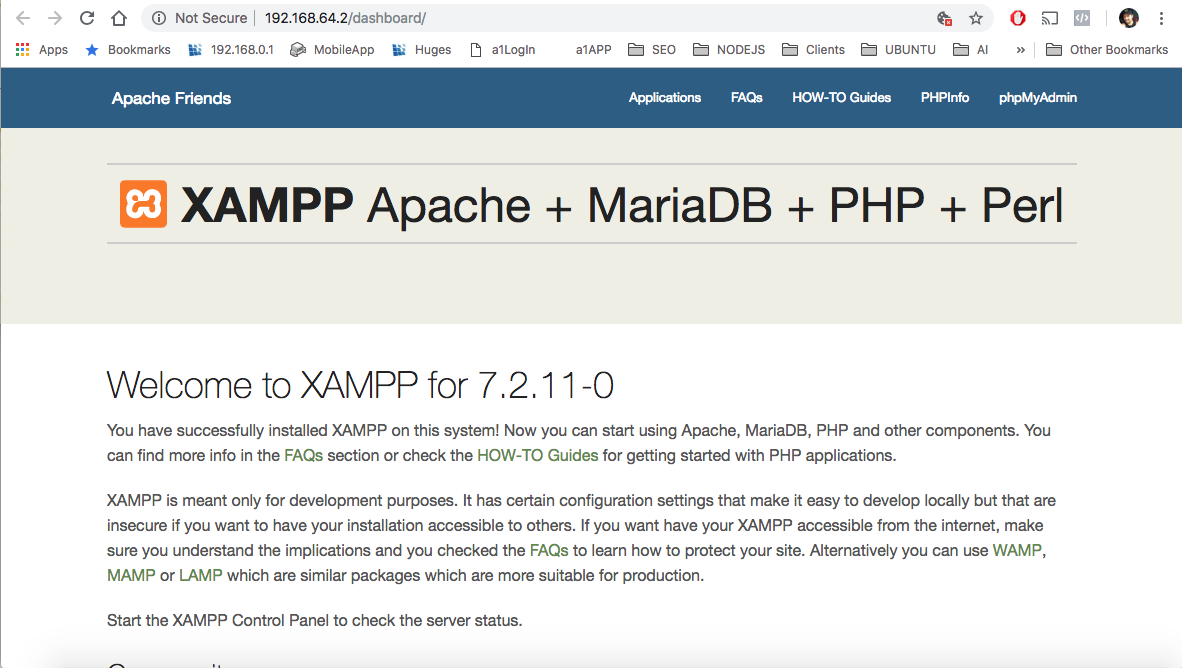
Now go to "General" then "Go To Application" if you see the following screen after clicking on it we are ready to get started.