
It's effortless to get your domain email with Gmail, and it only takes under five minutes! Suppose you have a personal or company email address that you want to use. In that case, you can streamline your email management by integrating it with your Gmail account. You can even add multiple email addresses using the same method. To demonstrate how to do this, we'll use my daughter's website and email address in this tutorial, and you can watch the included video for extra guidance.
Domain Email with Gmail
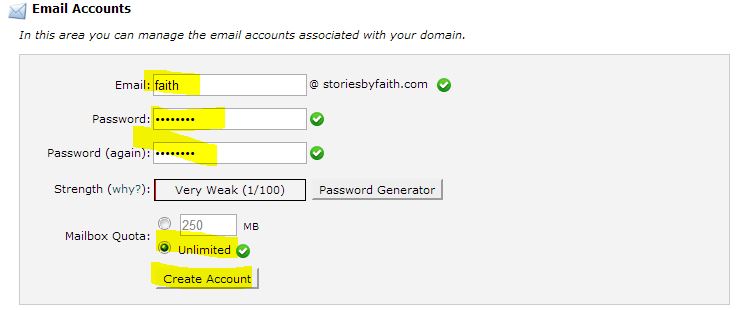
The first step for setting up your domain email with Gmail is to create an email address that you wish to use with your domain name. For instance, in this tutorial, we will use faith@storiesbyfaith.com. If you already have a personal email for your domain, you can skip this step and proceed to step #2 below. Log into your cPanel and find where it says "email accounts".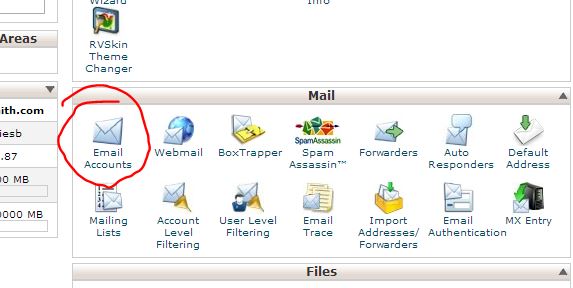 Enter the name you want to use with your domain name, I entered "faith" here. Give your email a password two times and select the quota you want to use, then click "Create Account".
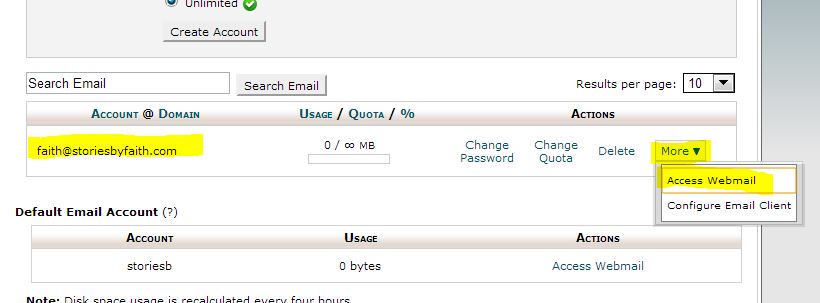
 You will see that we have created an email account called faith@storiesbyfaith.com. In the next box below, select "more" in the drop-down and then click on "Access Webmail".
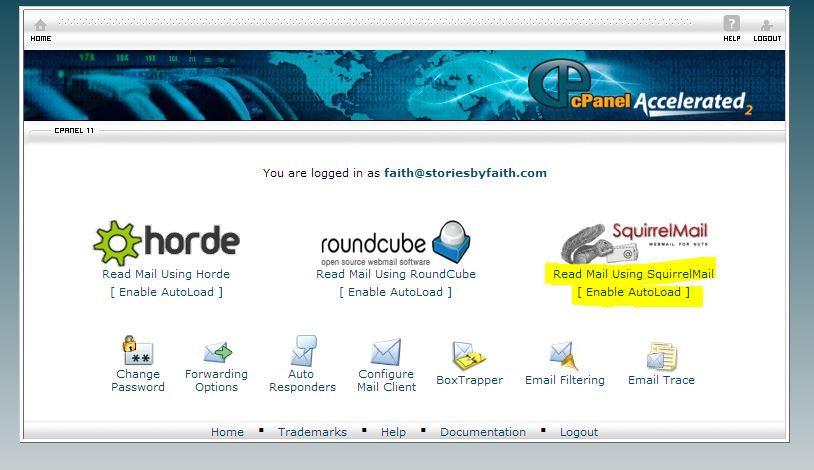
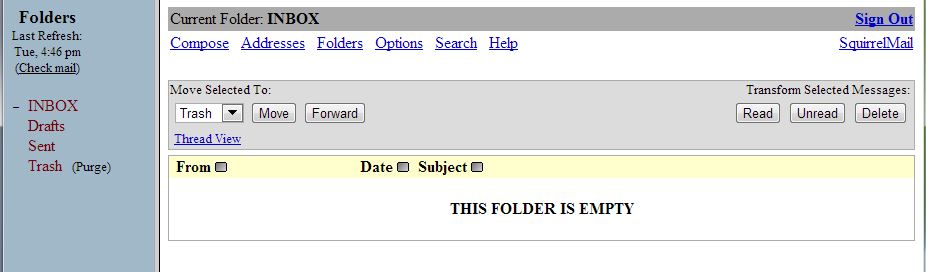
 You will be brought to a new screen that looks like this. You can access your email by selecting "Read Mail Using Squirrel Mail" click that.
 You will then be in your email client that will give you the ability to read, write and send emails. Keep this window open because we will use it later.
Step#2 Setting up Domain Email with Gmail
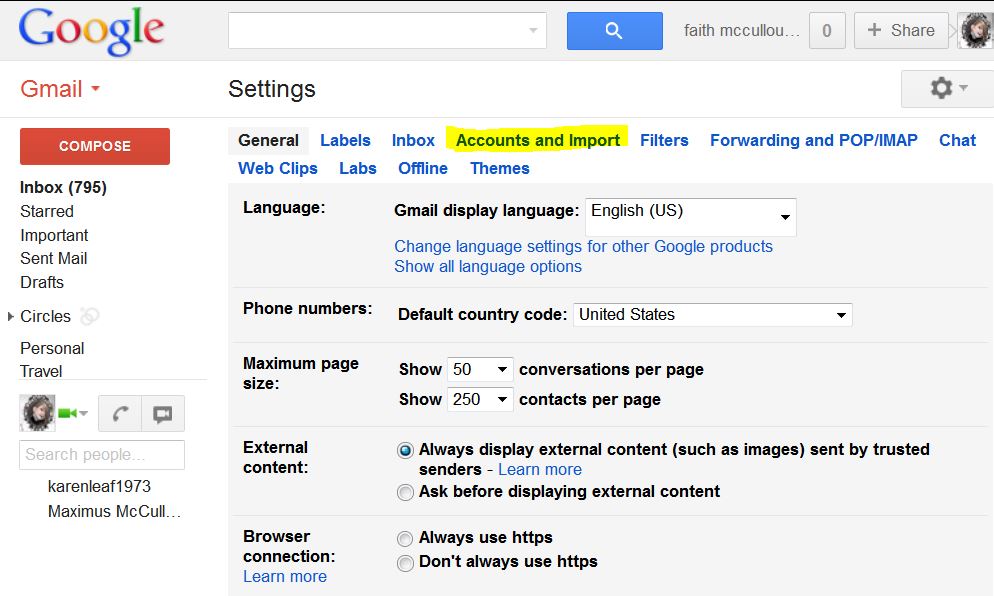
Ok now it is time to access our Gmail, look for the little icon that looks like a gear when you click on it, you will see a drop-down, click on settings.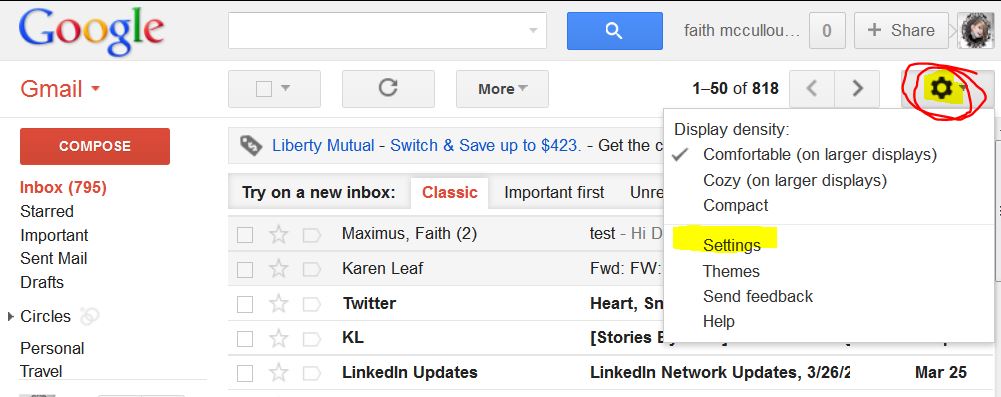 Next, select "Accounts and Import"
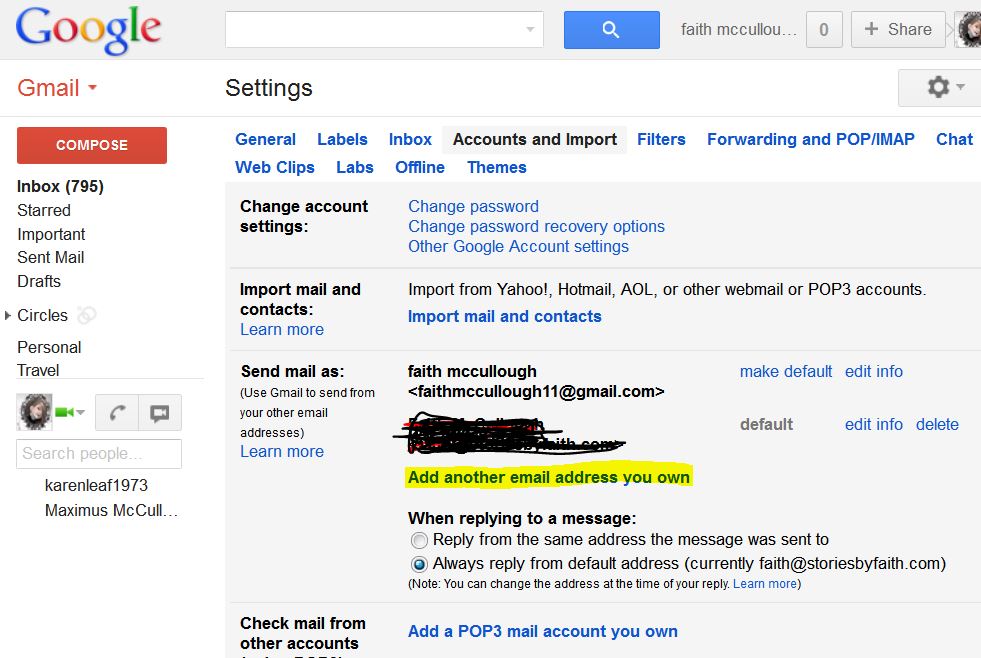
 When you are on that screen, scroll down to where it says "Add another email address that you own" and click on it.
 You will get a pop-up box that looks like this. Enter your name and email address that you want to use with Gmail. Then click "Next Step"
 You will then get another box that looks like this. Make sure you select send through Gmail (easier to set up). If you want to set up using SMPT you can, but that is not covered in this tutorial.
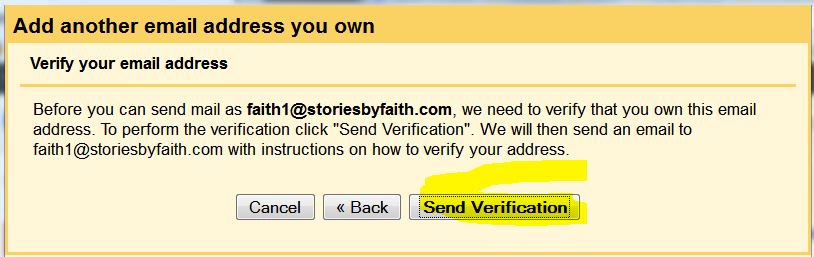
 Next you will arrive at yet another box that looks like this. Click on the "Send Verification" button and Google will then send a code to your email address.
 You will see a box like this open up, do not close it, leave it open and go check your email in your current email program. You will come back to this box and enter your verification number.
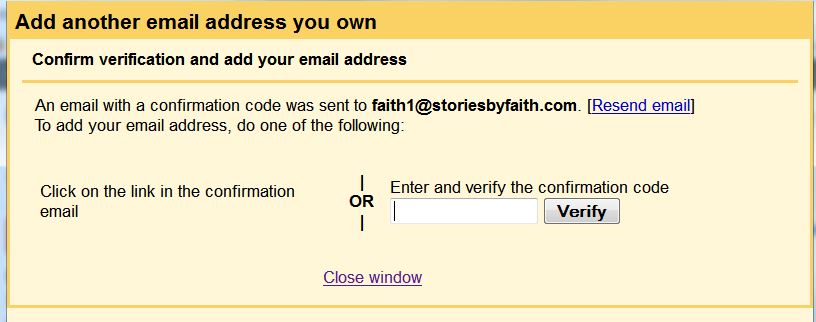 Go to your email and look for this code, you will enter that code in the box and click verify.
 If you would like to see more details on Domain Email with Gmail, check out the video below.