STEP 11 – Charge Method
Return the the “Settings” tab as before and edit the “Charge Method”. This section will ask you for your credit card information for any time that you have any fees. For instance if you choose the “Professional” seller plan there will be a monthly fee of $39.99.

STEP 12 – Return Information
The final Settings section is the Return Information”. This is important if you ever have a customer who needs to return an item. Whether they decide they do not want the item, if there was damage during shipping, or for whatever reason is chosen. Information gathered in this step will be your name or the business name you choose to use, the return address for shipping, and your phone number for customer service reasons.

STEP 13 – Start Selling
Once you have completed setting up your seller account with Amazon, you are ready to start selling products. This will be completed from the “Seller Account” dashboard. If you need help returning to this page you can follow Steps 1 through 3 shown above. On the Seller home page at the top are several links that you will need to use regularly. These include:
– Inventory – Where you will list products and keep track of your active and inactive listings
– Orders – Where you will view Open Orders, Processed Orders, Pending Orders
– Reports – Where you can view your financial statements, revenue and more
– Performance – Where you can view Customer Satisfaction, Feedback, A-to-Z Guarantee Claims, Chargeback Claims, Performance Notifications

STEP 14 – Creating a Listing
To create a listing you will click on Inventory on your Seller dashboard at the top. This page shows you all of your current inventory. Click on the button that says “Add a product”. From here you can choose to look up a product that is already on Amazon or Create a new product.
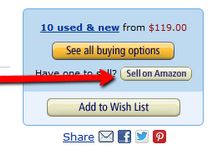
To choose a product that is already available, type the name of the product you wish to sell in the search box and hit “Enter”. If you see a listing that matches your product, you can choose to “Sell Yours”. This will open up the listing wizard with options for you to enter. When you use this option, you will only be able to submit information such as when you would like to start selling the item, the items condition and your price. You will not be able to change the name of the product, its description or UPC code.
When choosing to “Create a New Product”, you will need to fill out all the available information for the product by filling in the blanks in the step- by-step process. You will need to name your product, add an sku# or model number, a UPC code (if you do not have a UPC code, you can purchase these online through venues like Cheap-UPC-BarCode.com), date product will be available, detailed description, keyword search terms and more. It is important to fill in as much information as possible for each product that you list for better selling results.
The information in your listings can be edited at any time through your Inventory page. New listings can take up to 15 minutes to become active. I have received questions that sometimes the image(s) did not save when the listing was first created. If you should encounter this issue, it is easily resolved. Within a minute of saving your listing you can edit the listing and click on the images tab to upload an image. When you add images a pop-up window will appear. If you do not see this window, you may need to turn off your Pop-Up Blocker temporarily. In this window you can choose images one at a time adding up to nine images. Once you have chosen all the images that you wish to add, you will need to click the “Upload Images” button. You will see the images process. Once this is done, simply close the pop-up window and click “Save” on your listing editing page. Your changes will take effect within 15 minutes.
![]()
STEP 15 – View Orders
So now you have your products listed and you are ready to process orders. When a customer completes an order, Amazon will send you an email notification. It is still good to visit your Amazon account each day and check for orders to ensure that you do not miss an order by mistake or if you accidentally delete the order information from your email. Response times are critical as late shipments can leave a bad note on your record with Amazon. Click on an order that is waiting to be shipped to view all of the needed information. You can purchase your own shipping at the US Post Office, UPS or Fed-Ex and then simply add that information here to confirm the order, or you can purchase shipping through your Amazon account and print the label at home to attach to your package.

A1WEBSITEPRO Social Media Pages
Here are my social media pages, lets hook up!