Installing Linux Mint Alongside Windows Part 1
When installing Linux Mint, you may want to install it along with another operating system. You would need to partition the drive and allocate space for Linux Mint and your other operating system like Windows. Do this before you install Linux Mint with your bootable flash drive if you desire to run both operating systems. However, if you totally want to replace your current operating system with Linux Mint, this step is unnecessary.
Minimum Requirements for Linux Mint
Keep in mind while performing this action the minimum requirements for Linux Mint.
- 1GB RAM (2GB recommended for a comfortable usage).
- 15GB of disk space (20GB recommended).
- 1024×768 resolution (on lower resolutions, press ALT to drag windows with the mouse if they don’t fit in the screen).
Steps To Allocate Space in Windows 10
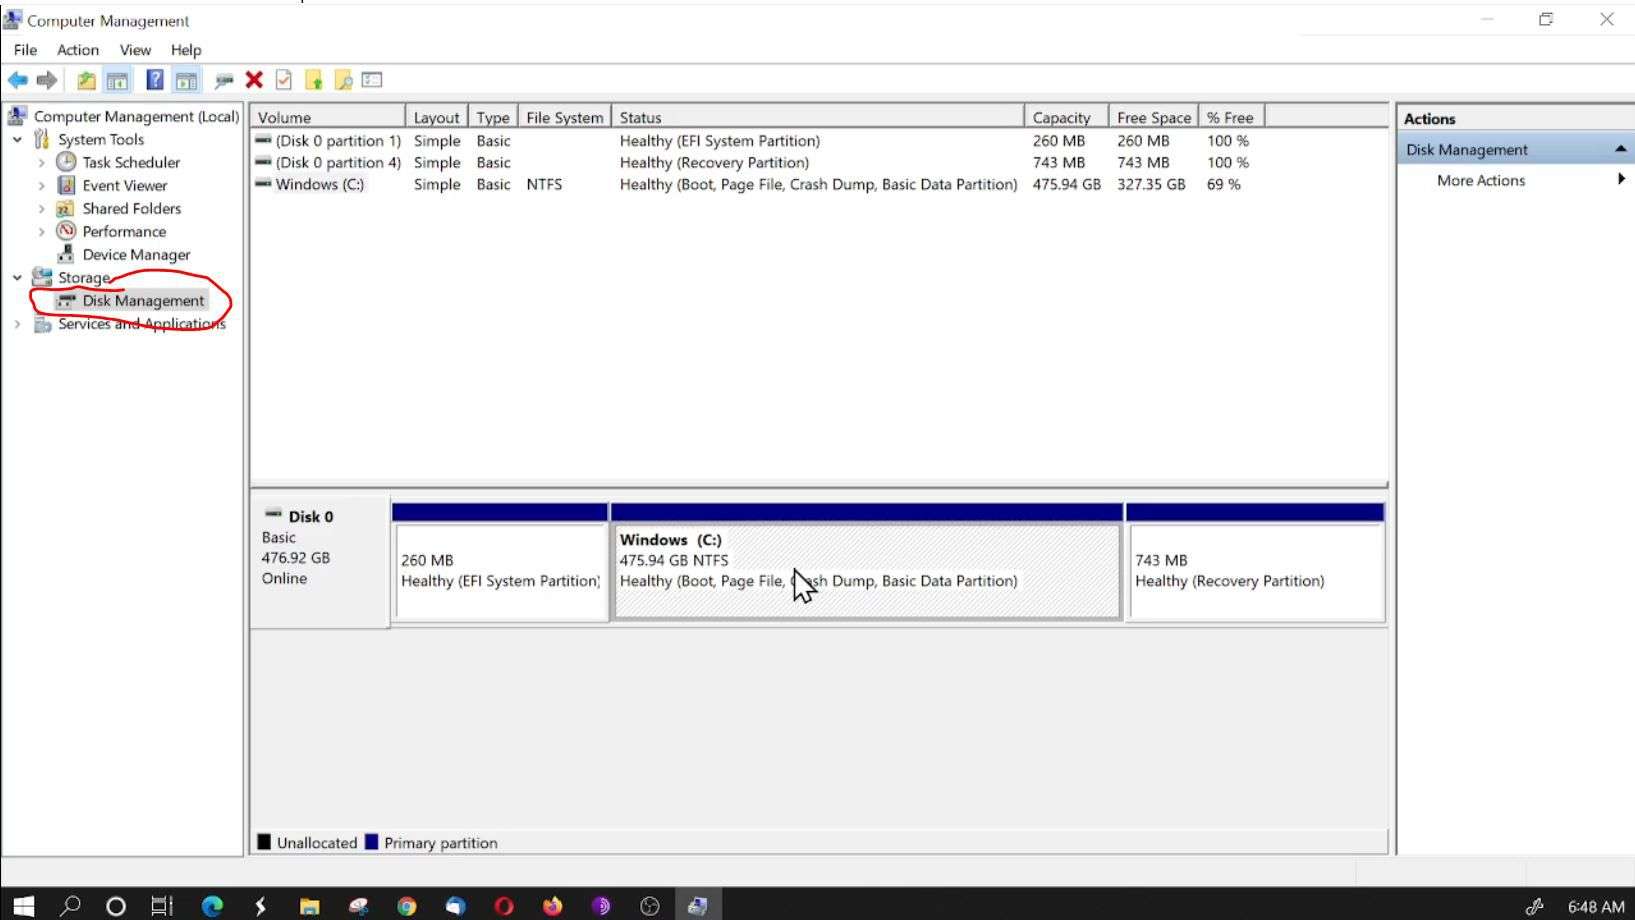
- Go to start on your computer and type in “Computer Management”.
- Click on “Disk Management” on the left, then you will see a list of your drives. This may take a minute or 2 to populate.
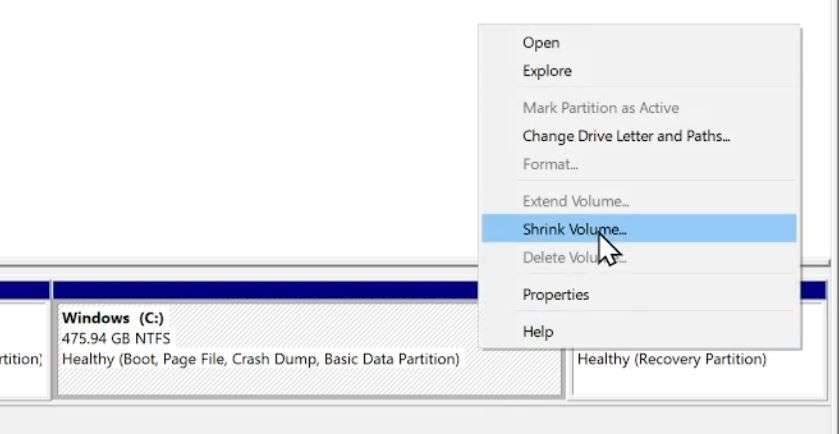
 Notice that there is no “Unallocated Space” on the c: drive. This means that we will have to shrink the drive before we can install Linux Mint from our Flash drive. Right-click over the Windows (C:) drive and left click “Shrink Volume”.
- The system will query the space that is available and let you know how far you can shrink it.
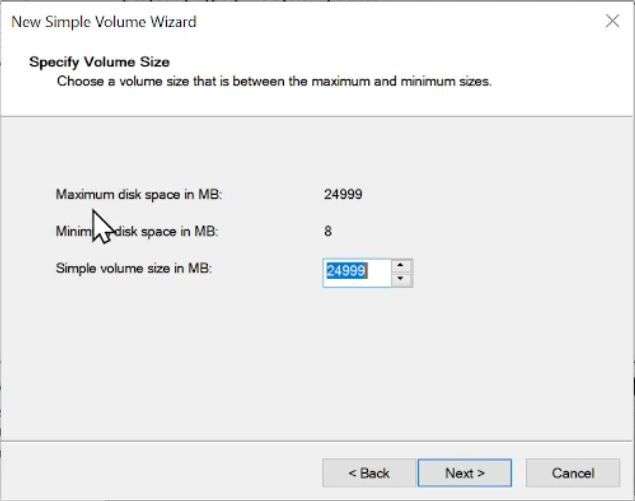
- Next, you will have a box pop up to enter a number in MB. I put mine at 25000, you can see here. Then click the “shrink” button.
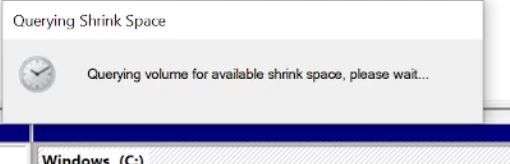
- Notice now you have Unallocated space on your C: Drive.
- We need to format that so that we can install Linux Mint on that part of your drive. Right click on the Unallocated part and left click “New Simple Volume”.
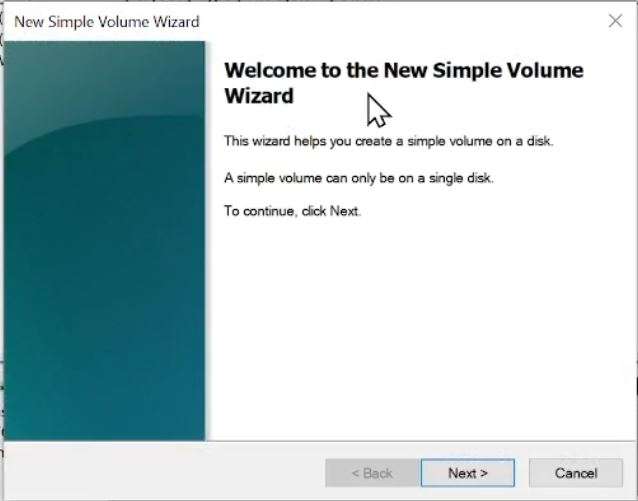
- You will have a Wizard Box appear that will walk you through the process.
- Click Next again on the next box. Do not make any changes here.
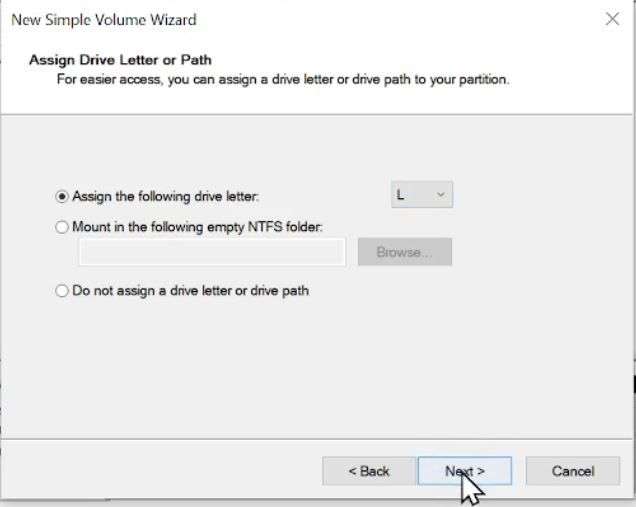
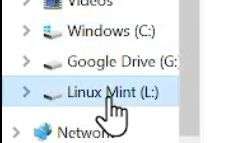
- Now assign a drive letter to your new drive volume. I chose the letter L for Linux Mint, but you can choose whatever you want.Click next.
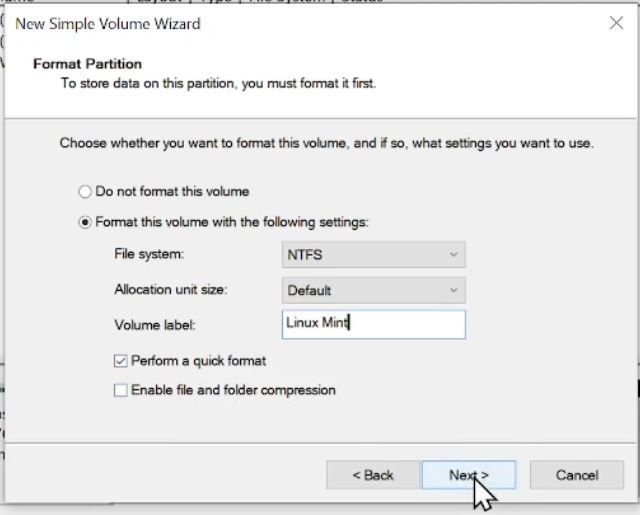
- In the next box, change the volume label to Linux Mint if you want, then click next. Leave everything as is.
- Next you will see a confirmation box, click Finish.


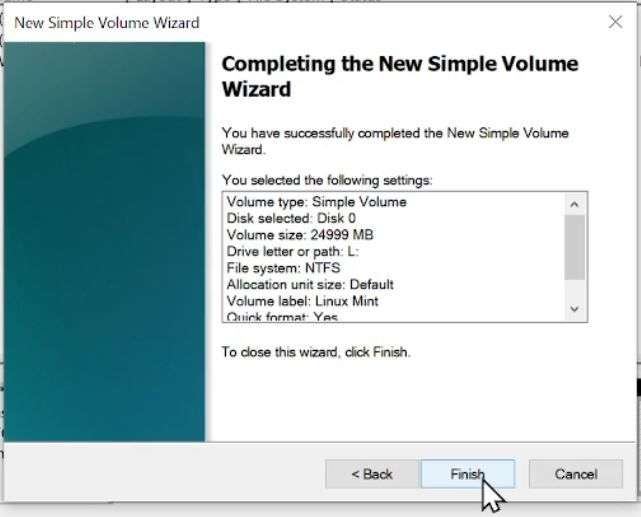
If you followed the steps, you should see the L drive that is named Linux Mint.
 You will also be able to see the drive space in the computer management box.
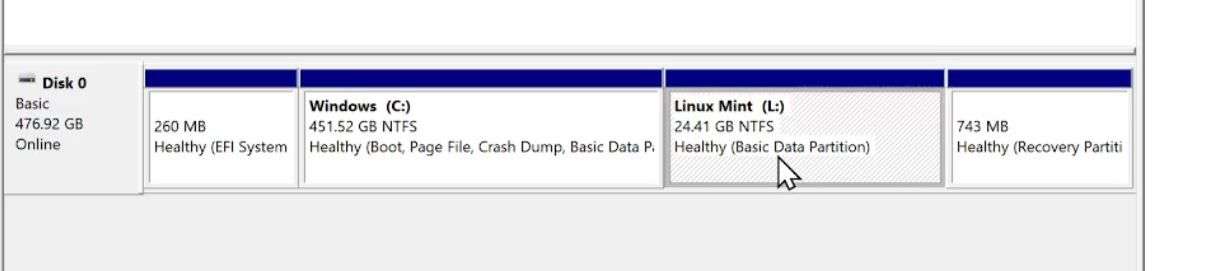 Now you are ready to install Linux Mint alongside Windows! Click to the next page.

A1WEBSITEPRO Social Media Pages
Here are my social media pages, lets hook up!