Setting your USPS basic options
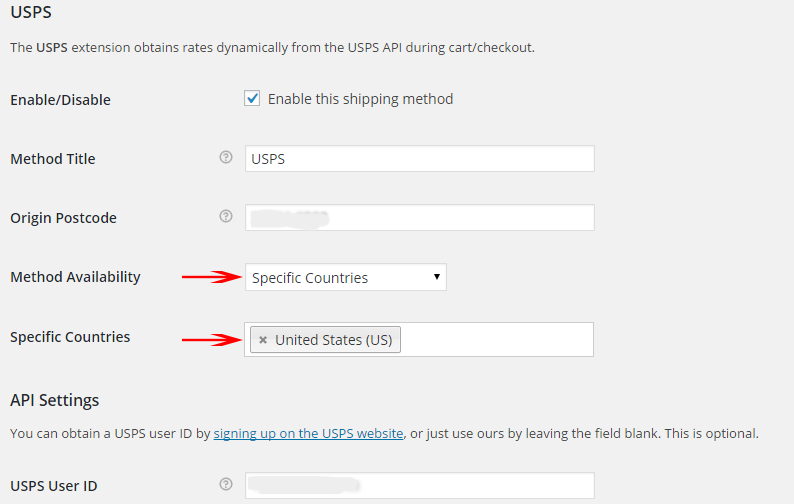
SETTING #1 Method Title – This is automatically set to USPS and is what your customers see as the name of the shipping type that they can choose.
SETTING#2 Origin Postcode – This is where you will enter your zip code or the zip code of the location that you ship from if you have a warehouse.
SETTING #3 Method Availability – This shows what countries where you will ship your products. For example, if shipping only within the continental US you would choose the option “Specific Countries” and in the box below put United States.
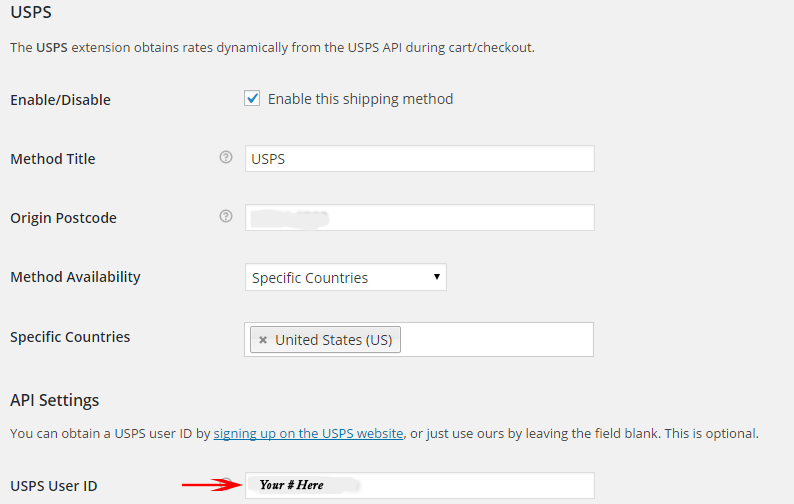
USPS API Settings
Next you will see the API Settings. API settings connect you to USPS to keep updated shipping rates. This is where you will put your USPS ID number. To get a USPS ID number visit the USPS Webtools page and set up an account.
USPS Rate Options and Services
As you move on down the rest of the page covers your rate options and services that you can choose to offer for your customer’s shipping choices. You can use ONLINE RATES to make sure your rates are current. You can enable Flat Rate shipping if you use standard Flat Rate packaging from the US Postal service. Enabling Standard Services from the API will calculate shipping based on weight for standard packaging that does not use the Flat Rate boxes and envelopes. All of these choices help keep your shipping accurate and determine how you ship your products.
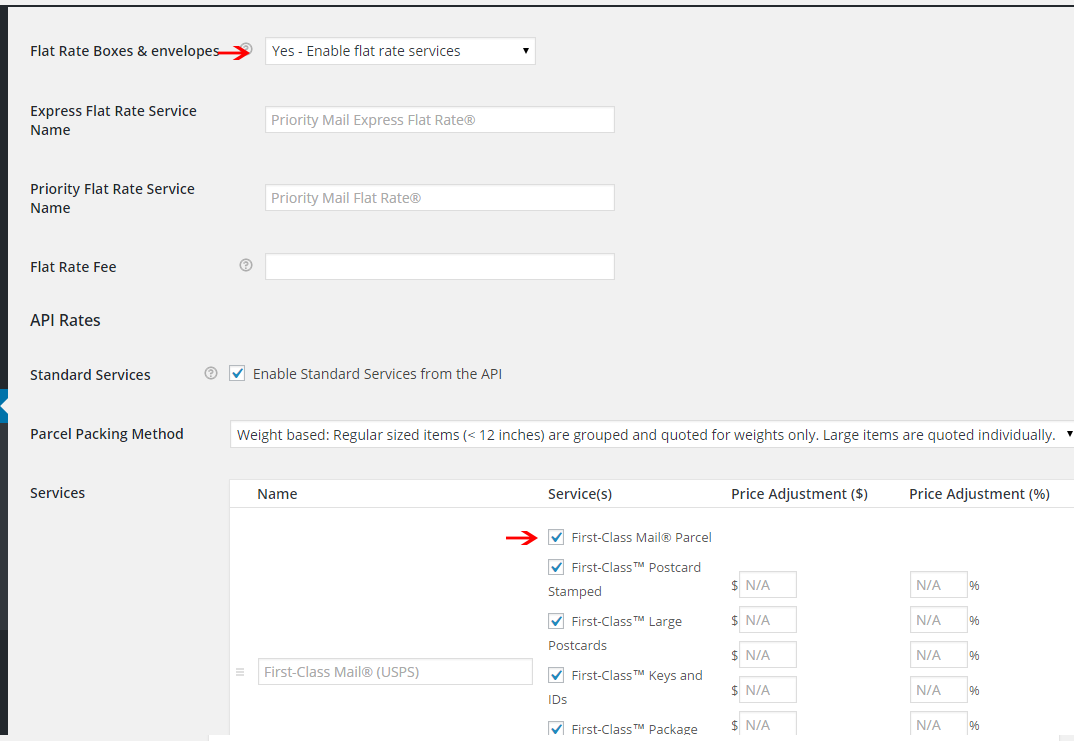
Specific USPS Services
The final options to set up on the USPS shipping tab in Woocommerce Settings let you choose what to offer to your customers based on your personal shipping needs. These options include:
- First Class Mail
- Priority Mail Express
- Standard Post
- Media Mail
- Library Mail
- Priority Mail
- Priority Mail Express International
- Priority Mail International
- Global Express Guaranteed
- First Class Mail International
- International Postcards
Check to make sure that only the shipping parameters that you use are selected for each type of USPS shipping service available.
Don’t Forget To Save!
![]()
You made your choices and set up all your options to be tailored specifically to your needs and wishes. It is very important that you click the “Save Changes” button at the bottom of the page. There is no autosave in Woocommerce settings. If you move to another tab without saving your choices then you will have to return to this tab and re-enter your information and redo all settings that you want to be changed.
That’s it! You are set up and ready to go. You can see the available options that you offer by visiting your website, adding a product or two to your cart and visiting the checkout page. This will let you know exactly how it looks when your customers do the same.

More Great Shipping Plugins
USPS Shipping is a great resource for many United States business owners. However, many business owners just like you will sometimes offer more than one type of shipping to their clients. Additional Shipping companies that you can also offer like UPS, FedEx, DHL and more also have plugins available from the same developer that built this USPS Shipping Method plugin. You may have noticed these when you searched “usps shipping” on the add new plugins page. Want to create and print shipping labels from your WordPress dashboard too? Try the Woocommerce Stamps.com Shipping Method Plugin also by WooForce.

1 Comment
Maximus helped us set up the USPS shipping method for our woocommerce store. This plugin works great for us. We are using USPS priority mail with shipping boxes provided by the post office and our packing dimensions and weights are accurately entered for our products. The shipping costs generated by the plugin (which are actually estimates based on data you’ve entered) have been within pennies of the actual shipping charges paid (which are determined by real-world package sizes and weights. I recommend using this plugin if you want to include shipping charges for your online store purchases AND want them to be accurate and fair.